
I have spent considerable time studying how digital manufacturing can be merged with traditional metal shaping. In my view, the most practical bridge between additive manufacturing and precision casting is the use of three-dimensional printed patterns for rapid investment casting. I also compare this route with evaporative pattern casting because both methods depend on a sacrificial pattern, a refractory shell or mold, and a final metal pour. When I speak of evaporative pattern casting, I mean the family of processes in which a pattern is vaporized, dissolved, or burned out during casting, leaving a cavity for liquid metal. The same digital design chain that supports investment casting can also inform evaporative pattern casting, and I believe this convergence is one of the strongest signs of a broader industrial shift.
Investment casting, which is often called lost-wax casting, uses a pattern that is surrounded by ceramic or refractory material. After the shell is built, the pattern is removed by heat, water, solvent, or a combination of methods. The empty shell is then fired and filled with molten metal. This process gives excellent surface finish and dimensional control, but conventional wax pattern production can be slow and expensive. Tooling for wax injection is a major cost, and changes in geometry often require new dies. In my experiments, I have found that three-dimensional printing can replace or supplement both the wax pattern and the pattern die. This is where rapid investment casting becomes attractive. The same logic applies to evaporative pattern casting, where a printed or molded foam pattern can be coated and then replaced by metal.
Why Digital Patterns Change the Casting Workflow
I begin with a simple observation: every casting process needs a pattern that defines the negative space of the final part. In traditional investment casting, the pattern is usually wax. In evaporative pattern casting, the pattern is often a polymeric foam that gasifies when metal enters the mold. In both cases, the pattern is sacrificial. The difference is how it leaves the mold and how the mold is made. I have used photopolymer resin patterns produced by stereolithography, also called SLA, and I have studied how those patterns behave during shell building, dewaxing, burnout, and pouring. My conclusion is that the digital pattern route is not a minor modification. It changes the economics, the lead time, and the geometric freedom of the entire process.
When I convert a computer-aided design model into a physical pattern, I follow a chain that includes tessellation, slicing, path planning, layer deposition or curing, and post-processing. The number of layers depends on the part height and the layer thickness:
$$N = \frac{H}{t_l}$$
Here, \(N\) is the number of layers, \(H\) is the build height, and \(t_l\) is the layer thickness. The approximate build time can be expressed as:
$$t_b = \frac{N}{v_s} + t_{pre} + t_{post}$$
In this expression, \(t_b\) is the total build time, \(v_s\) is the effective scanning or curing speed in layers per unit time, \(t_{pre}\) is the preparation time, and \(t_{post}\) is the post-processing time. I use this model to compare conventional wax injection with digital pattern printing. For small and medium parts, the digital route often wins because it removes the need for a dedicated die. For very large production volumes, the conventional route can still be more economical, which is why I treat the choice as a break-even problem rather than an absolute rule.
| Process Step | Conventional Investment Casting | 3D Printing Assisted Investment Casting | Evaporative Pattern Casting Comparison |
|---|---|---|---|
| Pattern design | Manual or CAD, then die design | Directly from CAD or scan data | Directly from CAD or scan data |
| Pattern tooling | Wax injection die required | No wax die for prototype or small batch | Foam mold or printed pattern may be used |
| Pattern material | Wax, resin-based wax, filled wax | Photopolymer, PLA, ABS, PETG, TPU, nylon | Expanded foam, printed polymer, or soluble pattern |
| Pattern removal | Autoclave, hot water, or furnace | Hot water, solvent, or furnace burnout | Vaporization by molten metal |
| Tooling lead time | Days to weeks | Hours to days | Hours to days for simple patterns |
| Geometry freedom | Limited by die parting and ejection | High for undercuts, internal channels, and thin walls | High for integrated foam patterns |
| Typical batch fit | Medium to high volume | Low to medium volume, prototypes, bridge production | Low to medium volume, complex single pieces |
I often explain the difference by saying that the digital pattern is a data-driven artifact. It is not merely a copy of a wax pattern. It is a new manufacturing object with its own thermal, chemical, and mechanical behavior. When I evaluate a pattern material for rapid investment casting, I consider melting range, ash content, thermal expansion, strength, surface quality, and compatibility with the shell system. The same criteria apply to evaporative pattern casting, although the pattern must also produce acceptable gas evolution and residue during metal entry.
Material Selection for Digital Patterns
In my material studies, I compare conventional waxes with common three-dimensional printing polymers. The first requirement is that the pattern must leave the mold without damaging the shell or leaving harmful residue. For investment casting, a low melting point is helpful because the pattern can be removed in hot water before high-temperature burnout. For evaporative pattern casting, the pattern must decompose or vaporize in a controlled way when the metal is poured. I have summarized representative melting ranges in the table below.
| Material Type | Main Composition Family | Melting or Softening Range | Typical Use in Digital Casting |
|---|---|---|---|
| Wax-based pattern material | Paraffin, stearic acid, and additives | 60–70 °C | Conventional investment casting patterns |
| Resin-based pattern material | Natural resins and modifiers | 70–120 °C | Investment casting patterns requiring higher strength |
| High-temperature pattern material | Rosin, ozokerite, polystyrene, and blends | Above 120 °C | Specialty investment casting and some evaporative pattern casting trials |
| Medium-temperature rosin-based material | Rosin and wax blends | 90–110 °C | Investment casting pattern trials |
| Medium-temperature wax-based material | Paraffin and other additives | 80–100 °C | General investment casting patterns |
| ABS | Acrylonitrile butadiene styrene | 210–240 °C | Printed patterns for larger or stronger parts |
| PLA | Polylactic acid | 170–220 °C | Low-cost printed patterns for prototypes |
| PETG | Polyethylene terephthalate glycol | 220–250 °C | Printed patterns with moderate chemical resistance |
| TPU | Thermoplastic polyurethane | 190–230 °C | Flexible printed patterns and trial molds |
| Photopolymer resin | Acrylate and epoxy-based resins | 60–90 °C | SLA patterns for rapid investment casting |
| Nylon | Polyamide | 235–270 °C | Durable printed patterns and engineering trials |
I selected a photopolymer resin for my small impeller study because its melting range is compatible with hot-water dewaxing. In my experience, the resin pattern can be removed from the shell at 85–95 °C, which is well below the shell firing temperature. This reduces the risk of shell cracking before burnout. For evaporative pattern casting, I would not use the same resin without testing gas evolution, because the metal temperature is much higher and the pattern must disappear without creating excessive porosity or carbon residue.
Thermal expansion mismatch is another critical issue. When the pattern is coated with ceramic slurry, the pattern and the shell expand differently as they are heated. I estimate the mismatch strain as:
$$\varepsilon_{m} = \left( \alpha_{p} – \alpha_{s} \right) \Delta T$$
Here, \(\varepsilon_{m}\) is the mismatch strain, \(\alpha_{p}\) is the coefficient of thermal expansion of the pattern, \(\alpha_{s}\) is the coefficient of thermal expansion of the shell, and \(\Delta T\) is the temperature change. If the mismatch strain becomes too large, the shell may crack or the pattern may distort. I therefore prefer pattern materials with moderate expansion and shell systems that can accommodate small dimensional changes. This concern is shared with evaporative pattern casting, where the pattern and coating must remain dimensionally stable until the metal is poured.
The ash content of the pattern is also important. After burnout, any remaining ash can react with the metal or create surface defects. I use the following ratio to describe residue severity:
$$R_{a} = \frac{m_{a}}{m_{p}} \times 100\%$$
In this equation, \(R_{a}\) is the ash residue percentage, \(m_{a}\) is the mass of ash remaining after thermal decomposition, and \(m_{p}\) is the original pattern mass. A low \(R_{a}\) is desirable for both investment casting and evaporative pattern casting. When I test a new resin, I measure residue after controlled pyrolysis and compare it with the acceptable limit for the target alloy.
| Selection Criterion | Why It Matters | Preferred Range or Condition | Risk If Violated |
|---|---|---|---|
| Melting point | Pattern removal before burnout | Low enough for hot-water or solvent removal | Shell cracking, incomplete removal |
| Ash content | Clean mold cavity | Low residue after pyrolysis | Surface defects, inclusion-like defects |
| Thermal expansion | Shell integrity during heating | Close to shell expansion or low overall expansion | Shell cracking, dimensional error |
| Strength | Handling and coating durability | Sufficient green strength and impact resistance | Pattern breakage before shell build |
| Surface finish | Final casting surface quality | Low roughness and minimal layer lines | Poor surface finish, extra finishing cost |
| Chemical compatibility | Slurry and binder contact | No adverse reaction with binder or solvent | Shell defects, pattern swelling |
| Gas evolution | Evaporative pattern casting behavior | Controlled decomposition, low harmful residue | Porosity, gas defects, mold erosion |
Digital Modeling and Data Preparation
I start every rapid investment casting project with a digital model. The model may come from direct CAD, reverse engineering, or three-dimensional scanning. I then convert the model into a mesh format and slice it into layers. The quality of this digital chain has a direct effect on the final casting. If the mesh is too coarse, the surface will be faceted. If the slice parameters are poorly chosen, the pattern may have weak layer bonds or excessive internal stress. In my work, I treat the digital model as the first production tool, not as a preliminary drawing.
I use the following relationship to estimate the dimensional error introduced by tessellation:
$$e_{t} \approx \frac{c^{2}}{8R}$$
Here, \(e_{t}\) is the chordal error, \(c\) is the chord length, and \(R\) is the local radius of curvature. This equation helps me choose mesh density. For small features, I reduce \(c\) so that \(e_{t}\) remains below the allowed tolerance. I also consider the stair-step effect caused by layer thickness:
$$e_{s} \approx \frac{t_l}{2}$$
In this expression, \(e_{s}\) is the approximate stair-step error and \(t_l\) is the layer thickness. A smaller layer thickness improves surface quality but increases build time. I therefore optimize the layer thickness according to the required surface roughness and dimensional tolerance. This balance is central to rapid investment casting and also affects evaporative pattern casting when printed patterns are used.
| Data Stage | Input | Output | Key Control Variable | Effect on Casting |
|---|---|---|---|---|
| CAD modeling | Design intent, constraints, alloy shrinkage | Solid model | Nominal dimensions and draft | Determines final geometry |
| Tessellation | Solid model | STL or equivalent mesh | Chord height and angle | Controls faceting and file size |
| Slicing | Mesh model | Layer contours and paths | Layer thickness and orientation | Controls surface finish and build time |
| Path planning | Layer contours | G-code or machine instructions | Scan speed, hatch spacing, curing dose | Controls strength and dimensional stability |
| Shrinkage compensation | Nominal model | Compensated pattern model | Alloy shrinkage factor | Reduces final dimensional mismatch |
| Verification | Printed pattern or scan | Inspection report | Deviation from nominal | Confirms process capability |
For alloy shrinkage compensation, I use a simple scale factor:
$$L_{p} = \frac{L_{f}}{1 + S_{a}}$$
Here, \(L_{p}\) is the pattern dimension, \(L_{f}\) is the desired final casting dimension, and \(S_{a}\) is the linear shrinkage of the alloy. If the alloy shrinks by 1.5%, then \(S_{a} = 0.015\). I apply this correction to the digital model before printing. This step is essential for rapid investment casting because the pattern must anticipate the contraction that occurs during solidification. The same principle applies in evaporative pattern casting, although the pattern may also change size during vaporization and mold filling.
Stereolithography for Pattern Production
In my small impeller study, I used stereolithography because it produces smooth surfaces and fine features. The process uses a photopolymer resin that cures when exposed to ultraviolet light. I spread a thin layer of resin over a build platform, scan the layer with a laser or digital light projector, and repeat the process until the pattern is complete. After printing, I clean the pattern, remove supports, and post-cure it to improve strength and stability.
The cured depth in photopolymerization can be approximated by:
$$C_{d} = D_{p} \ln\left(\frac{E}{E_{c}}\right)$$
Here, \(C_{d}\) is the cure depth, \(D_{p}\) is the penetration depth of the resin, \(E\) is the exposure energy, and \(E_{c}\) is the critical exposure energy. I use this relationship to avoid under-curing or over-curing. Under-curing produces weak layers, while over-curing can reduce dimensional accuracy and create brittle patterns. The print parameters I used for the impeller pattern are summarized in the table below.
| Parameter | Value or Range | Reason for Selection | Observed Effect |
|---|---|---|---|
| Layer thickness | 0.05–0.10 mm | Balance surface finish and build time | Lower thickness improved surface quality |
| Resin type | Photopolymer with low melting range | Compatible with hot-water dewaxing | Pattern melted out without shell damage |
| Exposure energy | Optimized for resin cure depth | Ensure layer bonding | Stable green strength |
| Build orientation | Aligned to reduce support marks | Improve critical surfaces | Less post-processing on functional faces |
| Support density | Moderate | Prevent distortion while allowing removal | Acceptable surface after sanding |
| Post-cure time | Controlled ultraviolet exposure | Increase strength and stability | Reduced pattern deformation during coating |
| Cleaning method | Solvent rinse and compressed air | Remove uncured resin | Cleaner shell contact surface |
I also calculate the theoretical build time for a given number of layers. If the machine cures one layer every \(t_{layer}\) seconds, then:
$$t_{b} = N t_{layer} + t_{setup} + t_{finish}$$
In my trials, the printed pattern for the small impeller was completed much faster than the conventional wax die route. The exact time depended on layer thickness, part height, and support structure. The important point is that the digital pattern route shifts the time burden from tooling fabrication to data preparation and printing. This shift is one reason rapid investment casting is so useful for new product development.
Shell Building and Refractory Coating
After the pattern is printed and cleaned, I build the ceramic shell. The pattern is dipped into a slurry, coated with refractory sand or stucco, and dried under controlled temperature and humidity. I repeat the dip, stucco, and dry cycle several times. In my work, five to six cycles are usually sufficient for small and medium parts. The shell must have enough strength to survive dewaxing, burnout, and pouring, but it must not be so thick that it traps gases or causes excessive residual stress.
I estimate the total shell thickness as:
$$t_{shell} = n t_{layer}$$
Here, \(t_{shell}\) is the total shell thickness, \(n\) is the number of coating cycles, and \(t_{layer}\) is the average thickness added per cycle. The actual thickness depends on slurry viscosity, sand size, drainage, and drying conditions. I control these variables carefully because shell defects are a common source of casting rejection. The same shell-building principles appear in evaporative pattern casting when a ceramic or refractory coating is applied to a foam pattern, although the coating may be thinner and the mold may be backed with sand.
| Shell Stage | Purpose | Typical Control Parameter | Risk If Poorly Controlled |
|---|---|---|---|
| Primary slurry dip | Create smooth face coat | Viscosity, wetting, drainage | Surface roughness, incomplete coverage |
| Primary stucco | Build refractory backbone | Grain size and distribution | Weak shell, surface defects |
| Drying | Remove water and set binder | Temperature, humidity, airflow | Cracks, delamination, weak layers |
| Secondary dips | Increase shell strength | Number of cycles, slurry formulation | Insufficient strength or excessive thickness |
| Final seal coat | Improve handling and thermal resistance | Coating uniformity | Shell spalling during pour |
| Shell drying | Complete binder cure | Time and ambient conditions | Residual moisture, gas defects |
I have found that the primary coat has the greatest influence on surface finish. If the pattern surface is smooth and the primary slurry wets it properly, the final casting will usually have a good surface. If the pattern has deep layer lines or support marks, those defects will be reproduced in the shell and then in the metal. For this reason, I often sand and polish the printed pattern before shell building. This step is especially important for rapid investment casting because the pattern is the master surface.
Dewaxing, Burnout, and Pouring
Once the shell is dry and strong, I remove the printed pattern. In my process, I immerse the shell in hot water at approximately 85–95 °C. The photopolymer softens and melts, allowing it to flow out of the cavity. I then inspect the shell to confirm that the pattern has been removed as completely as possible. Any remaining resin is eliminated during burnout. The shell is heated to about 900 °C for one to two hours. This step removes moisture, residual pattern material, and volatile compounds. It also strengthens the ceramic bonds.
The heat required to melt and decompose the pattern can be estimated as:
$$Q_{p} = m_{p} \left[ c_{p} \left( T_{m} – T_{0} \right) + L_{m} + q_{d} \right]$$
Here, \(Q_{p}\) is the total heat required, \(m_{p}\) is the pattern mass, \(c_{p}\) is the specific heat capacity, \(T_{m}\) is the melting or decomposition temperature, \(T_{0}\) is the initial temperature, \(L_{m}\) is the latent heat of melting, and \(q_{d}\) is the additional heat of decomposition. This equation helps me understand why burnout must be slow enough to avoid cracking the shell. If the pattern decomposes too quickly, gas pressure can build up inside the mold. In evaporative pattern casting, this gas pressure is even more important because the pattern is replaced directly by molten metal.
| Thermal Stage | Temperature Range | Time | Main Purpose | Critical Risk |
|---|---|---|---|---|
| Hot-water dewaxing | 85–95 °C | Until pattern flows out | Remove bulk pattern material | Incomplete removal, shell cracking |
| Drying | Ambient to low temperature | Several hours | Remove water | Residual moisture |
| Burnout | Approximately 900 °C | 1–2 hours | Remove residue and strengthen shell | Gas pressure, shell distortion |
| Pouring preparation | Shell held near pouring temperature | Minutes to hours | Prevent thermal shock | Shell cracking, misrun |
| Metal pour | Alloy-specific | Seconds | Fill cavity | Turbulence, gas entrapment |
| Solidification | Alloy-specific | Minutes | Form casting | Shrinkage porosity, hot tears |
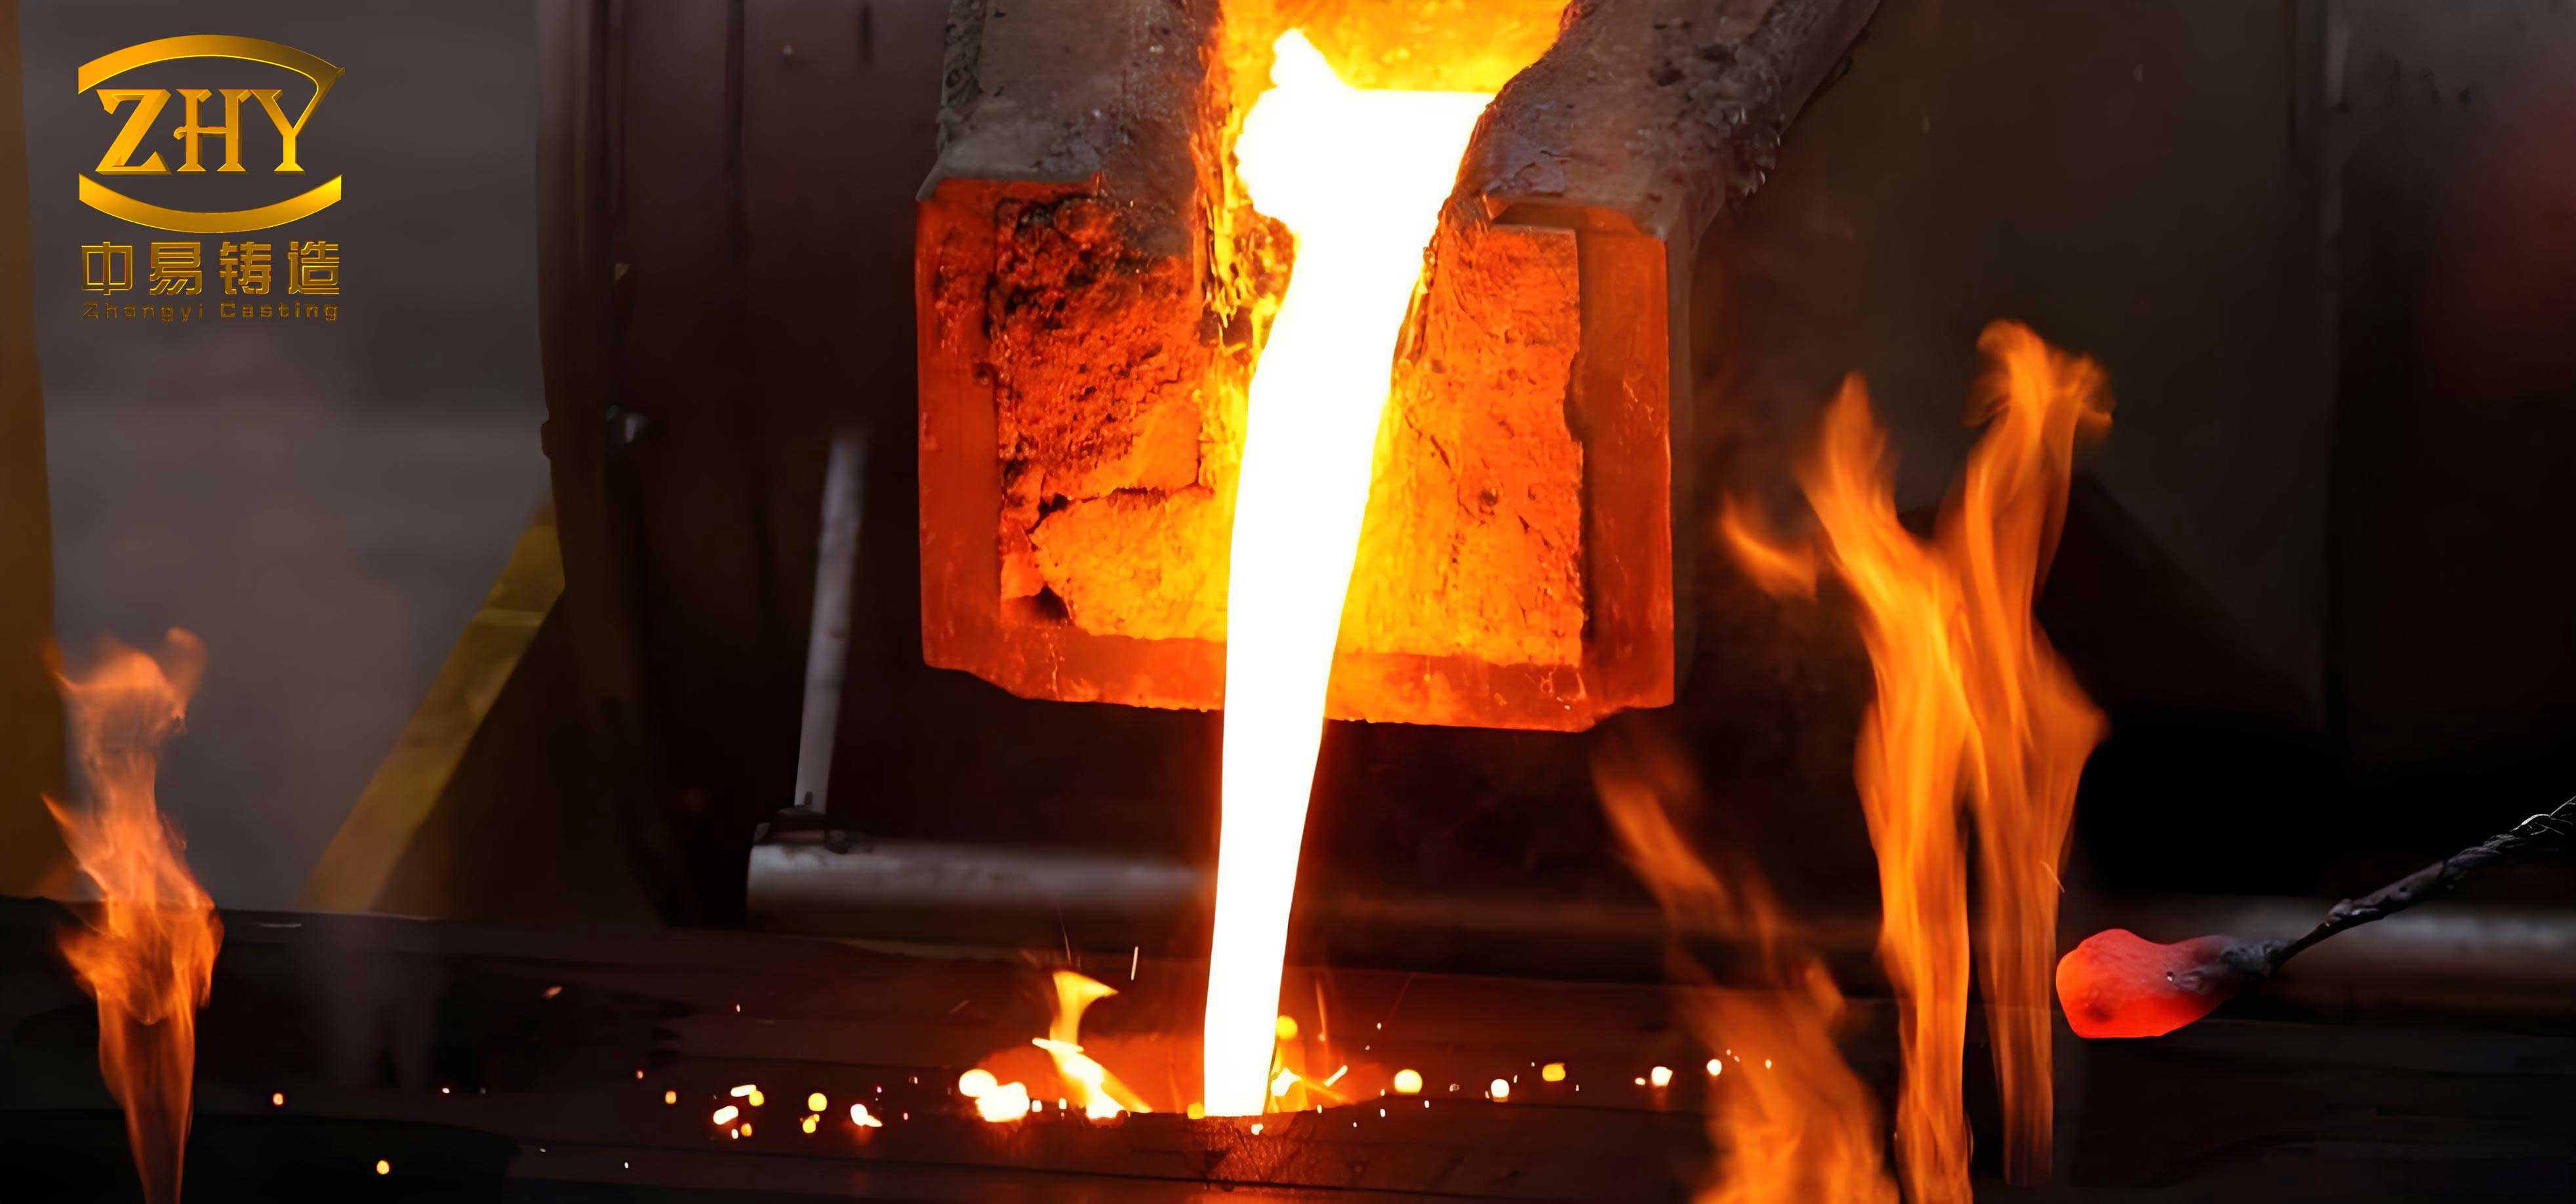
When I pour the metal, I often support the shell with dry sand to reduce the risk of deformation and cracking. The sand provides external constraint and helps absorb thermal shock. The metal fills the cavity and solidifies into the shape defined by the pattern. After cooling, I break the shell and remove the casting. I then cut off the gates and runners, grind the surfaces, and inspect the part.
In evaporative pattern casting, the pattern is not removed before pouring. Instead, the molten metal vaporizes the pattern as it enters the mold. This means the pattern decomposition gases must escape through the coating and sand. If the coating is too impermeable, gas defects can form. If the coating is too permeable, the metal may penetrate the mold. I mention this because the same digital pattern can be used in different sacrificial pattern processes, but the mold design must be adjusted to the removal mechanism.
Case Study: Small Impeller
I selected a small impeller as a case study because it has curved blades, a varying cross-section, and a complex flow path. The nominal dimensions were a bottom diameter of 100 mm, a top diameter of 26 mm, and a side width of 45 mm. These dimensions are small enough to print and cast in a laboratory or pilot environment, but complex enough to test the capability of the hybrid process. I designed the model in CAD, converted it to a mesh, oriented it for printing, and produced a photopolymer pattern using stereolithography.
After printing, I cleaned and post-cured the pattern. I then built the ceramic shell by repeated dipping and stuccoing. After the shell was dry, I removed the pattern in hot water, fired the shell, and poured the metal. After cooling and cleaning, I measured the casting. The results were close to the nominal dimensions, as shown in the table below.
| Feature | Nominal Dimension | Measured Dimension | Deviation | Relative Deviation |
|---|---|---|---|---|
| Bottom diameter | 100.00 mm | 99.80 mm | -0.20 mm | -0.20% |
| Top diameter | 26.00 mm | 26.12 mm | +0.12 mm | +0.46% |
| Side width | 45.00 mm | 45.23 mm | +0.23 mm | +0.51% |
I calculate the absolute deviation as:
$$\delta = x_{a} – x_{t}$$
Here, \(\delta\) is the absolute deviation, \(x_{a}\) is the actual measured dimension, and \(x_{t}\) is the theoretical dimension. The relative deviation is:
$$\varepsilon = \frac{\delta}{x_{t}} \times 100\%$$
In my impeller trial, the largest relative deviation was about 0.51%. This is a strong result for a rapid investment casting process using a printed polymer pattern. The deviation came from several sources: printing shrinkage, post-curing shrinkage, shell expansion, alloy shrinkage, and finishing. I use an error budget to separate these contributions.
| Error Source | Typical Contribution | Control Method | Effect on Final Dimension |
|---|---|---|---|
| CAD and tessellation | Small if mesh is fine | Chord height and angle control | Faceting and local deviation |
| Printing shrinkage | Material and geometry dependent | Calibration and compensation | Global size change |
| Layer stair-stepping | Approximately half layer thickness | Smaller layer thickness | Surface roughness and local error |
| Post-curing | Resin-dependent | Controlled ultraviolet dose | Shrinkage and distortion |
| Shell expansion | Thermal expansion mismatch | Compatible materials and slow heating | Dimensional change and cracking |
| Alloy shrinkage | Alloy-specific | Pattern scale compensation | Final size reduction |
| Finishing | Manual and process dependent | Controlled grinding and polishing | Local material removal |
The combined error can be approximated by root-sum-square if the sources are independent:
$$E_{total} = \sqrt{E_{CAD}^{2} + E_{print}^{2} + E_{shell}^{2} + E_{shrink}^{2} + E_{finish}^{2}}$$
I use this model to identify the largest contributor. In my case, alloy shrinkage and printing shrinkage were the dominant terms, so I refined the compensation factors. This is exactly the kind of iterative learning that makes rapid investment casting effective. I do not expect the first print to be perfect. I expect the digital model to improve after each trial. The same iterative approach can be used in evaporative pattern casting, where pattern density and coating permeability also affect final dimensions.
Advantages of the Hybrid Process
I see four major advantages in combining three-dimensional printing with rapid investment casting. First, the process reduces development and trial costs because it eliminates or postpones the need for hard tooling. Second, it simplifies the workflow because the digital model can be changed without making a new die. Third, it enables complex geometries that would be difficult or impossible to produce with conventional wax injection. Fourth, it increases production flexibility, which is valuable for customized parts, bridge production, and low-volume manufacturing.
The cost advantage can be expressed with a simple model:
$$C_{total} = C_{design} + C_{material} + C_{machine} + C_{labor} + C_{shell} + C_{melt} + C_{finish} + C_{inspection}$$
Here, \(C_{total}\) is the total cost per part, and each term represents a cost category. In conventional investment casting, the tooling cost is amortized over the production volume:
$$C_{tooling, part} = \frac{C_{tooling}}{N_{parts}}$$
When \(N_{parts}\) is small, \(C_{tooling, part}\) becomes very large. This is why the digital route is economically attractive for prototypes and small batches. For large batches, the tooling cost is spread over many parts, and conventional wax injection may become more competitive. I therefore calculate a break-even volume:
$$N_{b} = \frac{C_{tooling}}{C_{digital, unit} – C_{conventional, unit}}$$
In this equation, \(N_{b}\) is the break-even number of parts, \(C_{tooling}\) is the cost of the conventional die, \(C_{digital, unit}\) is the unit cost of the digital route, and \(C_{conventional, unit}\) is the unit cost of the conventional route excluding tooling. I use this equation to decide whether to print patterns or invest in a die. The same logic applies to evaporative pattern casting when comparing molded foam patterns with printed patterns.
| Advantage | Conventional Process | 3D Printing Assisted Process | Practical Effect |
|---|---|---|---|
| Pattern production speed | Average wax pattern may take about five days | Printed pattern can be completed in one to two days | Faster design iteration |
| Dimensional precision | Good but tooling-dependent | Can reach about 0.5 mm or better | Reduced machining allowance |
| Customization | Limited by die design | Supports more than 90% of individualized design needs | Mass customization becomes practical |
| Material utilization | Often around 50% | Can exceed 80% | Less waste and lower material cost |
| Tooling cost | High for new parts | Low or zero for small batches | Lower development risk |
| Geometry freedom | Restricted by parting lines | High for internal channels and undercuts | New design possibilities |
| Process visibility | Less digital integration | Visual, controllable, and data-rich | Better quality traceability |
I also measure material utilization as:
$$U = \frac{m_{part}}{m_{input}} \times 100\%$$
Here, \(U\) is the material utilization, \(m_{part}\) is the mass of the final part, and \(m_{input}\) is the mass of raw material consumed. In my trials, the printed pattern route used less material than a conventional wax injection run for the same small batch. This is partly because the printed pattern is produced only where it is needed and partly because the digital workflow reduces scrap from trial-and-error die modification. For evaporative pattern casting, printed patterns can also reduce foam molding waste, although the coating and sand system must be managed carefully.
Limitations and Risk Control
I do not present the hybrid process as a universal replacement for conventional casting. There are real limitations. The equipment cost can be high, and skilled personnel are needed to operate and maintain the printer. Some materials are difficult to print with high precision. Post-processing can be labor-intensive. Large parts may require large build volumes, which are expensive. In high-volume production, the unit cost of printing may still be higher than wax injection. I therefore treat the process as a targeted solution rather than an all-purpose answer.
I use a risk matrix to manage these limitations.
| Risk | Cause | Impact | Mitigation |
|---|---|---|---|
| High machine cost | Advanced laser or projector systems | Higher capital investment | Use service bureaus or shared equipment |
| Material limitations | Limited resin or polymer portfolio | Difficulty matching thermal requirements | Qualify multiple materials and test residue |
| Dimensional distortion | Shrinkage and post-curing | Out-of-tolerance parts | Calibration and shrinkage compensation |
| Shell cracking | Thermal expansion mismatch | Lost casting and downtime | Slow heating, compatible shell materials |
| Residual ash | Incomplete burnout | Surface or internal defects | Optimize burnout cycle and atmosphere |
| Gas porosity | Pattern decomposition products | Internal defects | Permeable coatings and venting |
| Low throughput | Layer-by-layer printing | Long production time for large batches | Use parallel machines or conventional tooling |
| Operator skill | Complex digital and physical workflow | Process variability | Standard operating procedures and training |
I also evaluate the energy and time required for printing. The energy per part can be written as:
$$E_{part} = P_{machine} t_{b} + E_{post}$$
Here, \(E_{part}\) is the energy per part, \(P_{machine}\) is the average machine power, \(t_{b}\) is the build time, and \(E_{post}\) is the post-processing energy. As printer efficiency improves and material costs decline, the hybrid process becomes more competitive. This trend is already visible in rapid investment casting and in evaporative pattern casting, where digital patterns can replace manual pattern making for complex geometries.
Scale-Up and Industrial Integration
I believe the next stage is not simply printing one pattern at a time. It is integrating the digital pattern process into a production system. That means digital inventory, automated slicing, machine scheduling, shell-building recipes, and inspection feedback. In my view, the factory of the future will use a hybrid model: conventional casting for high-volume standard parts, and digital pattern casting for complex, customized, or low-volume parts. Evaporative pattern casting will also benefit from this model because printed patterns can be stored as data and produced on demand.
I use the following productivity relationship:
$$P_{r} = \frac{N_{good}}{t_{cycle}}$$
Here, \(P_{r}\) is the production rate, \(N_{good}\) is the number of good parts, and \(t_{cycle}\) is the total cycle time. To improve \(P_{r}\), I can reduce \(t_{cycle}\) by increasing print speed, reducing shell-building time, or improving yield. I can also increase \(N_{good}\) by improving dimensional control and reducing defects. In my experience, the greatest gains come from reducing trial-and-error iterations, not from pushing the printer to its maximum speed. A stable process with predictable shrinkage is more valuable than a fast but inconsistent one.
| Scale-Up Factor | Current Limitation | Improvement Path | Expected Benefit |
|---|---|---|---|
| Build volume | Limited by printer size | Larger machines or segmented patterns | Larger castings and more parts per build |
| Print speed | Layer-by-layer curing | Faster light engines and resins | Shorter cycle time |
| Material cost | Specialty photopolymers | Volume production and new formulations | Lower unit cost |
| Automation | Manual support removal and finishing | Robotic post-processing | Consistent quality and lower labor |
| Process control | Variable shrinkage and ash | In-line inspection and closed-loop compensation | Higher yield |
| Shell recipe | Part-specific development | Database of validated recipes | Faster setup |
| Digital thread | Disconnected data | Integrated CAD, print, cast, and inspection data | Traceability and continuous improvement |
When I consider evaporative pattern casting at scale, I see similar opportunities. Printed patterns can be designed with controlled density, vents, and coatings. The digital model can predict gas evolution and mold filling. If the pattern is printed from a foam-like or gasifiable material, the process can be tuned in the same way as investment casting. This is why I do not treat the two processes as isolated. They are both sacrificial pattern processes, and both can be improved by additive manufacturing.
Quality, Inspection, and Process Control
I measure quality at every stage: pattern dimensions, shell thickness, surface roughness, casting dimensions, and internal soundness. I use coordinate measuring machines, calipers, surface profilometers, and visual inspection. For critical parts, I also use radiographic or ultrasonic inspection. The goal is not only to accept or reject a casting but to feed data back into the digital model. If I measure a consistent deviation, I adjust the model. If I see random variation, I investigate the process.
Surface roughness can be expressed as:
$$R_{a} = \frac{1}{L} \int_{0}^{L} |z(x)| \, dx$$
Here, \(R_{a}\) is the arithmetic mean roughness, \(L\) is the evaluation length, and \(z(x)\) is the profile height. I use this metric to compare printed patterns, shells, and final castings. In my trials, the primary slurry and pattern surface dominated the final roughness. A smoother pattern produced a smoother shell and a smoother casting. This is a direct benefit of stereolithography compared with some extrusion-based printing methods.
Porosity can be estimated as:
$$P = \frac{V_{p}}{V_{t}} \times 100\%$$
Here, \(P\) is the porosity percentage, \(V_{p}\) is the pore volume, and \(V_{t}\) is the total volume. I use this relationship when I evaluate internal defects. In investment casting, porosity may come from shrinkage, gas entrapment, or residual pattern decomposition. In evaporative pattern casting, gas porosity is a central concern because the pattern itself produces gas. By controlling pattern chemistry, coating permeability, and pouring temperature, I can reduce this risk.
| Quality Metric | Measurement Method | Target for Small Impeller | Corrective Action |
|---|---|---|---|
| Pattern dimensional accuracy | Calipers or scanner | Within ±0.10 mm for critical features | Adjust printer calibration and shrinkage factor |
| Pattern surface roughness | Profilometer or visual comparator | Low roughness to reduce finishing | Reduce layer thickness and polish |
| Shell thickness | Sectioning or ultrasonic measurement | Uniform and sufficient for pour | Adjust slurry viscosity and number of dips |
| Casting dimensions | Coordinate measuring machine | Within ±0.25 mm for nominal features | Modify pattern compensation |
| Surface finish | Visual and profilometer | No visible defects on functional surfaces | Improve primary coat and pattern finish |
| Internal porosity | Radiography or sectioning | Below application-specific limit | Optimize gating, venting, and burnout |
| Residual ash | Thermal decomposition test | Low residue | Change pattern material or burnout cycle |
I also model solidification time using Chvorinov’s rule:
$$t_{s} = B \left( \frac{V}{A} \right)^{2}$$
Here, \(t_{s}\) is the solidification time, \(B\) is a mold constant, \(V\) is the casting volume, and \(A\) is the surface area. This equation helps me place gates and feeders. In rapid investment casting, the shell acts as the mold, and its thermal properties affect \(B\). In evaporative pattern casting, the mold includes the coating and the backing sand, so the effective \(B\) may differ. I use this relationship to compare designs and to predict where shrinkage porosity may occur.
Sustainability and Economic Outlook
I am also interested in the sustainability of the hybrid process. Digital pattern production can reduce material waste, but it also consumes energy and uses specialty resins. The overall environmental benefit depends on the number of parts produced, the efficiency of the printer, and the ability to recycle or recover materials. I use the following energy intensity metric:
$$E_{i} = \frac{E_{total}}{m_{casting}}$$
Here, \(E_{i}\) is the energy intensity, \(E_{total}\) is the total energy consumed, and \(m_{casting}\) is the mass of the finished casting. I compare this metric across conventional and digital routes. In small-batch production, the digital route often has lower tooling-related energy and material waste. In high-volume production, the conventional route may have lower energy per part because the tooling is amortized and the process is highly optimized.
| Factor | Conventional Investment Casting | 3D Printing Assisted Investment Casting | Evaporative Pattern Casting with Digital Patterns |
|---|---|---|---|
| Tooling waste | High for new dies | Low for small batches | Low for simple patterns |
| Material waste | Moderate | Lower with near-net shape | Moderate to low |
| Energy demand | High for wax injection and autoclave | Concentrated in printing and burnout | Concentrated in pattern production and pour |
| Design iteration | Slow and costly | Fast and data-driven | Fast for complex geometry |
| Best volume range | Medium to high | Low to medium | Low to medium |
| Customization | Limited | High | High |
| Process control | Mature | Developing rapidly | Developing with digital patterns |
I expect the economic balance to continue shifting toward digital pattern production as printer speed increases, material costs decrease, and automation improves. In my view, the most successful factories will not choose one process exclusively. They will use a portfolio: conventional casting for stable high-volume parts, rapid investment casting for complex low-volume parts, and evaporative pattern casting for suitable geometries where a gasifiable pattern is advantageous. I also expect digital inventory to become more common. Instead of storing physical patterns, a factory can store a certified digital model and print it when needed. This reduces storage cost and shortens response time.
Conclusion and Outlook
My work leads me to a clear conclusion: three-dimensional printing is a powerful complement to rapid investment casting. It allows me to move from a digital model to a functional metal part with fewer tooling steps, faster iteration, and greater geometric freedom. In my small impeller case study, the measured dimensions were close to nominal, with relative deviations around half a percent. This confirms that the hybrid process can meet practical precision requirements for many applications.
I also conclude that the same digital pattern philosophy applies to evaporative pattern casting. Both processes rely on a sacrificial pattern, both require careful thermal management, and both benefit from simulation, compensation, and inspection feedback. When I compare them, I see complementary strengths. Investment casting offers excellent surface finish and dimensional control. Evaporative pattern casting offers simplicity for certain geometries and can use a pattern that is vaporized directly by the metal. By using three-dimensional printing, I can create patterns for either process without dedicated tooling, which is a major advantage for prototypes, custom parts, and low-volume production.
Looking forward, I recommend several directions. First, develop more pattern materials with low ash, controlled expansion, and predictable decomposition. Second, build validated databases that link print parameters, shell recipes, and casting outcomes. Third, integrate in-line inspection and closed-loop correction so that the digital model improves automatically. Fourth, reduce the cost and increase the speed of printing so that the hybrid process becomes competitive at higher volumes. Fifth, expand the use of simulation for mold filling, solidification, and gas evolution, especially for evaporative pattern casting.
I remain optimistic about the future of digital casting. The combination of additive manufacturing, ceramic shell technology, and data-driven process control is creating a new kind of foundry. It is more flexible, more responsive, and more capable of producing complex metal parts than the traditional workflow alone. For me, the most important lesson is that the pattern is no longer just a physical object. It is a digital asset that can be revised, optimized, and reproduced on demand. That change affects investment casting, evaporative pattern casting, and the entire metal casting industry. I believe the manufacturers who embrace this hybrid approach will be best positioned to deliver high-quality castings with shorter lead times and lower development risk.