
I approached the second-stage moving blade as a high-integrity lost wax casting problem in which geometry, ceramic core robustness, shell drying, wax filling, alloy superheat, and final non-destructive inspection all had to be linked into one controlled route. The blade is large and internally complex, with an overall envelope of approximately 351 mm × 168 mm × 89 mm. Its airfoil length is about 203 mm. The tip region is vulnerable to distortion during solidification. The waist-shaped hole near the tip is close to the airfoil, with a local distance of about 2.6 mm, which makes shell preparation difficult. On the back side, the tenon pocket is deep, and during shell drying this pocket can dry poorly, leading to excess metal that is difficult to clean. The internal cavity includes a complex grid, and the exhaust trailing slot must be held to 1.2 mm ± 0.2 mm. A water-flow check is also required. Because these requirements interact, I treated the work as a complete lost wax casting system rather than a collection of independent operations.
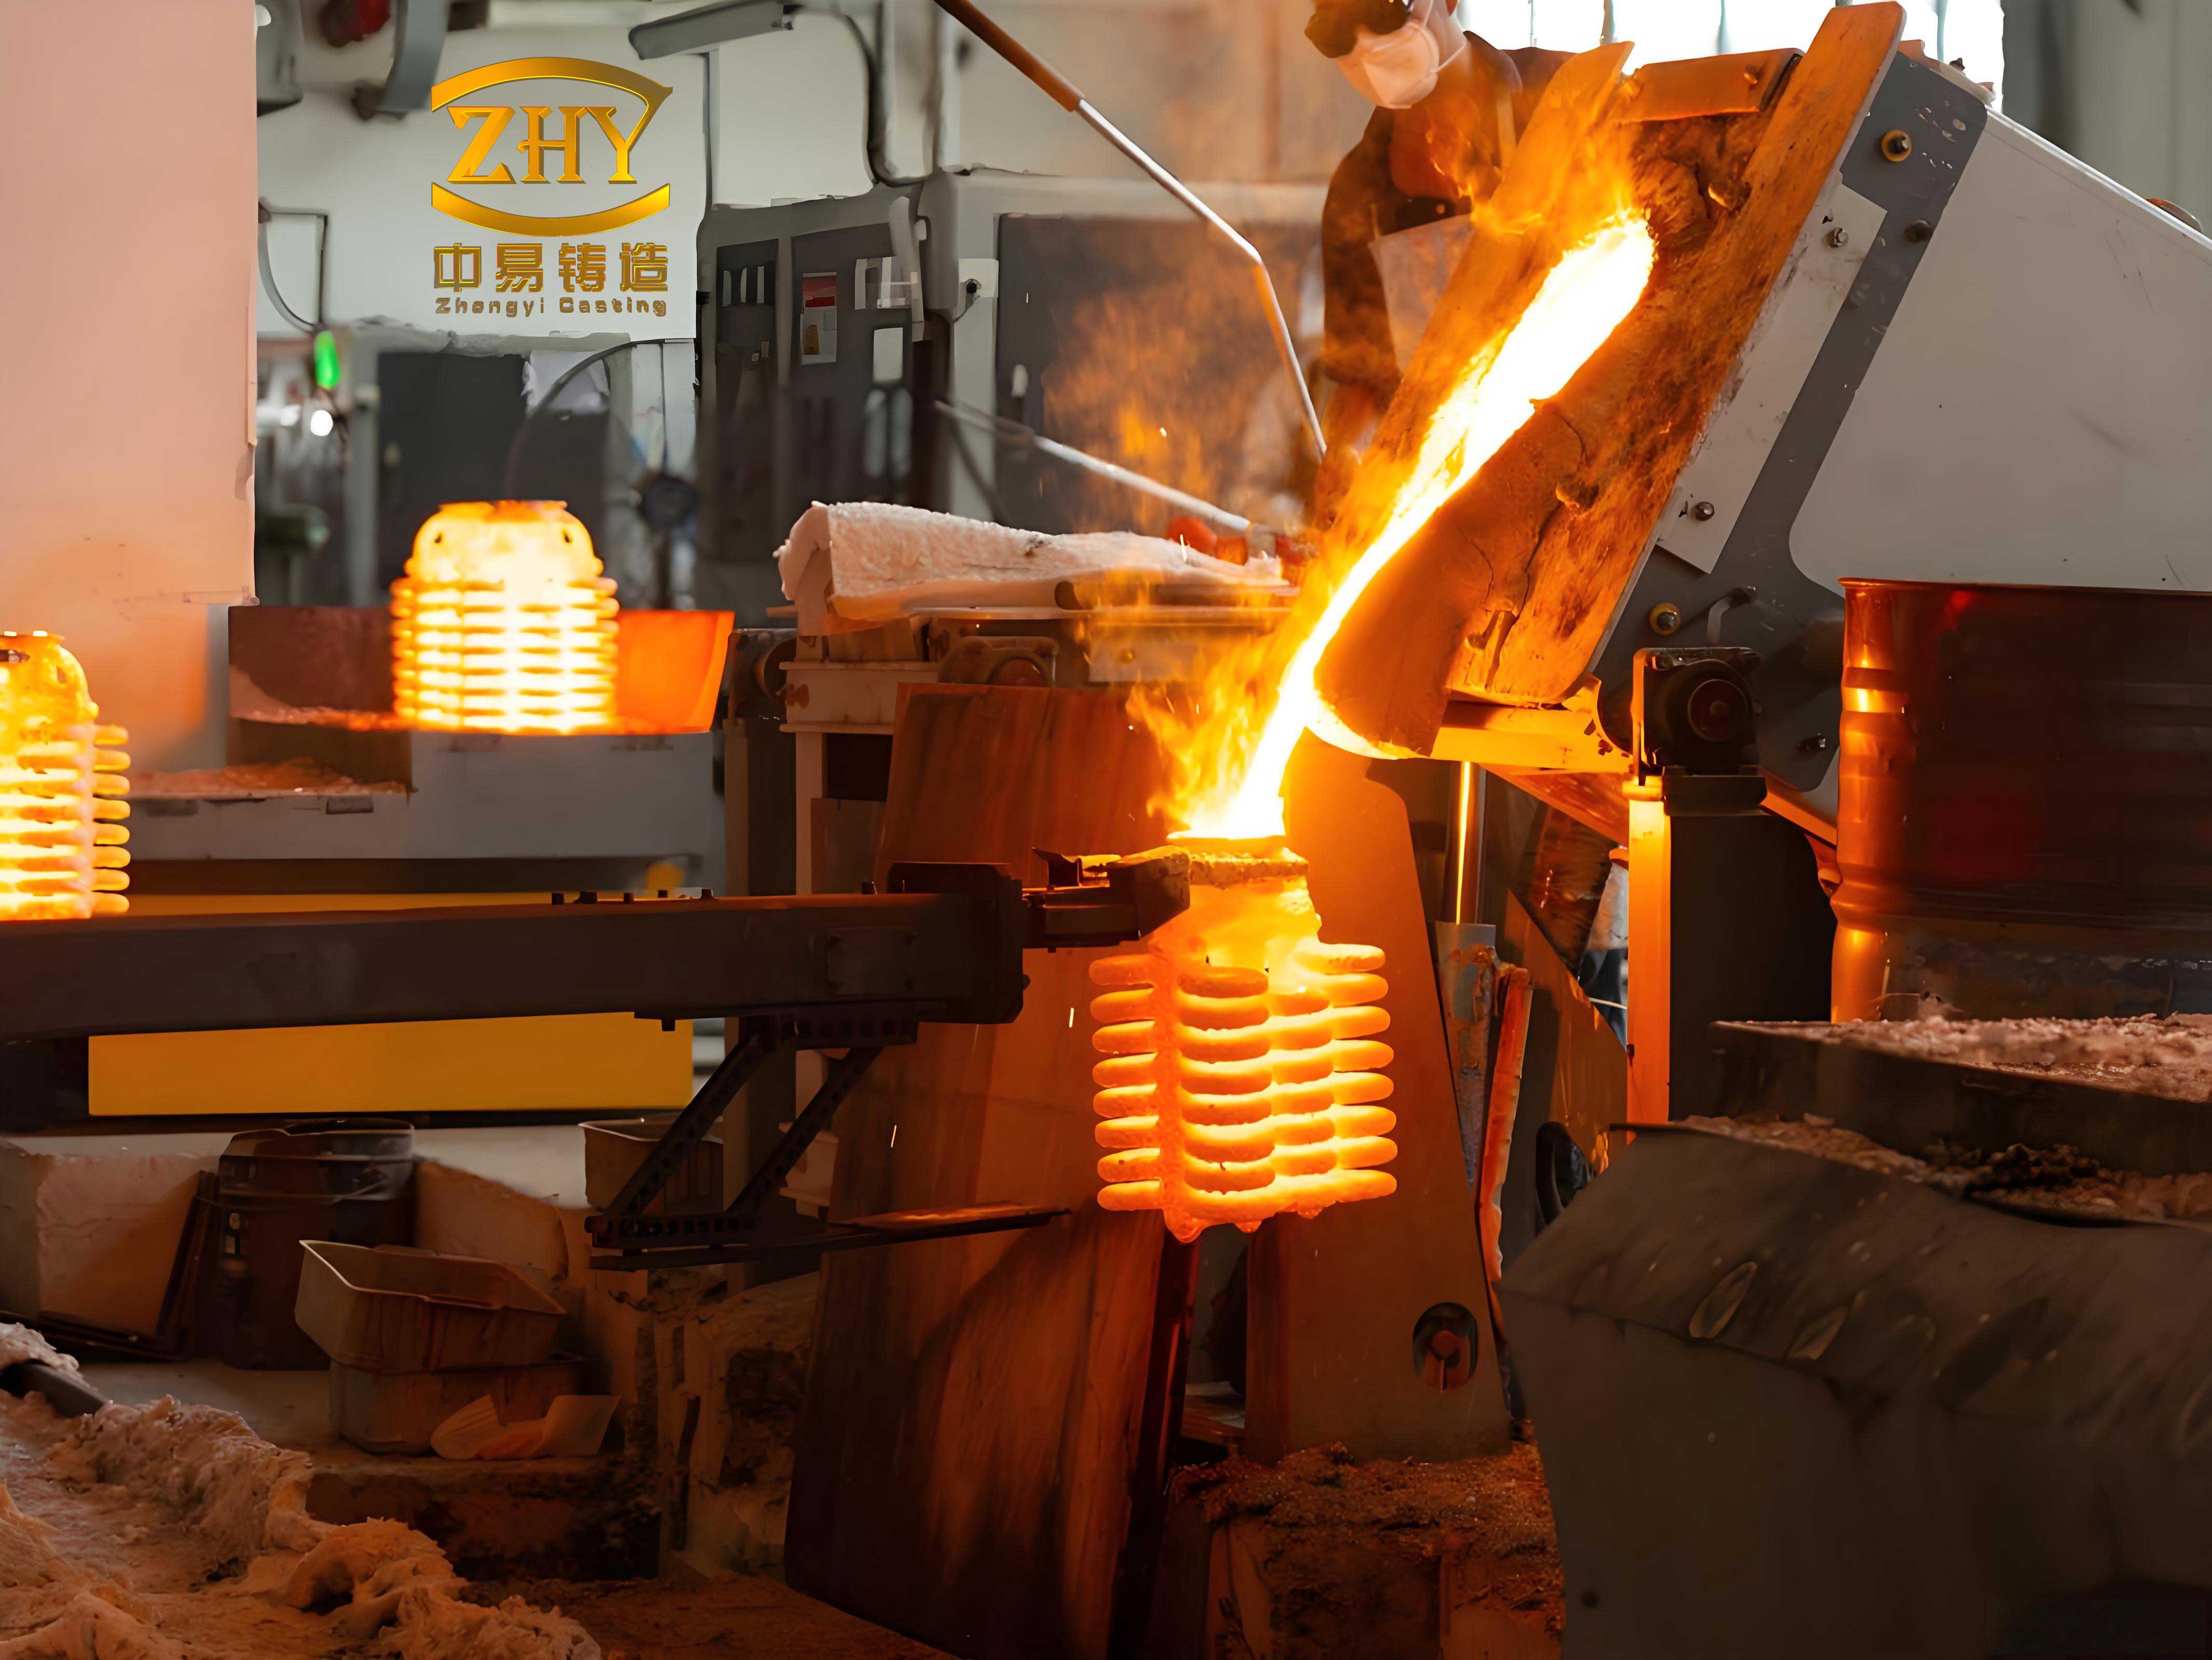
The first step I took was to convert the drawing and quality requirements into a process window. For a lost wax casting of this size and internal complexity, the process window must define not only final dimensions but also the intermediate states that protect the ceramic core, the wax pattern, the shell, and the melt. I summarized the main demands in a single table so that each later decision could be checked against a measurable target.
| Item | Target or characteristic | Process consequence in lost wax casting |
|---|---|---|
| Overall blade envelope | About 351 mm × 168 mm × 89 mm | Large wax pattern and shell require stable handling and uniform drying. |
| Airfoil length | About 203 mm | Tip distortion risk during wax cooling, shell sintering, and alloy solidification. |
| Tip waist-hole distance to airfoil | About 2.6 mm | Narrow shell space; bridging and insufficient local strength are likely. |
| Exhaust trailing slot | 1.2 mm ± 0.2 mm | Core positioning, shell support, and metal flow must be tightly controlled. |
| Internal cavity | Complex grid structure | Ceramic core has thin webs and fragile connections. |
| Tenon pocket | Deep back-side pocket | Poor drying can cause shell weakness and excess metal. |
| Alloy | K444 nickel-based precipitation-hardening equiaxed cast superalloy | Requires suitable superheat, vacuum, and shell preheat. |
| Casting mass | About 15 kg | Shell must have adequate thickness and strength. |
| Dimensional tolerance | +0.75 mm / −0.5 mm | Wax, shell, and solidification shrinkage must be balanced. |
| Inspection | Fluorescent, radiographic, dimensional, water-flow | Lost wax casting route must avoid surface and internal defects. |
In lost wax casting, the transport of wax and metal can be understood through the same basic flow and heat-transfer relations. I used these relations qualitatively to decide where the process was most sensitive. The volumetric flow through a narrow channel can be expressed as
$$Q=\frac{\pi \Delta P R^{4}}{8\mu L}$$
where \(Q\) is volumetric flow rate, \(\Delta P\) is pressure difference, \(R\) is channel radius, \(\mu\) is dynamic viscosity, and \(L\) is channel length. This relation shows why a small reduction in local gap, such as the narrow tip region, has a strong effect on fill behavior. It also explains why raising wax temperature can improve late-stage filling, because the viscosity \(\mu\) decreases. However, the same rise in temperature increases liquid contraction during cooling, which can impose stress on the ceramic core.
The Reynolds number for filling is
$$Re=\frac{\rho v D_{h}}{\mu}$$
where \(\rho\) is density, \(v\) is velocity, and \(D_h\) is hydraulic diameter. In wax injection I did not want turbulent, uncontrolled flow, because it can erode or displace the core and create flow marks. I wanted a filling pattern that remained progressive and balanced. The solidification modulus of a local section is
$$M=\frac{V}{A}$$
where \(M\) is the modulus, \(V\) is volume, and \(A\) is cooling surface area. Solidification time follows the general form
$$t_{s}=B M^{n}$$
where \(B\) is a mold constant and \(n\) is an exponent close to 2 for many castings. This helped me compare the tenon, airfoil, and tip regions. The tip has a small local modulus, so it cools quickly and can deform or fail to feed. The tenon pocket has a deep recess with a complex drying path, so shell quality there is critical. The vacuum level is expressed as
$$P_{abs}=P_{atm}-P_{vac}$$
so a vacuum of 10 Pa or less corresponds to a very low absolute pressure. This reduces gas entrapment and supports clean filling of the lost wax casting shell. Thermal expansion and contraction are represented by
$$L_{f}=L_{0}\left[1+\alpha\left(T-T_{0}\right)\right]$$
where \(\alpha\) is the coefficient of thermal expansion. This relation is important because wax contraction, shell expansion, and alloy shrinkage all influence the final blade dimensions.
| Symbol | Meaning | Relevance to this lost wax casting |
|---|---|---|
| \(Q\) | Volumetric flow rate | Wax and metal fill rate in narrow channels. |
| \(\Delta P\) | Pressure difference | Wax injection pressure and vacuum-assisted metal flow. |
| \(\mu\) | Dynamic viscosity | Wax temperature control and melt fluidity. |
| \(R\) | Channel radius | Tip gap and trailing slot sensitivity. |
| \(Re\) | Reynolds number | Flow stability during wax injection. |
| \(M\) | Solidification modulus | Feeding and cooling comparison between sections. |
| \(t_s\) | Solidification time | Tip distortion and grain structure control. |
| \(P_{abs}\) | Absolute pressure | Vacuum melting and pouring condition. |
| \(\alpha\) | Thermal expansion coefficient | Wax, shell, and alloy dimensional change. |
The wax pattern stage is where the ceramic core first experiences mechanical risk. In this lost wax casting, the ceramic core has a complex grid on the exhaust side, cylindrical connections on the tenon side that are prone to fracture, and a thinnest tip region of about 3 mm. Before wax injection, I filled the weak positions with R839 runner wax. This filled wax had to be solidly bonded to the core; virtual connection or incomplete support was not acceptable. The purpose was not merely to add material, but to create a mechanical bridge that could distribute injection pressure and prevent localized bending of thin core webs.
| Ceramic core location | Risk in lost wax casting | Action I used |
|---|---|---|
| Exhaust-side grid | Thin webs may crack under wax pressure. | Controlled injection rate and pressure; visual and dewax check. |
| Tenon-side cylindrical connection | Connection may break during handling or injection. | Filled with R839 runner wax for support before injection. |
| Tip thinnest region | About 3 mm thickness; easy to fracture or distort. | Local support and careful wax temperature control. |
| Trailing slot region | Must preserve 1.2 mm ± 0.2 mm slot. | Stable core location and shell support. |
| Overall core body | Wax contraction can squeeze the core. | Wax temperature kept within a limited window. |
I adjusted the wax injection parameters in a stepwise manner. The initial parameter set was a wax cylinder temperature of 80 °C ± 5 °C, a nozzle temperature of 80 °C ± 5 °C, a pressure of 5 bar ± 2 bar, and a flow rate of 40 cc/s. I first pressed wax patterns without the ceramic core to observe the basic filling behavior. The surface showed only slight flow lines. When I repeated the trial with the ceramic core and cold wax blocks, the surface flow lines disappeared, but a local unfilled condition appeared at the exhaust side. This indicated that the core and cold blocks had changed the thermal and flow balance enough to starve the narrow trailing-edge region.
| Wax injection parameter | Value | Reason for control |
|---|---|---|
| Wax cylinder temperature | 80 °C ± 5 °C | Balance fluidity against contraction stress on the core. |
| Nozzle temperature | 80 °C ± 5 °C | Prevent premature freezing at the gate. |
| Injection pressure | 5 bar ± 2 bar | Fill complex sections without damaging the core. |
| Flow rate | 40 cc/s, held near 40 ± 5 cc/s | Stable front advancement and reduced turbulence. |
| Core support | R839 runner wax at weak zones | Prevent core cracking and displacement. |
| Cold blocks | Used with core trials | Control local cooling and surface quality. |
To locate the unfilled region, I performed short-shot trials at 5 s, 10 s, 12 s, 13 s, 14 s, and 15 s. In the first 10 s, the basin side and back side filled at nearly the same speed. In the later stage, the back side wrapped faster than the basin side. The basin-side exhaust edge then became a small, confined space that the wax front could not enter. The final result was incomplete filling on the basin-side exhaust edge. This observation was important because it showed that the problem was not a general lack of pressure, but a late-stage flow imbalance caused by local geometry and cooling.
| Short-shot time | Observed filling state | Interpretation |
|---|---|---|
| 5 s | Early fill; both sides advancing. | Initial flow balance acceptable. |
| 10 s | Basin and back sides still close to equal. | Flow front remains stable. |
| 12 s | Back side begins to lead. | Local cooling begins to affect path resistance. |
| 13 s | Back side wrap faster than basin side. | Basin-side path becomes less favorable. |
| 14 s | Basin-side exhaust edge starves. | Narrow space cannot accept late wax. |
| 15 s | Local unfilled area confirms short shot. | Need higher late-stage fluidity. |
The solution I adopted was to raise the wax cylinder temperature so that the wax still had enough fluidity at the end of filling. However, I did not raise it indiscriminately. Excessive wax temperature increases cooling contraction, and that contraction can press on the ceramic core and damage it. This is a central conflict in lost wax casting: higher fluidity improves fill, but lower contraction stress protects the core. I therefore kept the temperature within the validated range rather than pursuing a single high-temperature setting. With the adjusted parameters, I produced ten wax patterns. After complete cooling, I removed the wax by dewaxing and inspected the ceramic core. No core cracks were found.
| Validation item | Method | Result |
|---|---|---|
| Wax pattern surface | Visual examination after injection | No flow lines after core and cold-block insertion. |
| Exhaust-side fill | Short-shot trials and full injection | Improved by late-stage fluidity control. |
| Core integrity | Dewaxing of ten patterns | No ceramic core cracks observed. |
| Weak-zone support | R839 runner wax filling | Provided solid support without virtual connection. |
| Process repeatability | Ten successive wax patterns | Acceptable for lost wax casting follow-up. |
For the assembly and feeding design, I used a top-pouring arrangement because the blade length is about 351 mm in the Z direction and the tenon section is about 80 mm. A top-pouring lost wax casting arrangement can provide the necessary feeding path for this geometry. I set the riser width at about 75 mm and the other major riser dimension at about 40 mm. These dimensions were not fixed by geometry alone; they were adjusted according to the metallurgical quality required at the tenon. I also used a split riser approach. First, I assembled the wax pattern with the riser connected to the tenon. Then I joined this subassembly to the remaining portion with bonding wax. After assembly, the transition between the part and the riser was made smooth so that flow would not be interrupted and stress concentrations would be reduced.
| Feeding and assembly feature | Design choice | Purpose |
|---|---|---|
| Pouring position | Top pouring | Feed the long Z-direction blade and tenon. |
| Riser width | About 75 mm | Provide adequate feed volume and thermal mass. |
| Secondary riser dimension | About 40 mm | Adjust local feeding and tenon quality. |
| Riser type | Split riser | Simplify wax assembly and improve handling. |
| Bonding method | Bonding wax for remaining section | Create a continuous, smooth connection. |
| Transition | Smooth and rounded | Reduce turbulence and stress concentration. |
Shell preparation was the next critical stage in the lost wax casting route. The deep tenon pocket on the back side is difficult to dry. If moisture remains trapped, the shell can be weak, and excess metal may form during pouring. To address this, I waited until the transition layer had dried for about 2 h, and then I directed compressed air into the pocket. This helped remove moisture-laden air and accelerated local drying. Before each slurry immersion, I also cleaned loose sand from the tenon pocket on both the basin and back sides with compressed air. This step reduced the chance of shell delamination. In lost wax casting, delamination is dangerous because it creates a weak zone that can fail under metallostatic pressure.
| Shell problem | Cause | Countermeasure |
|---|---|---|
| Deep tenon pocket dries poorly | Restricted air exchange in deep recess. | Compressed air after about 2 h of transition-layer drying. |
| Loose sand remains in pocket | Gravity and geometry trap stucco. | Blow clean before slurry immersion. |
| Risk of shell delamination | Weak bonding between layers. | Clean interfaces and controlled drying. |
| Excess metal at pocket | Poor local shell integrity. | Better drying and sand removal. |
| Shell strength at tenon | Large thermal mass and deep recess. | Controlled layer build-up and sealing. |
The tip region has a narrow space of about 2.6 mm. Large stucco particles can bridge this gap and create a shell bridge. A bridge prevents proper shell formation around the narrow passage and reduces local strength. To avoid this, I used 30–60 mesh mullite sand for the second and third layers. Before each of these layers, I cleaned loose sand from the narrow region. This maintained an open path and allowed the shell to build uniformly. The selection of finer sand in the critical layers is a standard lost wax casting method for narrow features, but it must be balanced against the need for overall shell strength.
| Tip-region issue | Mechanism | Action |
|---|---|---|
| Narrow gap about 2.6 mm | Stucco particles can arch across the opening. | Use 30–60 mesh mullite sand in layers 2 and 3. |
| Shell bridging | Bridge blocks uniform layer deposition. | Clean loose sand before each critical layer. |
| Low tip strength | Incomplete or bridged shell cannot resist pouring pressure. | Maintain open gap and proper layer build-up. |
| Core shift risk | Uneven shell support around tip. | Uniform drying and controlled sand size. |
| Tip deformation | Thin shell and rapid cooling. | Sufficient shell thickness before sealing. |
The shell schedule I used is summarized below. Because the casting mass is about 15 kg, I built ten layers and then applied a sealing layer. The primary layer used zircon sand and zircon flour for surface quality. The intermediate layers used mullite flour and mullite sand. The second and third layers used finer mullite sand for the narrow tip. The later layers used coarser mullite sand to build thickness and strength. The final layer was a seal coat with lower slurry viscosity and no stucco.
| Layer | Flour and specification | Slurry viscosity / s | Stucco material and specification | Function |
|---|---|---|---|---|
| 1 | Zircon sand, 325 mesh | 36 | Zircon sand, 100 mesh | Primary surface and fine reproduction. |
| 2–3 | Mullite flour, 200 mesh | 15 | Mullite sand, 30–60 mesh | Narrow tip support without bridging. |
| 4–10 | Mullite flour, 200 mesh | 12 | Mullite sand, 16–30 mesh | Build shell thickness and strength. |
| 11 | Mullite flour, 200 mesh | 10 | None | Seal the shell surface. |
The drying of a ceramic shell can be approximated by a diffusion-like relation:
$$J=-D\frac{dC}{dx}$$
where \(J\) is moisture flux, \(D\) is an effective diffusivity, and \(dC/dx\) is the moisture concentration gradient. In a deep pocket, the gradient is weak and the path length is long, so drying is slow. Forced air increases the surface mass-transfer coefficient, which can be written as
$$N_A=h_m\left(C_s-C_\infty\right)$$
where \(N_A\) is mass flux, \(h_m\) is the mass-transfer coefficient, \(C_s\) is the surface concentration, and \(C_\infty\) is the bulk concentration. This is why compressed air in the tenon pocket after partial drying was effective in the lost wax casting shell process.
| Shell-making control | Parameter or action | Effect on lost wax casting quality |
|---|---|---|
| Primary slurry viscosity | 36 s | Good surface reproduction. |
| Narrow-tip slurry viscosity | 15 s | Penetration into tight spaces without bridging. |
| Build-layer slurry viscosity | 12 s | Balance between penetration and thickness. |
| Seal slurry viscosity | 10 s | Seal surface and reduce loose particles. |
| Tenon pocket drying | Compressed air after about 2 h | Prevent poor drying and excess metal. |
| Loose sand removal | Before slurry immersion | Prevent delamination. |
| Layer count | 10 plus seal | Support about 15 kg of alloy. |
For melting and pouring, I preheated the shell with the gate cup facing downward. The preheat temperature was 1100 °C ± 10 °C, and the holding time was at least 1 h. This preheat reduces thermal shock and helps complete the shell burn-out. The alloy was K444, a nickel-based precipitation-hardening equiaxed cast superalloy with useful service below 900 °C. It has good high-temperature strength and hot-corrosion resistance. Its melting range is about 1262–1319 °C. Based on this range and the blade structure, I set the pouring temperature at 1440–1470 °C. The vacuum was controlled to 10 Pa or less. The refining temperature was 1520 °C ± 10 °C, and the refining time was at least 3 min. The pouring speed was controlled to within 2 s. After pouring, the mold was held for at least 10 min before furnace cooling. The casting was cooled for at least 6 h before shell removal.
| Melting and pouring parameter | Set point | Reason |
|---|---|---|
| Shell preheat position | Gate cup downward | Stable heating and burn-out. |
| Shell preheat temperature | 1100 °C ± 10 °C | Reduce thermal shock and improve fill. |
| Shell preheat holding time | At least 1 h | Uniform mold temperature. |
| Alloy | K444 nickel-based precipitation-hardening equiaxed cast superalloy | High-temperature strength and hot-corrosion resistance. |
| Service temperature | Below about 900 °C | Alloy application range. |
| Melting range | 1262–1319 °C | Basis for superheat calculation. |
| Pouring temperature | 1440–1470 °C | Fill the complex lost wax casting cavity. |
| Vacuum | 10 Pa or less | Reduce gas entrapment and oxidation. |
| Refining temperature | 1520 °C ± 10 °C | Melt cleanliness and homogeneity. |
| Refining time | At least 3 min | Allow inclusions and gas to separate. |
| Pouring speed | Within 2 s | Controlled filling of thin sections. |
| Post-pour holding | At least 10 min | Promote stable solidification. |
| Cooling before knockout | At least 6 h | Prevent cracking and deformation. |
The superheat can be expressed as
$$\Delta T_{s}=T_{p}-T_{L}$$
where \(T_p\) is the pouring temperature and \(T_L\) is the liquidus temperature. With a liquidus near 1319 °C and a pouring temperature of 1440–1470 °C, the superheat is approximately 121–151 °C. This range is high enough to fill the thin trailing slot and complex internal passages, but it is not so high that it unnecessarily increases reaction with the shell or grain growth. The vacuum condition can also be expressed as an oxygen partial pressure limit. In the lost wax casting furnace, maintaining a low absolute pressure helps prevent oxidation of the nickel-based melt and reduces gas defects.
| Thermal quantity | Expression | Approximate value in this work |
|---|---|---|
| Liquidus temperature | \(T_L\) | About 1319 °C |
| Pouring temperature | \(T_p\) | 1440–1470 °C |
| Superheat | \(\Delta T_s=T_p-T_L\) | About 121–151 °C |
| Shell preheat | \(T_{shell}\) | 1100 °C ± 10 °C |
| Vacuum | \(P_{vac}\) | 10 Pa or less |
| Refining temperature | \(T_{ref}\) | 1520 °C ± 10 °C |
| Refining time | \(t_{ref}\) | At least 3 min |
| Pouring time | \(t_p\) | Within 2 s |
| Post-pour hold | \(t_{hold}\) | At least 10 min |
| Cooling before knockout | \(t_{cool}\) | At least 6 h |
After shell removal, the castings were inspected for missing metal and incomplete fill. None were found. I then used blue-light scanning to evaluate the profile dimensions. The required profile tolerance was +0.75 mm / −0.5 mm. The measured dimensions met this tolerance. The shell layer count and shell strength were sufficient to maintain the blade dimensions. I also checked both the basin side and the back side. The dimensional results confirmed that the lost wax casting process was stable enough for this large, thin-walled, internally complex blade.
| Inspection stage | Method | Acceptance criterion | Result |
|---|---|---|---|
| Visual after knockout | Visual examination | No missing metal or incomplete fill | No such defects observed. |
| Profile dimension | Blue-light scanning | +0.75 mm / −0.5 mm | Within tolerance. |
| Basin-side profile | Blue-light scanning | Same profile tolerance | Within tolerance. |
| Back-side profile | Blue-light scanning | Same profile tolerance | Within tolerance. |
| Surface condition | Manual dressing and inspection | No harmful surface defects | Surface state good. |
| Tenon teeth | Wire cutting | Correct tooth profile | Cut and inspected. |
| Fluorescent inspection | Fluorescent penetrant | No excessive indications | No excessive defects. |
| Radiographic inspection | X-ray according to HB/Z60 | No excessive internal defects | No excessive defects. |
| Trailing slot | Dimensional check | 1.2 mm ± 0.2 mm | Maintained by core and shell control. |
| Water-flow requirement | Flow check | Required by product specification | Supported by internal cavity cleanliness and slot control. |
The dimensional check was followed by surface conditioning. I removed surface defects and then wire-cut the tenon teeth. After that, fluorescent inspection was performed. No excessive indications were found, and the surface condition was good. Radiographic inspection was performed according to HB/Z60. The X-ray results showed no excessive defects in either the airfoil region or the tenon region. These results were important because they showed that the lost wax casting process had controlled both surface and internal quality.
| Region inspected | Method | Observed condition | Disposition |
|---|---|---|---|
| Airfoil surface | Fluorescent inspection | No excessive indications | Accepted. |
| Tenon surface | Fluorescent inspection | No excessive indications | Accepted. |
| Airfoil internal | Radiographic inspection | No excessive defects | Accepted. |
| Tenon internal | Radiographic inspection | No excessive defects | Accepted. |
| Trailing slot | Dimensional and visual | Within 1.2 mm ± 0.2 mm | Accepted. |
| Internal cavity | Core removal and flow check | Clean and open | Accepted. |
The final process window that I established for the second-stage moving blade lost wax casting is summarized in the following table. The wax parameters, shell schedule, and melting parameters are coupled. For example, the wax temperature cannot be raised without considering core contraction stress. The shell layer count cannot be reduced without considering the 15 kg casting mass. The pouring temperature cannot be lowered without considering the 1.2 mm trailing slot and the complex internal grid. The vacuum cannot be relaxed without considering gas defects. Each parameter therefore has a narrow but practical range.
| Process area | Parameter | Final set point |
|---|---|---|
| Wax injection | Wax cylinder temperature | 80 °C ± 5 °C |
| Wax injection | Nozzle temperature | 80 °C ± 5 °C |
| Wax injection | Pressure | 5 bar ± 2 bar |
| Wax injection | Flow rate | 40 cc/s, approximately 40 ± 5 cc/s |
| Core preparation | Weak-zone support | R839 runner wax filling |
| Core validation | Dewax check | Ten patterns; no core cracks |
| Feeding | Pouring position | Top pouring |
| Feeding | Riser dimensions | About 75 mm and about 40 mm |
| Assembly | Riser type | Split riser with bonding wax |
| Shell | Layer count | 10 layers plus seal |
| Shell | Primary layer | Zircon sand 325 mesh / zircon sand 100 mesh / 36 s |
| Shell | Layers 2–3 | Mullite flour 200 mesh / mullite sand 30–60 mesh / 15 s |
| Shell | Layers 4–10 | Mullite flour 200 mesh / mullite sand 16–30 mesh / 12 s |
| Shell | Seal layer | Mullite flour 200 mesh / 10 s / no stucco |
| Shell drying | Tenon pocket | Compressed air after about 2 h |
| Shell drying | Narrow tip | Fine sand and loose-sand cleaning |
| Preheat | Position | Gate cup downward |
| Preheat | Temperature and time | 1100 °C ± 10 °C, at least 1 h |
| Melting | Alloy | K444 |
| Melting | Refining temperature | 1520 °C ± 10 °C |
| Melting | Refining time | At least 3 min |
| Pouring | Temperature | 1440–1470 °C |
| Pouring | Vacuum | 10 Pa or less |
| Pouring | Pouring speed | Within 2 s |
| Solidification | Post-pour hold | At least 10 min |
| Cooling | Before knockout | At least 6 h |
I considered several potential defect modes during the development of this lost wax casting. The first was ceramic core cracking during wax injection. This was controlled by filling weak positions with R839 runner wax, keeping the wax temperature in a moderate range, and validating the result by dewaxing ten patterns. The second was incomplete filling at the basin-side exhaust edge. This was controlled by short-shot trials and by improving late-stage wax fluidity without exceeding the contraction-stress limit. The third was shell bridging at the tip. This was controlled by using 30–60 mesh mullite sand in the second and third layers and by cleaning loose sand before each layer. The fourth was poor drying in the tenon pocket. This was controlled by forced air after about 2 h of transition-layer drying and by cleaning loose sand before slurry immersion. The fifth was internal or surface defects in the alloy. This was controlled by vacuum, refining, pouring temperature, pouring speed, and shell preheat.
| Potential defect | Root cause | Control measure | Verification |
|---|---|---|---|
| Ceramic core crack | Wax pressure and contraction stress on thin webs. | R839 support, controlled temperature and flow. | Dewaxing of ten patterns; no cracks. |
| Exhaust-edge incomplete fill | Late-stage flow imbalance and narrow basin-side gap. | Short-shot study and improved late-stage fluidity. | Full wax patterns filled without flow lines. |
| Tip shell bridging | Coarse stucco in 2.6 mm gap. | 30–60 mesh mullite in layers 2–3. | Open narrow space and sound shell. |
| Tenon pocket poor drying | Deep recess and restricted air exchange. | Compressed air after 2 h; loose-sand cleaning. | No excess metal and no delamination. |
| Gas entrapment | Insufficient vacuum or high turbulence. | Vacuum 10 Pa or less; controlled pouring. | X-ray shows no excessive defects. |
| Shrinkage porosity | Inadequate feeding of tenon or airfoil. | Top pouring and split riser. | X-ray and section quality acceptable. |
| Dimensional deviation | Wax, shell, and alloy shrinkage. | Stable shell and controlled cooling. | Blue-light scan within +0.75/−0.5 mm. |
| Surface indications | Shell surface or metal contamination. | Zircon primary layer and clean melting. | Fluorescent inspection acceptable. |
In lost wax casting, the interaction between the ceramic core and the shell is especially important for hollow blades. The core must be strong enough to survive wax injection, but it must also be compliant enough to avoid cracking when the wax contracts. The shell must support the core during pouring, but it must not bridge the narrow tip passage. The metal must fill the trailing slot and internal grid, but it must not erode the shell or react excessively. These competing requirements are why I used a staged validation: first without core, then with core and cold blocks, then short-shot trials, then dewaxing checks, then shell trials, and finally melting and inspection. Each stage provided evidence for the next.
| Development stage | Main question | Finding | Decision |
|---|---|---|---|
| Wax trial without core | Does the basic wax pattern fill? | Slight flow lines only. | Base parameter set acceptable for surface study. |
| Wax trial with core and cold blocks | Does the core change fill behavior? | Flow lines gone, but exhaust edge locally unfilled. | Investigate late-stage flow. |
| Short-shot study | Where does the flow front lose balance? | Back side leads after 10 s; basin side starves. | Increase late-stage fluidity within limits. |
| Dewax check | Does the ceramic core survive? | No cracks in ten patterns. | Wax parameters validated for core integrity. |
| Shell drying trial | Can deep pocket and narrow tip be built? | Compressed air and fine sand prevent defects. | Use 10-layer shell plus seal. |
| Melting and pouring | Can the alloy fill and feed the blade? | No missing metal or incomplete fill. | Melting and pouring window validated. |
| Final inspection | Does the casting meet requirements? | Dimensional, fluorescent, and X-ray results acceptable. | Lost wax casting route qualified. |
The final conclusion I reached is that the second-stage moving blade can be produced by a controlled lost wax casting route using the following integrated parameters: wax cylinder temperature 80 °C ± 5 °C, nozzle temperature 80 °C ± 5 °C, pressure 5 bar ± 2 bar, and flow rate 40 cc/s, held near 40 ± 5 cc/s. The shell is made with ten layers plus a seal. The melting and pouring route uses a refining temperature of 1520 °C ± 10 °C, a pouring temperature of 1440–1470 °C, a refining time of at least 3 min, a pouring speed within 2 s, and a post-pour holding time of at least 10 min. With these conditions, the castings passed fluorescent inspection and radiographic inspection without excessive defects. Dimensional inspection also met the required profile tolerance. The process therefore provides a practical and repeatable lost wax casting solution for this large, thin-walled, internally complex second-stage moving blade.
| Final conclusion area | Established condition |
|---|---|
| Wax cylinder temperature | 80 °C ± 5 °C |
| Nozzle temperature | 80 °C ± 5 °C |
| Wax injection pressure | 5 bar ± 2 bar |
| Wax flow rate | 40 cc/s, approximately 40 ± 5 cc/s |
| Core weak-zone support | R839 runner wax filling |
| Core crack verification | Ten dewaxed patterns without cracks |
| Shell build | 10 layers plus seal |
| Narrow-tip stucco | 30–60 mesh mullite in layers 2–3 |
| Tenon pocket drying | Compressed air after about 2 h |
| Shell preheat | 1100 °C ± 10 °C for at least 1 h |
| Alloy | K444 |
| Refining temperature | 1520 °C ± 10 °C |
| Refining time | At least 3 min |
| Pouring temperature | 1440–1470 °C |
| Vacuum | 10 Pa or less |
| Pouring speed | Within 2 s |
| Post-pour hold | At least 10 min |
| Cooling before knockout | At least 6 h |
| Dimensional tolerance | +0.75 mm / −0.5 mm |
| Trailing slot | 1.2 mm ± 0.2 mm |
| Final NDT | Fluorescent and X-ray acceptable |
The value of this lost wax casting development is that it connects ceramic core support, wax flow, shell drying, narrow-gap sand selection, feeding design, vacuum melting, and final inspection into a single qualified route. The blade geometry creates several local risks, but each risk can be managed when the process window is defined and verified. The deep tenon pocket requires positive drying and cleaning. The 2.6 mm tip gap requires fine stucco and loose-sand removal. The 1.2 mm ± 0.2 mm trailing slot requires stable core location and adequate metal superheat. The complex internal grid requires a core that survives wax injection and shell handling. The large 15 kg casting mass requires a ten-layer shell plus seal. When these controls are combined, the lost wax casting process produces a second-stage moving blade that meets dimensional, fluorescent, and radiographic acceptance requirements.