
In my own research and practical work, I treat 3D printing as a digital pattern-making and mold-making engine for rapid investment precision casting. I do not see it as a simple prototyping tool. Instead, I see it as a method that connects a three-dimensional digital model directly to a refractory shell, a dewaxed cavity, and finally a metal casting. This connection is especially valuable in precision casting because the accuracy of the pattern, the stability of the shell, and the control of thermal events determine whether the final component meets dimensional and surface requirements. When I apply 3D printing to precision casting, I can replace or supplement traditional wax pattern production, shorten the development cycle, reduce tooling cost, and manufacture geometries that would be difficult or impossible to produce by conventional wax injection. In my assessment, the combination of 3D printing and rapid investment precision casting is one of the most practical routes for small-batch, high-complexity, and high-value metal components.
The core idea I follow is straightforward. A digital model is created by computer-aided design, reverse engineering, or scanning. That model is converted into a printable format, sliced into layers, and built as a physical pattern. The pattern is then coated with refractory slurry and stucco, dried, dewaxed, burned out, and filled with molten metal. The pattern disappears, but the cavity remains. In precision casting, this cavity must preserve fine details, sharp edges, thin walls, and tight tolerances. Therefore, every step from digital file to final casting must be controlled with process parameters, measurement feedback, and mathematical models. I use tables and formulas throughout my work because they allow me to compare materials, predict deviations, estimate costs, and optimize the route from digital design to precision casting.
My Understanding of Investment Precision Casting
Investment precision casting, which I also refer to as lost-wax casting, is a near-net-shape metal-forming process. A pattern, traditionally made of wax or a wax-like material, is coated with ceramic or refractory material. After the coating hardens, the pattern is removed by heat, leaving a cavity. The cavity is then fired, and molten metal is poured into it. After cooling and solidification, the shell is broken away, and the casting is cleaned, cut, and finished. I value this process because it can produce complex shapes, thin sections, and excellent surface finish. It is widely used in aerospace, automotive, electronics, energy, and medical equipment. However, the traditional route requires a metal die for wax injection, a long pattern-making cycle, and careful control of wax shrinkage, shell strength, and dewaxing behavior. These requirements make small-batch production expensive and slow. This is exactly where 3D printing becomes useful for rapid investment precision casting.
In traditional precision casting, the pattern material must melt or vaporize at a relatively low temperature so that it can leave the shell without damaging the cavity. The pattern must also have enough strength to survive handling, coating, and drying. Its thermal expansion should be low enough to avoid shell cracking, and its ash content should be low enough to prevent residue. I summarize common pattern materials in the following table.
| Material Type | Main Constituents | Melting Range in Celsius |
|---|---|---|
| Wax-based pattern material | Paraffin, stearic acid, and additives | 60 to 70 |
| Resin-based pattern material | Natural resins and modifiers | 70 to 120 |
| High-temperature pattern material | Rosin, ozokerite, polystyrene, and fillers | Above 120 |
| Medium-temperature rosin-based material | Rosin, waxes, and fillers | 90 to 110 |
| Medium-temperature wax-based material | Paraffin and other additives | 80 to 100 |
From my perspective, the most important issue is not simply whether a material can melt. The important issue is whether the pattern can be removed cleanly after the shell has formed. For a pattern of volume \(V_p\), density \(\rho_p\), specific heat \(c_p\), latent heat \(L_f\), and surface area \(A_s\), the dewaxing time under an external heating medium can be approximated as:
$$t_{dewax} \approx \frac{\rho_p V_p (c_p \Delta T + L_f)}{h A_s \Delta T_{water}}$$
In this expression, \(h\) is the effective heat-transfer coefficient between the hot water or steam and the pattern, and \(\Delta T_{water}\) is the temperature difference between the heating medium and the pattern. I use this kind of relationship to understand why thin, complex patterns can be removed more quickly than thick, solid patterns. For precision casting, a fast and complete dewaxing step is essential because residual pattern material can create gas defects, ash inclusions, or incomplete cavity reproduction.
The shell itself is not a passive container. It must withstand the weight of the molten metal, thermal shock, and mechanical handling. In my work, I think of the shell as a composite structure built from multiple slurry and stucco layers. The strength of the shell depends on binder content, particle size distribution, drying conditions, and the number of coats. A simple expression for the required shell thickness can be written as:
$$t_{shell} \ge \frac{P_{metal} R}{2 \sigma_{shell}} + t_{margin}$$
Here, \(P_{metal}\) is the metallostatic pressure, \(R\) is a characteristic radius, \(\sigma_{shell}\) is the allowable tensile stress of the shell, and \(t_{margin}\) is an additional safety allowance. This formula reminds me that precision casting is not only about pattern accuracy. The shell must be strong enough to preserve that accuracy under thermal and mechanical load.
How 3D Printing Enters the Rapid Precision Casting Route
I classify the role of 3D printing in rapid investment precision casting into two main areas. First, 3D printing can manufacture the pattern directly, replacing the wax pattern. Second, 3D printing can manufacture the die or mold used to produce wax patterns. The first route is more direct and is especially useful for prototypes, small batches, and complex geometries. The second route is useful when many identical wax patterns are needed and when the production volume justifies a printed tool. In both cases, the digital model is the starting point. The difference is whether the printed part becomes the sacrificial pattern or the tooling that produces the sacrificial pattern.
Common 3D printing materials have melting ranges that are much lower than the melting point of typical casting alloys. This is one reason why printed polymer patterns can be used as sacrificial patterns in precision casting. I list common materials and their melting ranges in the table below.
| Material | Melting Range in Celsius |
|---|---|
| ABS, acrylonitrile butadiene styrene | 210 to 240 |
| PLA, polylactic acid | 170 to 220 |
| PETG, polyethylene terephthalate glycol | 220 to 250 |
| TPU, thermoplastic polyurethane | 190 to 230 |
| Photopolymer resin | 60 to 90 |
| Nylon | 235 to 270 |
When I compare pattern materials with 3D printing materials, I look for a low melting or decomposition temperature, low ash content, good dimensional stability, and adequate green strength. Photopolymer resin is particularly attractive for rapid investment precision casting because it can be processed by stereolithography, which offers fine feature resolution and smooth surfaces. The printed pattern can be used much like a wax pattern. It is coated, dried, dewaxed or burned out, and then replaced by metal. In my experience, this route is highly effective for small impellers, pump components, brackets, housings, and other parts where precision casting is required but wax tooling is not economical.
The amount of material required for a printed pattern can be estimated from the sliced model. For a part divided into \(n\) layers, each with area \(A_i\) and layer thickness \(\Delta z\), the ideal solid volume is:
$$V_{ideal} = \sum_{i=1}^{n} A_i \Delta z$$
In actual printing, I must also account for supports, rafts, purge material, and post-processing waste. Therefore, the material utilization efficiency is better expressed as:
$$\eta_m = \frac{V_{part}}{V_{part} + V_{support} + V_{waste}} \times 100\%$$
For rapid investment precision casting, material utilization is not only an economic issue. It also affects the amount of material that must be removed during dewaxing and burnout. A high support volume can increase cleaning time and may leave ash or residue. Therefore, I try to orient the part to minimize supports while preserving critical surfaces.
The layer count of a printed pattern is determined by part height \(H\) and layer thickness \(\Delta z\):
$$N_l = \left\lceil \frac{H}{\Delta z} \right\rceil$$
The build time can be approximated as:
$$T_b = N_l (t_{scan} + t_{recoat} + t_{dwell})$$
where \(t_{scan}\) is the scanning or exposure time per layer, \(t_{recoat}\) is the recoating time, and \(t_{dwell}\) is any additional waiting or stabilization time. This formula helps me understand the trade-off between resolution and productivity. A smaller layer thickness improves surface finish and dimensional detail, but it increases the number of layers and the total build time. For precision casting, the optimal layer thickness depends on the smallest feature, the required surface roughness, and the acceptable production time.
My Integrated Workflow for Rapid Investment Precision Casting
My workflow begins with digital modeling. I create the model in computer-aided design software, or I obtain it by reverse engineering and 3D scanning. I then convert the model into a printable format, usually STL, and slice it into layers. During slicing, I define orientation, supports, layer thickness, exposure or extrusion parameters, and compensation for shrinkage. The goal is not only to print a nice-looking part. The goal is to produce a pattern that will survive shell building and produce an accurate precision casting cavity.
After printing, I clean the pattern, remove supports, and inspect critical dimensions. If the pattern is made by stereolithography, I wash away uncured resin and post-cure it under controlled ultraviolet light. If the pattern is made by material extrusion, I remove supports and may sand the surface. I measure the pattern before shell building because any error in the pattern will be transferred to the precision casting. I then prepare the slurry and stucco. The pattern is dipped into face-coat slurry, coated with fine refractory sand, and dried. This step is repeated with backup coats until the shell has sufficient thickness and strength. I control viscosity, temperature, humidity, and drying time because these variables affect shell permeability and surface quality.
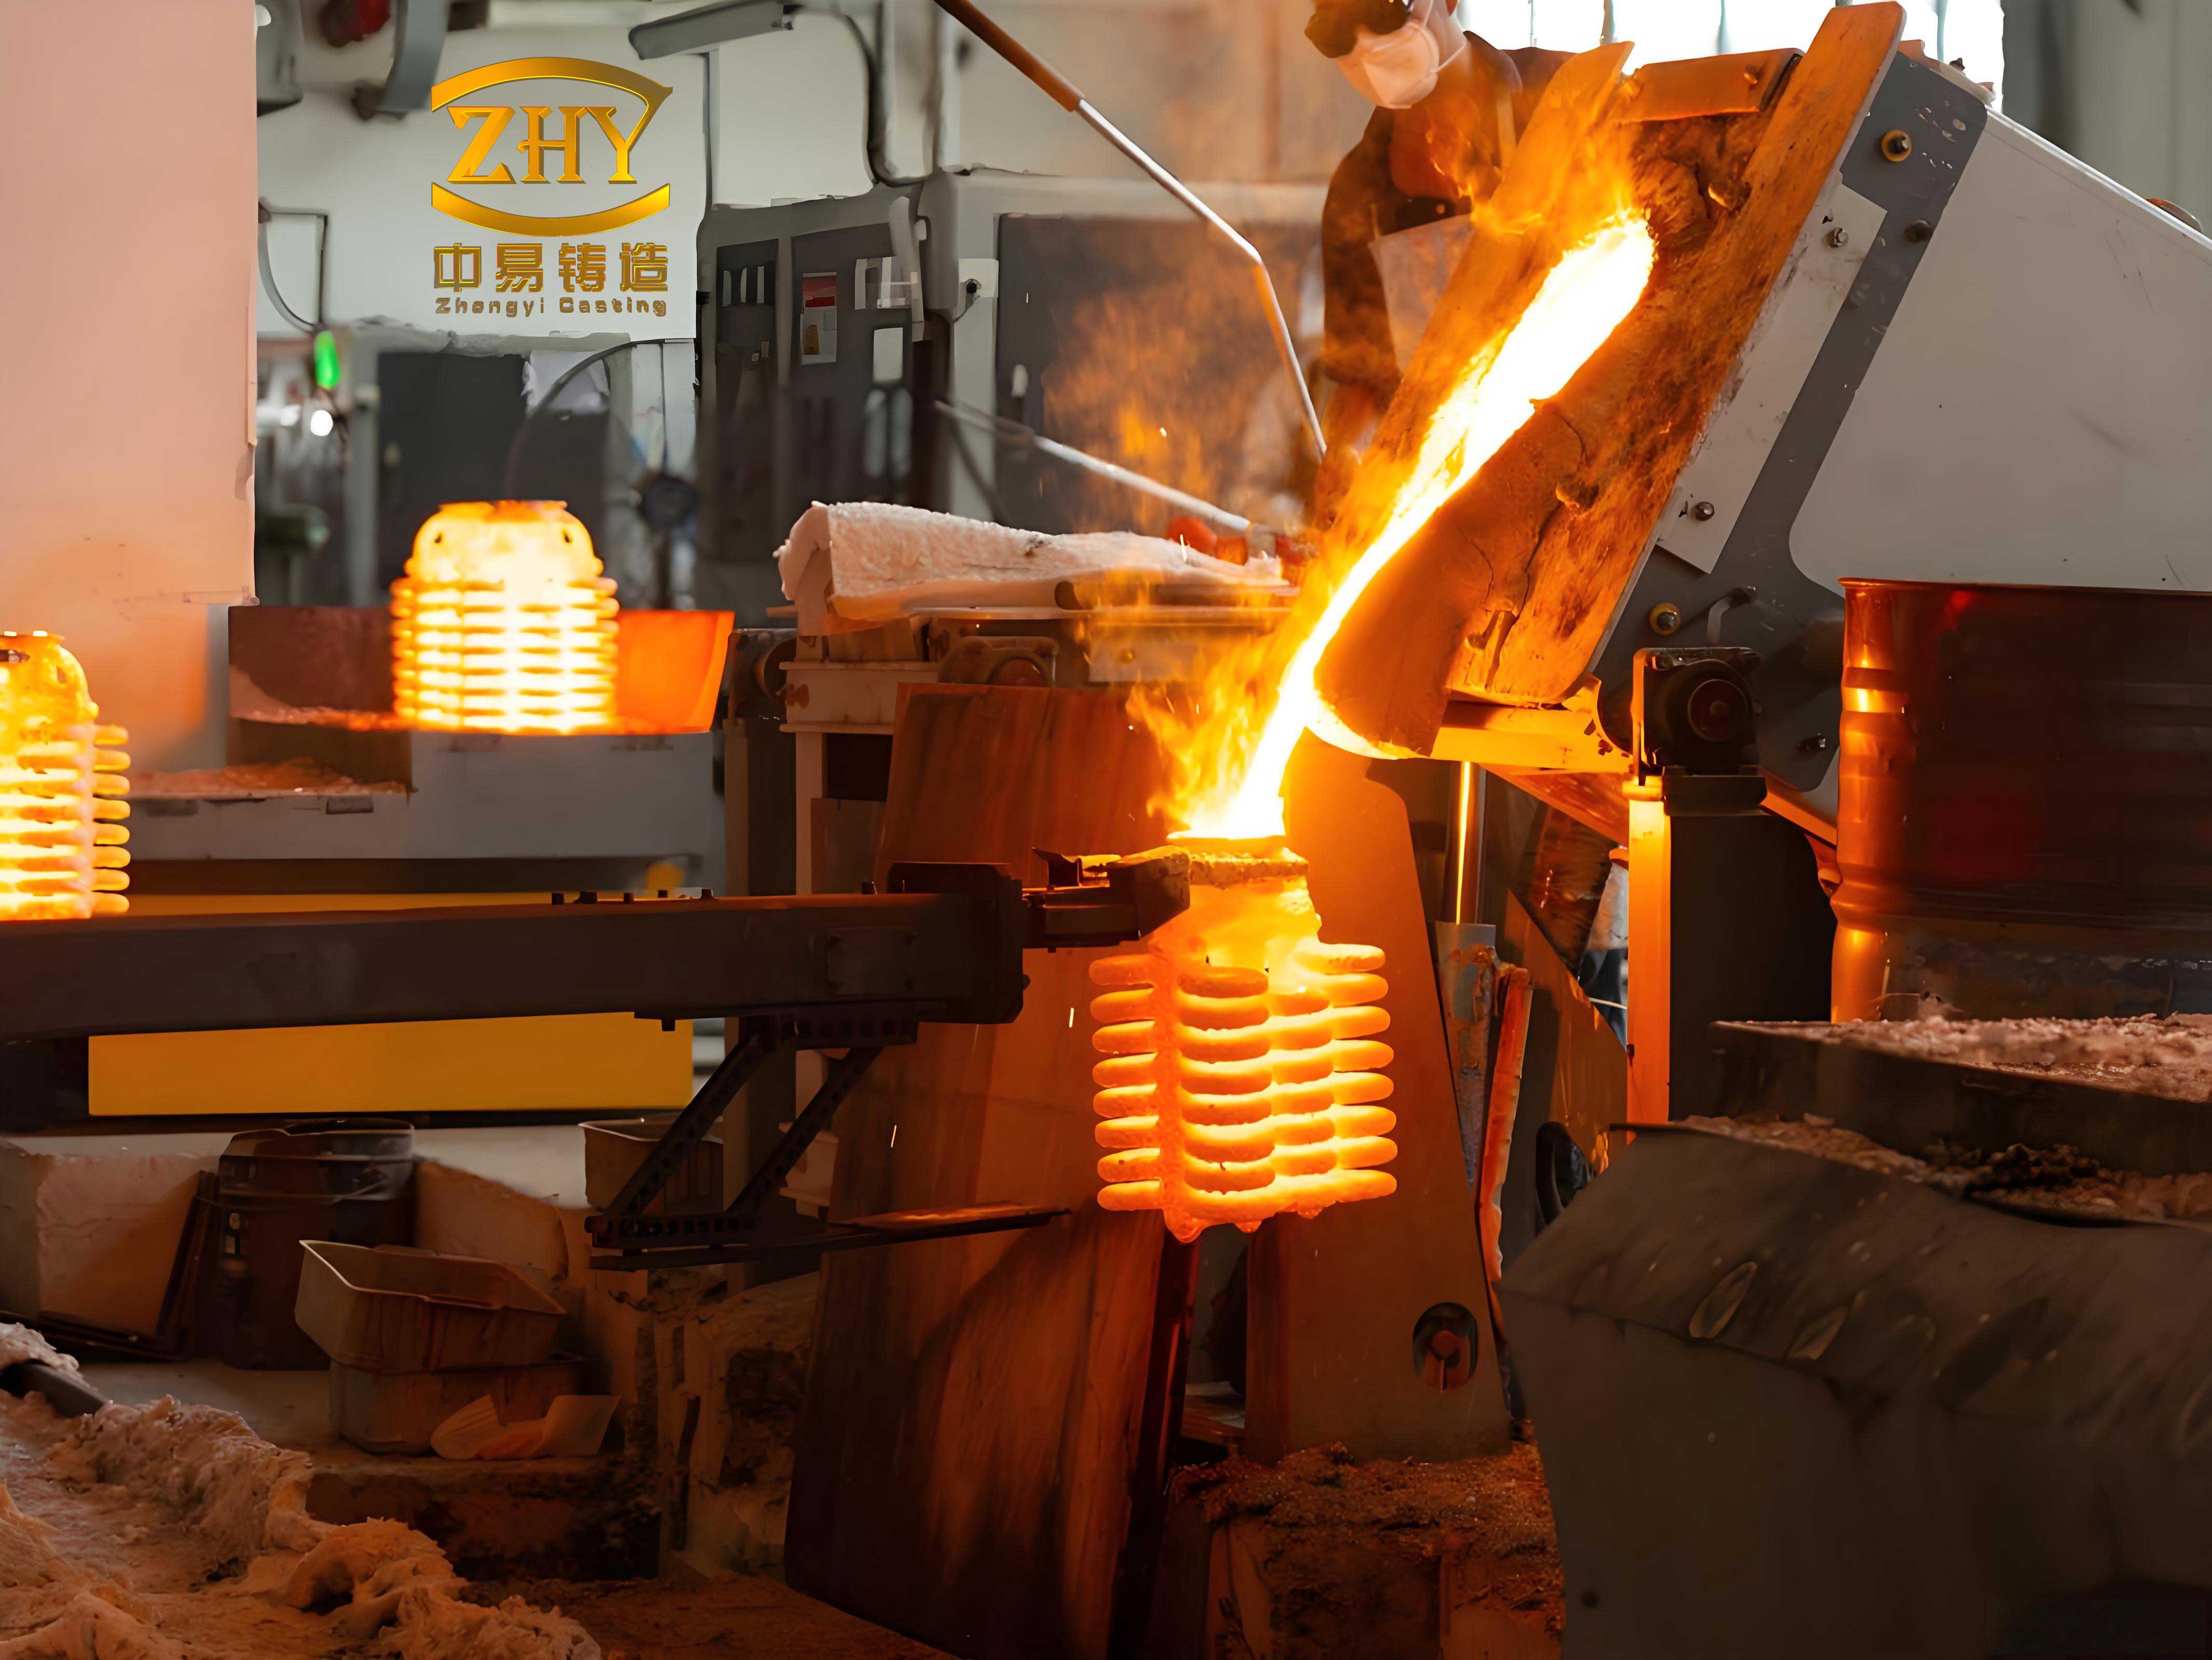
Once the shell is built, I remove the pattern. For a photopolymer or wax-like pattern, I immerse the shell in hot water or place it in a furnace at a controlled heating rate. The pattern melts or softens and flows out, leaving a cavity. The shell is then fired at high temperature to remove residual pattern material, moisture, and volatile compounds. After firing, I place the shell in dry sand for support and pour molten metal. After solidification and cooling, I break the shell, cut the gates, and finish the casting. Finally, I inspect dimensions, surface roughness, and internal quality. This entire route is what I mean by rapid investment precision casting: a digital pattern, a refractory shell, and a metal part produced with minimal tooling and maximum geometric freedom.
The process parameters I use for shell building can be summarized in a structured table. These values are not universal, but they represent the logic I follow when I adapt the process to a specific alloy and part.
| Stage | Key Variable | Typical Control Range | My Reason for Control |
|---|---|---|---|
| Face coat | Slurry viscosity | 20 to 60 seconds by standard cup | Preserve fine surface detail |
| Face coat | Drying temperature | 20 to 25 Celsius | Prevent cracking and uneven drying |
| Backup coats | Number of coats | 5 to 6 | Build strength and thermal resistance |
| Backup coats | Relative humidity | 40 to 70 percent | Control binder migration and curing |
| Dewaxing | Water temperature | 85 to 95 Celsius | Melt and remove pattern safely |
| Burnout | Furnace temperature | About 900 Celsius | Remove residues and strengthen shell |
| Pouring | Shell support | Dry sand or equivalent | Prevent deformation and cracking |
I also model the thermal side of the process. The time required for a casting to solidify can be estimated by Chvorinov’s rule:
$$t_s = B \left( \frac{V}{A} \right)^n$$
Here, \(t_s\) is solidification time, \(V\) is casting volume, \(A\) is heat-transfer surface area, \(B\) is a mold constant, and \(n\) is an exponent usually close to 2. This relationship is valuable in precision casting because it helps me place gates and risers. If a thin section cools too quickly, it may not fill. If a thick section cools too slowly, it may develop shrinkage porosity. By understanding the modulus \(V/A\), I can design a feeding system that promotes directional solidification and improves internal quality.
I also use flow calculations when designing the gating system. For a metal of density \(\rho\), pouring velocity \(v\), gate area \(A_g\), and fill time \(t_f\), the poured mass can be approximated by:
$$W = \rho A_g v t_f$$
The Reynolds number helps me judge whether the flow is likely to be laminar or turbulent:
$$Re = \frac{\rho v D}{\mu}$$
where \(D\) is a characteristic hydraulic diameter and \(\mu\) is dynamic viscosity. In precision casting, excessive turbulence can entrain gas and oxide films. Therefore, I prefer gating designs that fill the cavity smoothly and avoid sharp changes in flow direction.
My Case Study with a Small Impeller
I selected a small impeller as a representative part for rapid investment precision casting. The impeller had a bottom diameter of 100 mm, a top diameter of 26 mm, and a side width of 45 mm. These dimensions created a compact but geometrically complex part with curved blades and a central hub. I created the digital model, converted it into a printable format, and built the pattern with stereolithography using a photopolymer resin. I chose this route because the resin pattern offered fine resolution and a smooth surface. After printing, I cleaned the pattern, removed supports, post-cured it, and measured it. I then built the ceramic shell, dewaxed the pattern in hot water, fired the shell, and poured the metal. After cooling, I removed the shell and measured the casting.
The theoretical dimensions and measured dimensions are shown in the table below. I use this table to evaluate whether the digital-to-metal route preserves precision casting accuracy.
| Feature | Theoretical Dimension in mm | Actual Dimension in mm | Absolute Error in mm | Relative Error |
|---|---|---|---|---|
| Bottom diameter | 100.00 | 99.80 | -0.20 | 0.20 percent |
| Top diameter | 26.00 | 26.12 | +0.12 | 0.46 percent |
| Side width | 45.00 | 45.23 | +0.23 | 0.51 percent |
I calculate absolute error as:
$$e = L_{actual} – L_{theoretical}$$
I calculate relative error as:
$$\delta = \frac{|L_{actual} – L_{theoretical}|}{L_{theoretical}} \times 100\%$$
The results show that the actual dimensions are close to the theoretical dimensions. The largest relative error is about 0.51 percent, which is acceptable for many precision casting applications, especially during initial development. The bottom diameter is slightly undersized, while the top diameter and side width are slightly oversized. This pattern of deviation suggests that shrinkage compensation and thermal expansion effects are not uniform in all directions. I can improve the result by calibrating the digital model with an anisotropic shrinkage factor rather than a single uniform factor.
A general shrinkage compensation model can be written as:
$$L_{model} = L_{final} (1 + S_x)$$
for the x direction, with similar expressions for y and z:
$$L_{model,y} = L_{final,y} (1 + S_y)$$
$$L_{model,z} = L_{final,z} (1 + S_z)$$
Here, \(S_x\), \(S_y\), and \(S_z\) are directional shrinkage factors. In my experience, directional compensation is more accurate than a single global factor when the part has thin blades, thick hubs, and non-uniform cooling. For precision casting, this kind of calibration is important because the final metal part must meet tolerance requirements without excessive machining.
I also evaluate the total tolerance stack-up. If the CAD tolerance is \(T_{CAD}\), the printing tolerance is \(T_{print}\), the shell-related tolerance is \(T_{shell}\), the shrinkage tolerance is \(T_{shrink}\), and the machining tolerance is \(T_{machining}\), then the combined tolerance can be estimated by the root-sum-square method:
$$T_{total} = \sqrt{T_{CAD}^2 + T_{print}^2 + T_{shell}^2 + T_{shrink}^2 + T_{machining}^2}$$
This formula helps me identify which stage dominates the final error. If printing tolerance is small but shrinkage tolerance is large, I focus on thermal compensation. If shell tolerance is large, I focus on slurry viscosity, drying, and shell thickness. If machining tolerance is critical, I plan the machining allowance accordingly. In precision casting, tolerance control is a system problem, not a single-operation problem.
Surface quality is another important measure. I approximate the final casting surface roughness as:
$$Ra_{cast} \approx Ra_{pattern} + \Delta Ra_{shell} + \Delta Ra_{metal}$$
where \(Ra_{pattern}\) is the roughness of the printed pattern, \(\Delta Ra_{shell}\) is the additional roughness caused by the refractory coating, and \(\Delta Ra_{metal}\) is the roughness caused by metal flow and solidification. To reduce final roughness, I polish the pattern, use a fine face-coat slurry, and control metal temperature and filling speed. This is especially important for precision casting because surface defects can require costly finishing.
Advantages I Observe in 3D Printing for Rapid Precision Casting
The first advantage I observe is speed. Traditional wax pattern production requires a metal die, wax injection, cooling, trimming, and assembly. This can take several days or even weeks. A 3D printed pattern can often be produced in one to two days. This speed is valuable during product development because it allows design iterations to be tested quickly. In rapid investment precision casting, speed does not come at the expense of complexity. On the contrary, 3D printing is often most valuable when the geometry is too complex for conventional tooling.
The second advantage is precision. Stereolithography and digital light processing can produce fine features with layer thicknesses in the tens of micrometers. This supports precision casting because fine pattern details are transferred to the shell cavity. However, I must remember that precision is not only about the printer. It is also about shrinkage compensation, shell stability, and metal solidification. Therefore, I combine high-resolution printing with measurement feedback and process calibration.
The third advantage is customization. I can modify the digital model without making a new metal die. This makes it practical to produce patient-specific implants, custom brackets, unique impellers, and one-of-a-kind replacement parts. In my view, this flexibility is one of the strongest reasons to use 3D printing in precision casting.
The fourth advantage is material utilization. Additive manufacturing uses material only where it is needed, plus supports. Traditional subtractive manufacturing removes material as chips. In casting, traditional wax injection also produces runners, flashing, and scrap. I summarize the comparative advantages in the table below.
| Advantage | Effect in My Workflow | Traditional Route | 3D Printing Route |
|---|---|---|---|
| Pattern build speed | Faster iteration and development | About 5 days on average | About 1 to 2 days |
| Dimensional precision | Better feature reproduction | Depends on die and wax shrinkage | Can reach 0.5 mm or better with calibration |
| Customization | Easy digital modification | Requires new die or insert | Supports more than 90 percent of individualized designs |
| Material utilization | Less waste in pattern production | About 50 percent | Above 80 percent in favorable cases |
| Geometric freedom | Complex internal and external features | Limited by die parting and wax injection | High, including lattices and curved channels |
| Tooling cost | Lower for small batches | High die cost | Low to moderate, mainly digital and machine cost |
I also compare the cost structure mathematically. For a traditional route, the total cost can be written as:
$$C_{traditional} = C_{die} + C_{wax} + C_{injection} + C_{assembly} + C_{shell} + C_{pour} + C_{finish}$$
For a 3D printing route, the total cost can be written as:
$$C_{3D} = C_{design} + C_{resin} + C_{machine} + C_{support} + C_{post} + C_{shell} + C_{pour} + C_{finish}$$
For a production quantity \(Q\), the average cost per part is:
$$\bar{C}_{traditional} = \frac{C_{die}}{Q} + C_{variable,traditional}$$
$$\bar{C}_{3D} = \frac{C_{setup,3D}}{Q} + C_{variable,3D}$$
The break-even quantity is approximately:
$$Q_{BE} = \frac{C_{die} – C_{setup,3D}}{C_{variable,3D} – C_{variable,traditional}}$$
This formula explains why 3D printing is often superior for small and medium batches, while traditional die-based wax injection may become more economical at very high volumes. In precision casting, the choice depends on tolerance, material, surface finish, and the value of lead time. If the part is expensive and the development schedule is tight, the 3D printing route can be justified even at a higher unit cost.
Process Optimization and My Use of Formulas
I optimize the rapid investment precision casting process by controlling four groups of variables: digital variables, printing variables, shell variables, and metal variables. Digital variables include model quality, shrinkage compensation, orientation, and support placement. Printing variables include layer thickness, exposure, temperature, and post-curing. Shell variables include slurry viscosity, stucco size, drying, and number of coats. Metal variables include pouring temperature, filling time, gating, and solidification. I use formulas to connect these variables and to decide which experiments are most important.
For printing, the exposure energy per layer can be expressed as:
$$E = I t_{exp}$$
where \(I\) is the ultraviolet intensity and \(t_{exp}\) is the exposure time. The cure depth in stereolithography can be approximated by:
$$C_d = D_p \ln \left( \frac{E}{E_c} \right)$$
Here, \(C_d\) is cure depth, \(D_p\) is the penetration depth of the resin, and \(E_c\) is the critical exposure energy. I use this relationship to avoid under-curing and over-curing. Under-curing can cause layer separation and dimensional instability. Over-curing can reduce resolution, create brittleness, and increase ash during burnout. For precision casting, a well-cured pattern with accurate dimensions is essential.
For shell drying, I monitor the evaporation of water from the slurry. A simplified drying rate can be written as:
$$R_d = k_d A_s (P_{sat} – P_{vapor})$$
where \(R_d\) is the drying rate, \(k_d\) is a mass-transfer coefficient, \(A_s\) is the exposed surface area, \(P_{sat}\) is the saturation vapor pressure, and \(P_{vapor}\) is the actual vapor pressure in the surrounding air. This formula helps me understand why humidity control is important. If the surrounding air is too humid, drying is slow and the shell may remain weak. If the air is too dry, rapid drying can cause cracking. I therefore keep the drying environment within a controlled range and use gradual transitions between coats.
For metal pouring, the filling time can be related to the gate area and the desired fill rate:
$$t_f = \frac{V_{cavity}}{A_g v}$$
where \(V_{cavity}\) is the cavity volume. I combine this with the mass flow equation and Reynolds number to design a gating system that fills the cavity without excessive turbulence. In precision casting, a smooth fill is especially important for thin blades and fine surface details. If the metal freezes before the cavity is filled, the result is a misrun. If the metal flows too violently, the result can be gas porosity, sand inclusions, or surface defects.
I also use a simple thermal modulus criterion for feeding:
$$M = \frac{V}{A}$$
The casting modulus and riser modulus should satisfy:
$$M_{riser} > M_{casting}$$
In my practice, I aim for a riser modulus that is sufficiently larger than the local casting modulus to ensure that the riser remains liquid longer than the casting section. This promotes feeding and reduces shrinkage porosity. For complex precision castings, I may use multiple risers or chills to control the thermal gradient.
Quality Control and Defect Management in My Precision Casting Work
Quality control in rapid investment precision casting must cover the pattern, the shell, the metal, and the final part. I inspect the pattern for layer lines, incomplete features, support marks, and dimensional errors. I inspect the shell for cracks, delamination, weak spots, and incomplete coverage. I inspect the melt for temperature, composition, and gas content. I inspect the final casting for dimensions, surface roughness, porosity, shrinkage, and internal defects. This layered approach is necessary because precision casting defects can originate at any stage.
The following table summarizes defects I have encountered and the countermeasures I apply.
| Defect | Possible Cause | My Countermeasure |
|---|---|---|
| Layer lines on pattern | Large layer thickness or poor orientation | Reduce layer thickness and orient critical surfaces vertically or obliquely |
| Incomplete cure | Low exposure energy or insufficient post-curing | Increase exposure and perform controlled post-cure |
| Shell cracking | Rapid drying, weak shell, or pattern expansion | Control humidity, increase backup coats, and use gradual heating |
| Gas porosity | Residual pattern material or turbulent flow | Improve dewaxing and burnout, optimize gating, and reduce turbulence |
| Shrinkage porosity | Poor feeding or incorrect thermal gradient | Increase riser modulus, add chills, and control pouring temperature |
| Dimensional deviation | Incorrect shrinkage compensation or shell deformation | Calibrate directional shrinkage and improve shell support |
| Surface roughness | Coarse face coat or pattern surface defects | Use fine slurry, polish pattern, and control metal temperature |
| Misrun | Low pouring temperature or slow fill | Increase temperature, enlarge gates, and shorten fill time |
I also quantify casting yield. If the weight of the useful casting is \(W_c\) and the total weight of metal poured is \(W_p\), then the yield is:
$$Y = \frac{W_c}{W_p} \times 100\%$$
For precision casting, yield is affected by gating design, riser size, and the number of parts per tree. A higher yield reduces metal waste and energy consumption. However, I do not sacrifice quality for yield. If a larger riser is needed to prevent shrinkage porosity, I accept a lower yield because the cost of a rejected precision casting is usually much higher than the cost of extra metal.
I also use process capability indices to evaluate whether a process can meet tolerance. For a measured mean \(\mu\), standard deviation \(\sigma\), upper specification limit \(USL\), and lower specification limit \(LSL\), the capability index is:
$$C_p = \frac{USL – LSL}{6\sigma}$$
The centered capability index is:
$$C_{pk} = \min \left( \frac{USL – \mu}{3\sigma}, \frac{\mu – LSL}{3\sigma} \right)$$
When \(C_{pk}\) is low, I investigate the dominant variation source. It may be printing, shell building, pouring, or measurement. In rapid investment precision casting, a capable process is more important than a single successful sample. I want repeatability, not only feasibility.
Economic and Sustainable Assessment from My Perspective
I evaluate the economics of 3D printing in rapid investment precision casting through both direct and indirect costs. Direct costs include resin or filament, machine time, labor, shell materials, metal, and energy. Indirect costs include design time, programming, inspection, rework, and scrap. Traditional wax pattern production has a high tooling cost but a low variable cost per part. 3D printing has a lower tooling cost but a higher variable cost in many cases. Therefore, the optimal route depends on batch size, part complexity, and required precision.
The total energy consumption of the route can be written as:
$$E_{total} = E_{design} + E_{print} + E_{post} + E_{shell} + E_{burnout} + E_{melt} + E_{finish}$$
I try to reduce energy by optimizing build orientation, reducing support volume, shortening burnout time where possible, and improving casting yield. The environmental benefit of 3D printing is not automatic. If the process uses a large amount of support material or if the shell must be fired for a long time, the energy savings may be smaller than expected. However, when the route eliminates a metal die and reduces development iterations, the overall resource savings can be significant.
I estimate waste reduction as:
$$W_{reduction} = \frac{W_{traditional} – W_{3D}}{W_{traditional}} \times 100\%$$
In my observations, the greatest waste reduction occurs during pattern production and design iteration. Traditional wax injection can generate runners, flashing, and rejected wax patterns. 3D printing can reduce those losses, especially for complex parts. The shell and metal stages still produce waste, but the pattern stage becomes more efficient. For precision casting, this matters because pattern defects can propagate directly into the final casting.
| Factor | Traditional Wax Route | 3D Printed Pattern Route | My Interpretation |
|---|---|---|---|
| Tooling cost | High | Low to moderate | 3D printing favors small batches |
| Lead time | Long | Short | 3D printing favors rapid development |
| Design flexibility | Limited | High | 3D printing supports complex precision casting geometries |
| Material waste | Moderate to high | Lower in pattern stage | Savings depend on support and cleaning |
| Energy use | Concentrated in tooling and injection | Concentrated in printing and post-curing | Compare total route, not one step |
| Scalability | Strong at high volume | Strong at low and medium volume | Volume determines the best choice |
Limitations I Have Observed and How I Address Them
Although I am enthusiastic about 3D printing in rapid investment precision casting, I do not ignore its limitations. Equipment cost can be high, especially for high-resolution stereolithography or metal printing systems. Operators need training in digital modeling, slicing, machine maintenance, and material handling. Some materials are expensive or have limited availability. Some printed materials produce more ash or residue during burnout than traditional wax. Large-scale production can still be slower and more expensive than wax injection. These limitations mean that 3D printing is not a universal replacement for traditional precision casting. It is a powerful complement.
I address material limitations by selecting resins with low ash content and good thermal decomposition behavior. I address equipment cost by using the technology where it provides the greatest value: complex geometries, small batches, rapid iterations, and high-value parts. I address operator skill by documenting procedures and using standardized parameter sets. I address large-scale cost by combining 3D printing with traditional tooling when production volume increases. In other words, I treat 3D printing as one part of a flexible precision casting system.
Mechanical properties of printed patterns can also be anisotropic. Layer direction affects strength, surface finish, and shrinkage. I therefore define orientation before printing and test critical dimensions after printing. For precision casting, orientation is not a minor decision. It influences support removal, surface roughness, dimensional stability, and shell coverage.
Another limitation is inspection. Complex internal features may be difficult to measure with conventional tools. I use computed tomography, optical scanning, or coordinate measuring machines when the precision casting requires internal geometry verification. The cost of inspection can be significant, but it is often lower than the cost of a failed casting. I prefer to measure early and correct the digital model rather than discover errors after metal pouring.
Future Directions I Recommend for Rapid Investment Precision Casting
I see several future directions for 3D printing in rapid investment precision casting. The first is digital twin technology. A digital twin can simulate printing, shell building, dewaxing, burnout, pouring, and solidification. It can predict distortion and help me compensate the model before manufacturing. The second is artificial intelligence for parameter optimization. A machine learning model can learn from previous jobs and recommend layer thickness, exposure, orientation, and gating parameters. The third is topology optimization. By combining topology optimization with precision casting, I can design lightweight parts with organic shapes that are difficult to produce by traditional tooling but well suited to 3D printing.
A simple machine learning prediction model can be written as:
$$\hat{y} = f_{\theta}(x_1, x_2, \ldots, x_n)$$
where \(\hat{y}\) is the predicted quality characteristic, \(x_i\) are process variables, and \(\theta\) are model parameters. I train the model by minimizing a loss function such as:
$$L(\theta) = \sum_{i=1}^{N} (y_i – \hat{y}_i)^2 + \lambda \|\theta\|^2$$
Here, \(N\) is the number of experiments, \(y_i\) is the measured result, and \(\lambda\) is a regularization parameter. This approach can reduce the number of trial-and-error experiments and improve precision casting consistency.
The fourth direction is hybrid manufacturing. I can combine additive manufacturing with machining, inspection, and surface treatment. For example, a printed pattern can be machined at critical interfaces before shell building. A casting can be additively repaired or modified after pouring. The fifth direction is metal 3D printing for tooling and inserts. Metal printing can produce conformal cooling channels in dies, which improves wax pattern quality and reduces cycle time. This indirectly benefits precision casting by improving the tooling route.
The sixth direction is automation. I believe that rapid investment precision casting will become more automated when digital models, printing parameters, shell recipes, and pouring schedules are connected in one data flow. Sensors can monitor temperature, humidity, viscosity, and metal flow. Feedback can adjust the process in real time. This will make precision casting more repeatable and more capable of meeting tight tolerances.
My Final Assessment
In my work, 3D printing has proven to be a practical and powerful enabler of rapid investment precision casting. It allows me to move from a digital model to a physical pattern quickly, without the cost and delay of a metal die. It supports complex geometry, customization, and design iteration. When combined with careful shell building, dewaxing, burnout, pouring, and inspection, it can produce precision castings with high dimensional accuracy and good surface quality. The small impeller example shows that the dimensions of the final casting can remain close to the theoretical model, with errors small enough for many engineering applications. The use of photopolymer resin as a sacrificial pattern material is especially promising because it can be printed with fine resolution and removed cleanly.
At the same time, I recognize that 3D printing is not a complete replacement for every traditional precision casting operation. Tooling, wax injection, and high-volume production still have advantages in specific cases. The best results come from combining digital design, additive manufacturing, refractory shell technology, metal solidification control, and measurement feedback. I use formulas for shrinkage, tolerance stack-up, solidification, flow, cost, and quality capability to guide decisions. I use tables to compare materials, process parameters, advantages, defects, and economics. This structured approach helps me improve precision casting and reduce the risk of defects.
Looking forward, I expect 3D printing to become even more integrated with precision casting. Better resins, faster printers, lower equipment costs, intelligent process control, and digital twins will expand its applications. The goal is not only to print a pattern. The goal is to produce a reliable, repeatable, and high-quality precision casting that meets functional requirements. In my view, 3D printing in rapid investment precision casting is a key route toward flexible manufacturing, shorter lead times, lower tooling cost, and higher geometric freedom. It supports the development of complex industrial components and contributes to high-quality manufacturing in fields such as aerospace, automotive, energy, electronics, and medical devices.
For me, the most important lesson is that precision casting is a chain of transformations. The digital model becomes a pattern, the pattern becomes a cavity, the cavity becomes a metal part, and the metal part becomes a verified product. Every link in that chain must be controlled. 3D printing strengthens the first link by making the pattern digital, fast, and flexible. When I combine that strength with disciplined shell making, thermal control, and inspection, I can achieve rapid investment precision casting that is both innovative and reliable. This is why I continue to use 3D printing as a central tool in my precision casting work, and this is why I believe it will remain a valuable technology for rapid manufacturing and high-quality casting development.