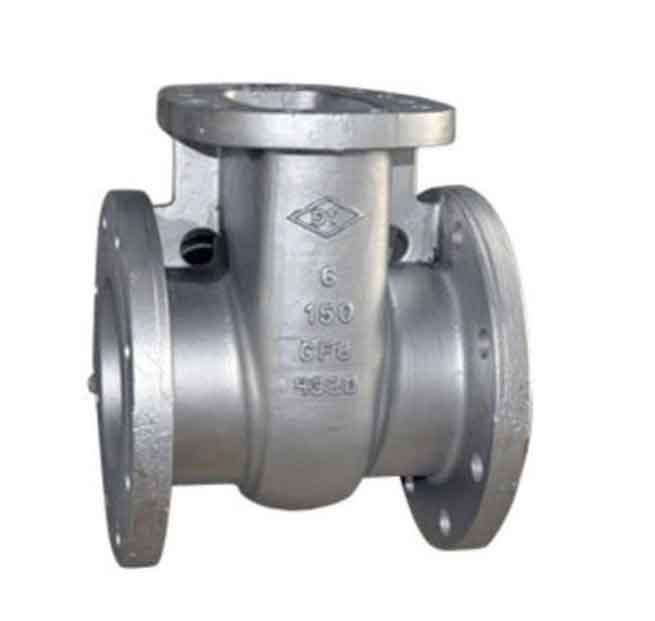
Ultrasonic testing is critical for detecting subsurface defects in valve body castings used in hydropower systems. The coarse-grained microstructure of cast steel causes significant ultrasonic attenuation and scattering, necessitating specialized probe selection and testing protocols. This article details a combined single/double-crystal longitudinal wave straight probe methodology validated through comparative experiments.

Probe Selection Parameters
Probe frequency optimization counteracts attenuation in coarse-grained valve body castings. Lower frequencies (1.5-3.5 MHz) improve penetration depth while larger crystal diameters (ϕ20–ϕ30 mm) enhance defect detectability:
| Valve Body Thickness (mm) | Probe Frequency (MHz) | Crystal Diameter (mm) |
|---|---|---|
| 50–100 | 3.0–3.5 | ϕ20–ϕ30 |
| 100–200 | 2.5–3.0 | ϕ20–ϕ30 |
| 200–400 | 2.0–2.5 | ϕ20–ϕ30 |
| 400–600 | 1.5 | ϕ20–ϕ30 |
Double-Crystal Probe Optimization
1-3 composite polymer probes outperform conventional PZT for near-surface defects in valve body castings due to superior signal-to-noise ratio and reduced dead zone. Sensitivity validation uses ϕ3 mm flat-bottom holes (FBH):
- 1-3 composite probe detects FBH at 5 mm depth with 80% amplitude
- PZT probe fails detection below 10 mm depth
The signal amplitude ratio confirms superiority:
$$ \frac{A_{1-3}}{A_{PZT}} = 1.8 \quad \text{at 10 mm depth} $$
Testing Protocol Essentials
Attenuation Measurement: Calculate material attenuation coefficient (α) using backwall echoes at three locations:
$$ \alpha = \frac{20 \lg \frac{B_1}{B_2} – 6}{2(x_2 – x_1)} \quad \text{(dB/mm)} $$
where \( B_1, B_2 \) = echo amplitudes at thicknesses \( x_1, x_2 \) (mm).
Single-Crystal Testing:
- For T < 3N (near-field): DAC curve using FBH blocks matching valve body casting material
- For T ≥ 3N: Backwall echo method with sensitivity gain adjustment:
$$ \Delta G = 20 \lg \frac{2\lambda T}{\pi d^2} + 6 \quad \text{dB} $$
where λ = wavelength, d = FBH diameter.
Double-Crystal Testing: DAC curve established with 1-3 composite probe using ϕ3 mm FBH blocks. Surface compensation applied during scanning.
Defect Characterization in Valve Body Castings
Aggregated defects exhibit distinct waveform signatures critical for identification:
| Defect Type | Waveform Features | Physical Mechanism |
|---|---|---|
| Stomatal Aggregation | Sharp pulses with low amplitude, connected peaks. Backwall echo remains visible. | Spherical gas pores cause scattered reflections: \( P_{pore} \propto d \) vs \( P_{FBH} \propto d^2 \) |
| Island Lamination | Steep, repeating echoes. >12 dB backwall reduction. | Planar discontinuities create resonant reflections with path difference \( \Delta s = 2T \) |
| Shrinkage Cavity | Branching waveforms with wide base, secondary echoes. | Dendritic cavity surfaces generate multi-path reflections: \( I_{scatter} \propto \frac{1}{\lambda^4} \) |
| Slag Inclusion | Rounded peaks with high background noise, fluctuating amplitude. | Impedance mismatch \( \Delta Z = Z_{slag} – Z_{steel} \) causes partial transmission |
Scanning and Evaluation
- Scan overlap: ≥15% with bidirectional coverage
- Scan speed: ≤150 mm/s for double-crystal probes
- Rejection criteria: DAC exceedance or >12 dB backwall reduction
Dynamic waveform analysis combined with static patterns enables reliable defect classification in valve body castings.
Conclusion
The hybrid single/double-crystal probe method effectively detects subsurface flaws in hydropower valve body castings. Frequency-optimized probes overcome acoustic attenuation in coarse-grained cast steel, while 1-3 composite transducers resolve near-surface defects unreachable by conventional PZT. Defect waveform libraries enable accurate identification of critical imperfections before machining. This approach ensures valve integrity in high-pressure hydropower applications.
