
The relentless advancement of urbanization demands robust and efficient public transportation systems. Urban rail transit, a cornerstone of modern metropolitan mobility, relies on highly reliable traction systems. At the heart of these systems are electric motors, whose performance and durability are critically dependent on the integrity of their protective enclosures. This article details the comprehensive journey of designing, simulating, optimizing, and producing a high-quality ductile iron (QT500-7) motor housing—a quintessential thin-walled shell casting—utilizing resin sand molding processes. The focus is on overcoming the inherent challenges of complex geometries to achieve sound castings that meet stringent radiographic inspection standards.
The subject shell casting is a primary structural component for a traction motor. Its design embodies the challenges typical of modern engineering components: complex geometry, significant variation in wall thickness, and high-performance material requirements. The casting approximates a cylindrical barrel shape with major external dimensions of 760 mm in length, 500 mm in width, and 580 mm in height, having a finished weight of approximately 160 kg. The dominant wall thickness is a mere 10 mm, classifying it definitively as a thin-walled structure. However, this is interspersed with localized mass accumulations at mounting bosses, reinforcing ribs, and connection pads, where wall thickness can soar to 90 mm. This disparity creates numerous isolated thermal centers, or hot spots, which are primary candidates for shrinkage porosity defects if not properly managed during solidification.
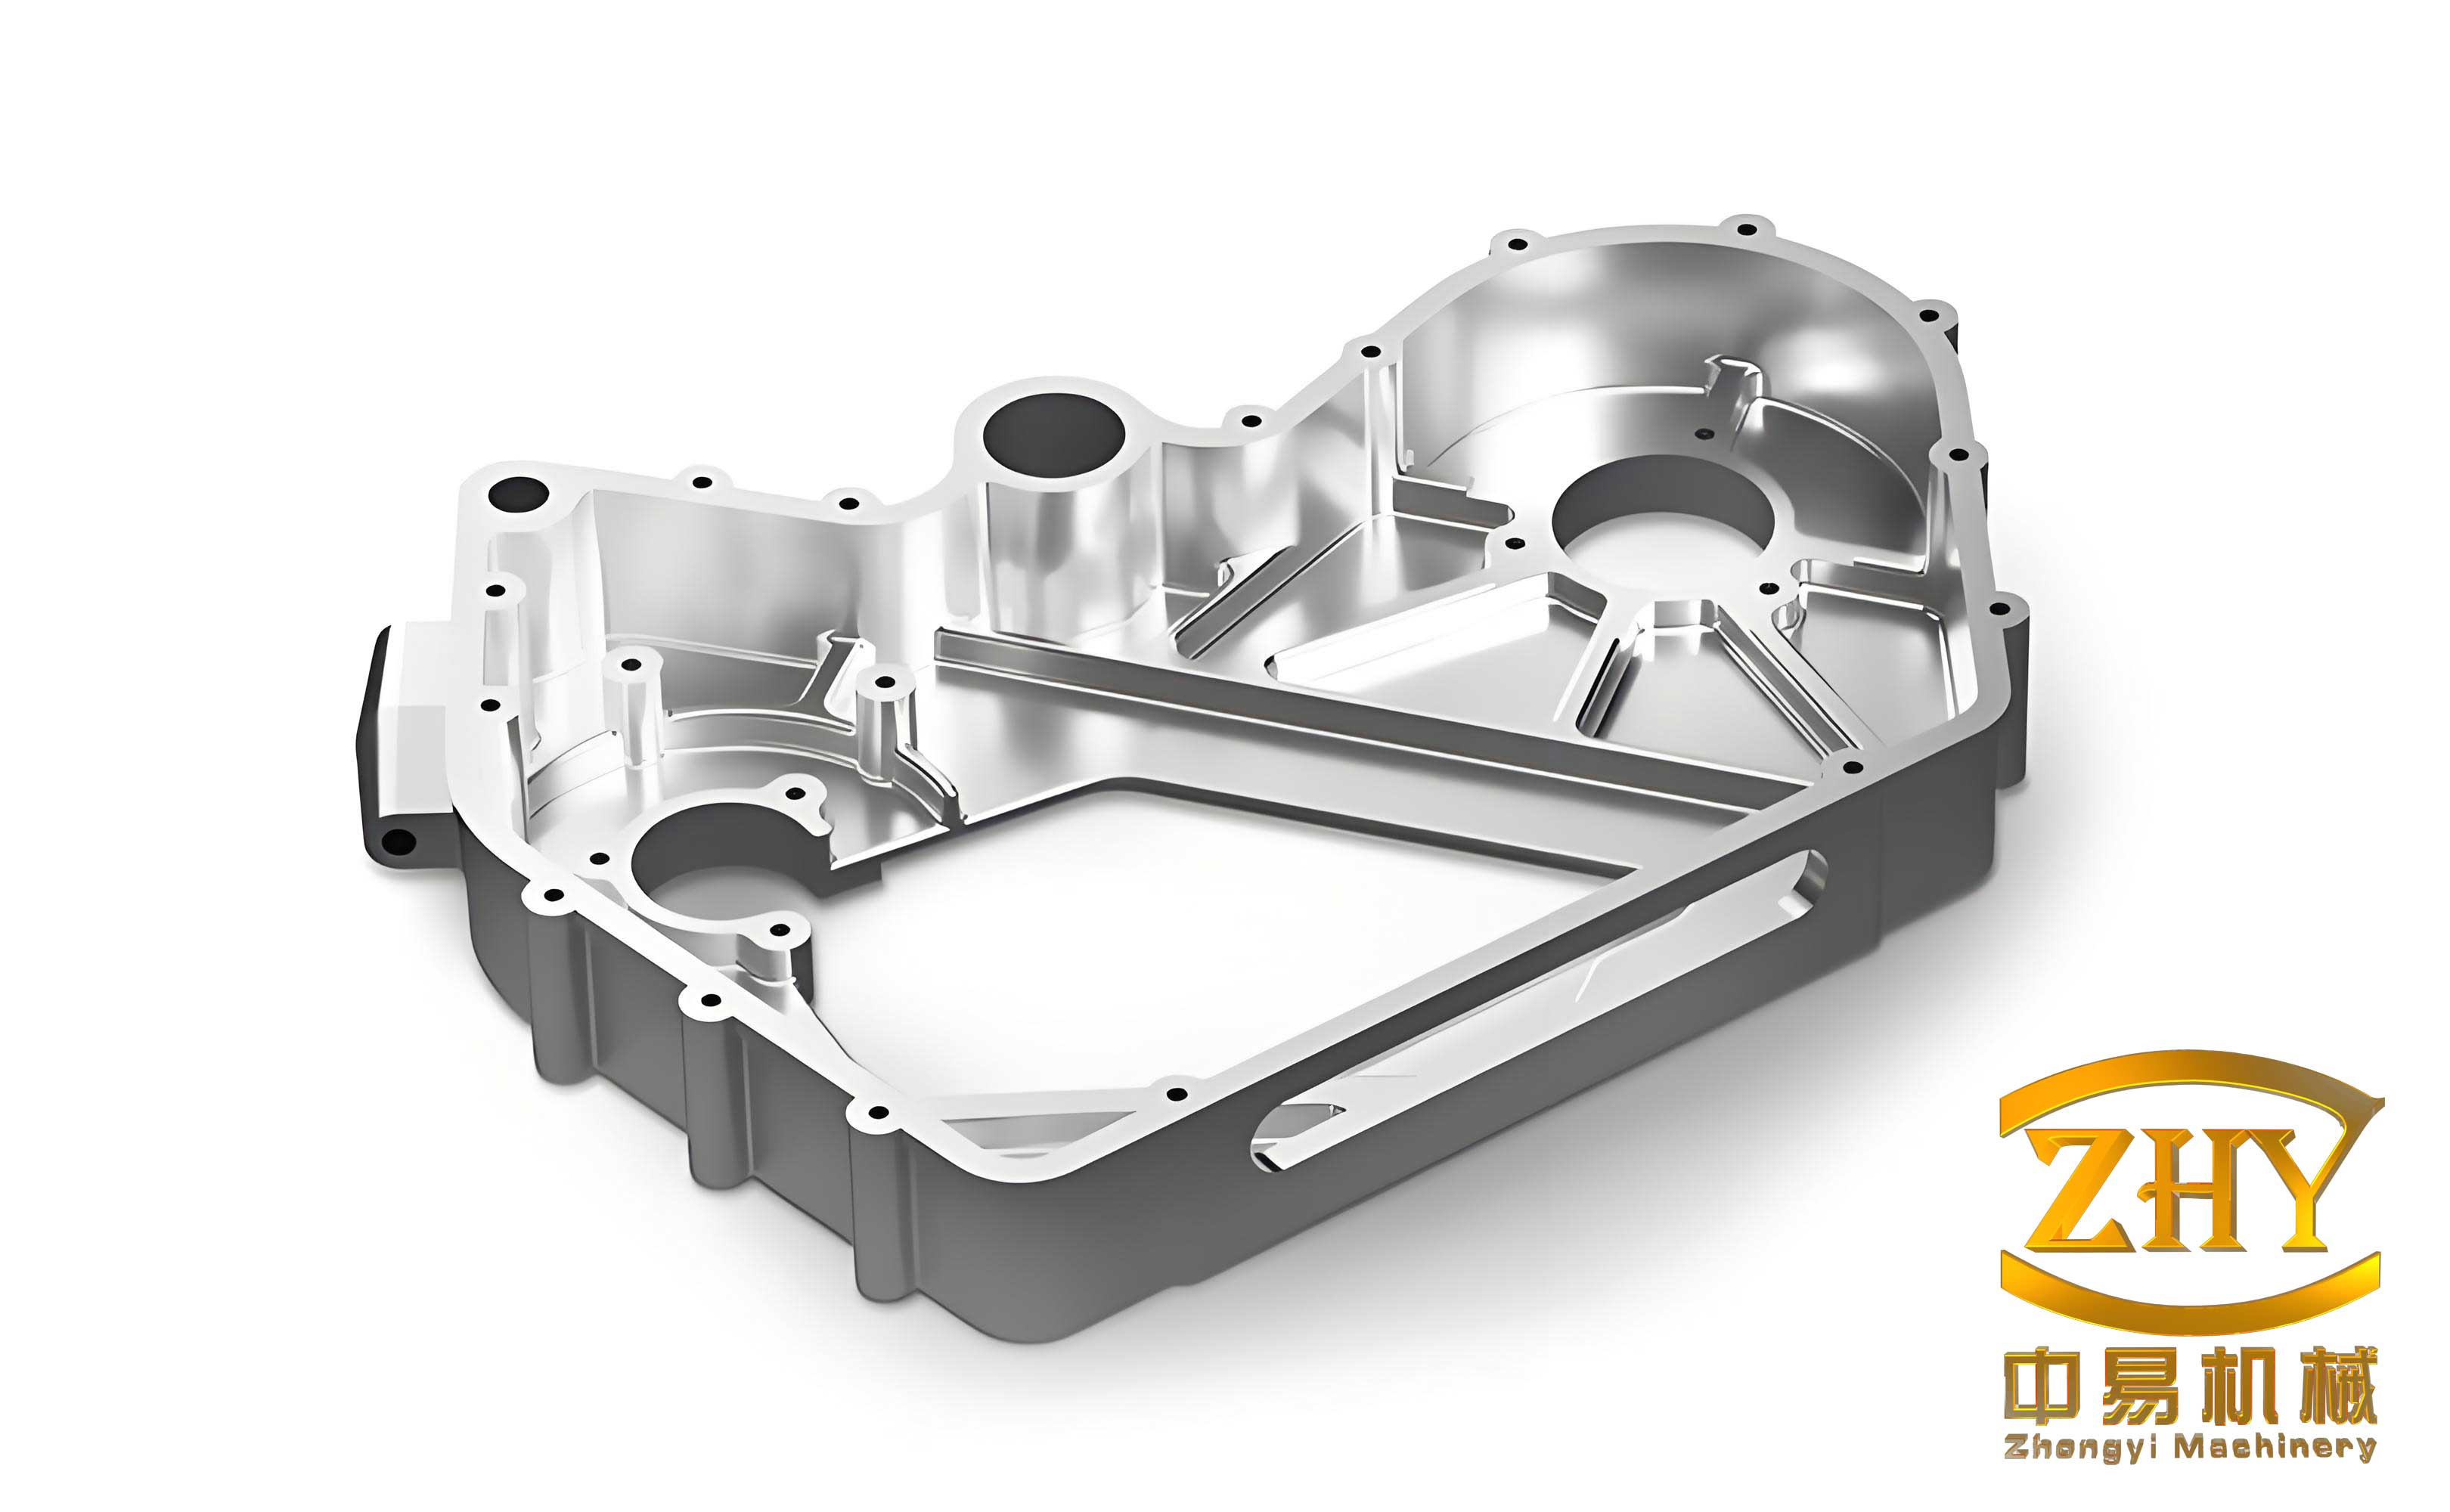
The material specification, QT500-7, denotes a ferritic-pearlitic ductile iron with a minimum tensile strength of 500 MPa, a minimum yield strength of 320 MPa, and a minimum elongation of 7%. This grade offers an excellent balance of strength, ductility, and castability, making it ideal for demanding, dynamically loaded applications like motor shells. The quality requirement is paramount: the casting must undergo 100% X-ray inspection. The验收标准 defines critical areas (typically high-stress zones like mounting points) to meet Level 2 quality per relevant standards (e.g., ASTM E446), while non-critical areas must meet Level 3. This mandate places significant emphasis on achieving near-flawless internal soundness in these complex shell castings.
| Parameter | Specification |
|---|---|
| Material | Ductile Iron QT500-7 |
| Dimensions | ~760 mm x 500 mm x 580 mm |
| Weight (Approx.) | 160 kg |
| Nominal Wall Thickness | 10 mm |
| Maximum Wall Thickness | 90 mm (at bosses/ribs) |
| Quality Standard | X-ray Inspection |
| Critical Areas | Level 2 |
| Non-Critical Areas | Level 3 |
| Molding Process | Resin Sand, Hand Molding |
Foundry Process Design Philosophy
The design of the casting process for such shell castings begins with two fundamental decisions: the pouring position and the parting line. These choices dictate everything from mold complexity to feeding efficiency.
Parting Line and Pouring Position Analysis: Two primary orientations were evaluated. The first involved placing the cylinder axis vertically (“upright” position). This allows for a simpler, bottom-gating system that promotes tranquil filling—a significant advantage for thin-walled sections to prevent mist runs and turbulence. However, this orientation necessitates numerous circumferential cores to form the internal geometry and makes the feeding of hot spots on the horizontal mounting pads extremely difficult. The second option, with the cylinder axis horizontal and the parting plane running along it (“horizontal” or “HALF” split), was selected. While this may introduce slightly more turbulent filling for the side walls, it drastically reduces core complexity and, most importantly, positions the major thermal masses (mounting pads) near the cope, facilitating the effective placement of feeding risers. For shell castings, managing thermal centers often takes precedence over perfect filling dynamics, provided gating is designed correctly.
Gating System Design and Calculation: With a horizontal parting plane, the gating was designed as a pressurized system to ensure rapid and complete filling of the thin sections before heat loss becomes detrimental. The gates were placed along the parting plane, introducing metal into the barrel’s side wall. Key parameters were calculated empirically:
1. Pouring Time (t): Estimated based on the total mold weight (G ≈ 180 kg).
$$ t = K \sqrt{G} $$
Where K is an empirical coefficient (taken as 1.85 for ductile iron shell castings of this size). This yields:
$$ t = 1.85 \times \sqrt{180} \approx 25 \text{ seconds} $$
2. Rate of Rise (V): Verified to ensure the thin sections are filled quickly enough.
$$ V = \frac{C}{t} $$
Where C is the height of the casting in the poured position (48 cm).
$$ V = \frac{48}{25} = 1.92 \text{ cm/s} $$
This value is within the acceptable range for thin-walled ductile iron castings, minimizing cold shuts and misruns.
3. Choke Area (S_choke): Determines the controlling cross-section of the gating system.
$$ S_{\text{choke}} = \frac{G}{0.31 \mu t \sqrt{H_p}} $$
Where:
- μ is the total hydraulic efficiency coefficient (≈0.48 for resin sand).
- H_p is the mean effective metallostatic pressure head (calculated as ≈35 cm).
$$ S_{\text{choke}} = \frac{180}{0.31 \times 0.48 \times 25 \times \sqrt{35}} \approx 8.5 \text{ cm}^2 $$
Based on experience with similar shell castings and to account for potential friction losses, this area was increased to 12 cm². A semi-pressurized system ratio of 1.2 : 1.5 : 1 (Sprue : Runner : Ingate) was chosen. Thus:
- Sprue exit area: 14.4 cm² (ø43 mm sprue used).
- Total Runner area: 18 cm².
- Total Ingate area: 12 cm², divided into two ingates each of 6 cm².
Simulation-Driven Optimization of Feeding for Shell Castings
Before committing to tooling, numerical simulation is indispensable for predicting solidification patterns and defect formation in complex shell castings. An initial simulation without any feeding aids (risers or chills) was performed using MAGMAsoft. The results clearly identified the predicted isolated thermal centers, corroborating the initial design review. The simulation output provided not just qualitative hot spot locations but also quantitative modulus (M) values. The modulus, defined as Volume/Surface Area (cooling surface), is a critical parameter for predicting solidification time. A higher modulus indicates a slower cooling section.
The key thermal centers identified were:
- Junction of internal radial ribs with the barrel wall (M ~ 1.4 cm).
- Upper and lower mounting boss connections to the wall (M ~ 1.6 cm).
- Safety bracket pad connections (M ~ 1.3 cm).
- Electrical junction box connection to the wall (M ~ 1.5 cm).
The solidification sequence showed these areas remaining liquid long after the surrounding thin walls had solidified, creating isolated liquid pools doomed to form shrinkage porosity. The predicted shrinkage map from this initial simulation aligned perfectly with these late-freezing zones.
Based on the modulus and location, a feeding strategy was devised:
- Exothermic Insulating Risers: Applied to the largest thermal masses on the top (cope) side—specifically the upper mounting bosses. The riser size is selected based on the modified modulus of the casting hot spot. When a riser is placed, it effectively increases the thermal mass of that region. The rule of thumb is to select a riser whose neck modulus satisfies:
$$ M_{\text{riser neck}} \geq (1.1 \text{ to } 1.3) \times M_{\text{casting hot spot}} $$
For a hot spot with M = 1.6 cm, a riser is chosen to feed a thermal node of ~1.9 cm. An undersized riser will solidify prematurely and cause shrinkage in the casting itself. - Internal Chills: Used for hot spots located in the drag (bottom) or in areas inaccessible to risers, such as the junctions of internal ribs. Chills, typically made of iron or steel, act as heat sinks, locally increasing the cooling rate and effectively reducing the thermal modulus of the area, thereby eliminating the isolated liquid condition.
| Hot Spot Location | Approx. Modulus (cm) | Proposed Solution | Rationale |
|---|---|---|---|
| Upper Mounting Boss | 1.6 | Exothermic Insulating Riser | Top of cope, largest mass. Riser provides feed metal and heat. |
| Lower Mounting Boss | 1.6 | Internal Chill | Located in drag. Chill accelerates solidification. |
| Internal Rib Junction | 1.4 | Internal Chill(s) | Internal, confined space. Chill is most practical solution. |
| Junction Box Pad | 1.5 | None initially | Moderate modulus; hoped directional solidification would suffice. |
A second simulation incorporating these risers and chills showed a vastly improved solidification pattern. A favorable temperature gradient was established, with the risers remaining liquid longest, effectively feeding the casting hot spots. The shrinkage prediction indicated a high probability of sound castings in the targeted areas.
Trials, Validation, and Final Process Refinement
The first trial casting, produced according to the simulated and calculated process, underwent X-ray inspection. The results were largely positive for the areas where risers and chills were applied. However, a distinct area of shrinkage porosity, exceeding the Level 3 acceptance criterion, was detected in the region of the electrical junction box pad—the one hot spot that did not initially receive a dedicated feed aid.
Root Cause Analysis: Post-mortem analysis, supported by revisiting the simulation results, revealed that while the junction box had a moderate modulus, its geometric configuration created a semi-isolated thermal node. The directional solidification towards the nearest riser was insufficient because the liquid path became blocked by solidified metal in the thin surrounding walls, creating an isolated liquid pool. The simulation’s “porosity probability” function had indicated a low risk, but the actual solidification dynamics in the trial proved more sensitive.
Corrective Action: The solution was to accelerate solidification at this specific site using chills. Two small, rectangular steel chills were designed to be placed in the mold adjacent to the junction box pad on its internal faces. This intervention served two purposes: 1) It directly extracted heat from the hot spot, reducing its effective solidification time. 2) It promoted a stronger thermal gradient towards the main body of the casting, eliminating the isolated liquid condition.
A final simulation including these additional chills confirmed the efficacy of the change, showing a complete elimination of the late-freezing zone at the junction box. A second trial casting was produced with the optimized process.
Quality Assurance and Final Results
The second trial casting passed the comprehensive X-ray inspection, with all areas meeting the specified Level 2 and Level 3 requirements. Chemical analysis confirmed the desired composition for QT500-7. Most importantly, separately cast test coupons (from the same ladle of iron used for the shell casting) were machined and tested for mechanical properties, which comfortably exceeded the minimum specifications.
| Property | Specification (QT500-7 Min.) | Result Achieved |
|---|---|---|
| Tensile Strength (Rm) | 500 MPa | 570 MPa |
| Yield Strength (Rp0.2) | 320 MPa | 423 MPa |
| Elongation (A%) | 7% | 15.5% |
| Hardness (HBW) | 170 – 230 | 200 |
This successful outcome validated the integrated approach of traditional calculation, advanced simulation, and empirical refinement. The project demonstrated that producing high-integrity, complex ductile iron shell castings is a science-guided art, where simulation acts as a powerful predictive tool but must be complemented by practical foundry engineering knowledge and validation through physical trials.
Conclusion
The development of this motor housing exemplifies a modern, robust methodology for producing critical ductile iron shell castings. Key takeaways include:
- Strategic Process Design: The choice of parting and pouring position must prioritize the management of major thermal masses to enable effective feeding, even if it slightly compromises ideal filling conditions for thin-walled shell castings.
- Synergy of Calculation and Simulation: Empirical formulas provide a solid foundation for initial parameters like pouring time and gating dimensions. However, numerical solidification simulation is irreplaceable for visualizing thermal gradients, quantifying hot spot moduli, and predicting shrinkage locations in geometrically complex shell castings.
- Targeted Feeding Strategy: A combination of exothermic risers (for major top-side hot spots) and internal chills (for drag-side or internal hot spots) is highly effective. Riser selection must account for the increased thermal mass it creates at the connection point.
- Iterative Validation is Crucial: Simulation models have limitations based on their input parameters and underlying assumptions. Physical trial castings and thorough non-destructive testing (NDT) are essential to identify unforeseen defect mechanisms, such as the semi-isolated thermal center at the junction box, leading to final process refinement.
By adhering to this disciplined approach—integrating design, simulation, calculated feeding, and empirical validation—foundries can reliably and efficiently produce high-quality, sound ductile iron shell castings that meet the stringent demands of advanced applications like urban rail traction systems.