
In our foundry, we have undertaken the research and development of lost foam castings process for the 863 transmission case of a 6‑ton loader. This component is a critical part of the new loader series, and we were tasked to produce it using the lost foam casting method. The project involved numerous technical challenges due to the complex geometry, stringent quality requirements, and limitations of our existing equipment. Over many months of experimentation, we developed a robust process that eventually led to stable mass production. In this article, I will share our journey, detailing the structural features, pattern fabrication, gating system design, coating, molding, and the solutions we devised to overcome defects such as collapse, expansion, sand inclusion, and carbon slag. Throughout the text, I emphasize the key aspects of lost foam castings technology.
1. Structural Features and Technical Requirements
The 863 transmission case is a large, thin‑walled shell casting with a complex internal cavity. Its external shape is a three‑step structure, while the interior consists of a double‑layer chamber. An additional auxiliary oil tank is located next to the oil pan. The overall dimensions are 1135 mm × 640 mm × 500 mm, with a main wall thickness of 12 mm and a maximum wall thickness of 40 mm. The casting weight is 295 kg. The material is HT250, which requires stress‑relief annealing. The casting must be free from defects such as deformation, carbon slag, sand holes, gas porosity, cracks, and cold shuts. Many surfaces are machined, and there are high‑pressure oil passages and hydraulic valve faces. One particular oil passage with a bend must be directly cast as a cored channel, and the entire casting must pass a leak test under pressure.
The following table summarizes the key geometric and material data for the 863 box.
| Parameter | Value |
|---|---|
| Overall dimensions (mm) | 1135 × 640 × 500 |
| Main wall thickness (mm) | 12 |
| Maximum wall thickness (mm) | 40 |
| Casting weight (kg) | 295 |
| Material | HT250 |
| Oil passage type | Bent channel, directly cast |
| Leak test requirement | No leakage under pressure |
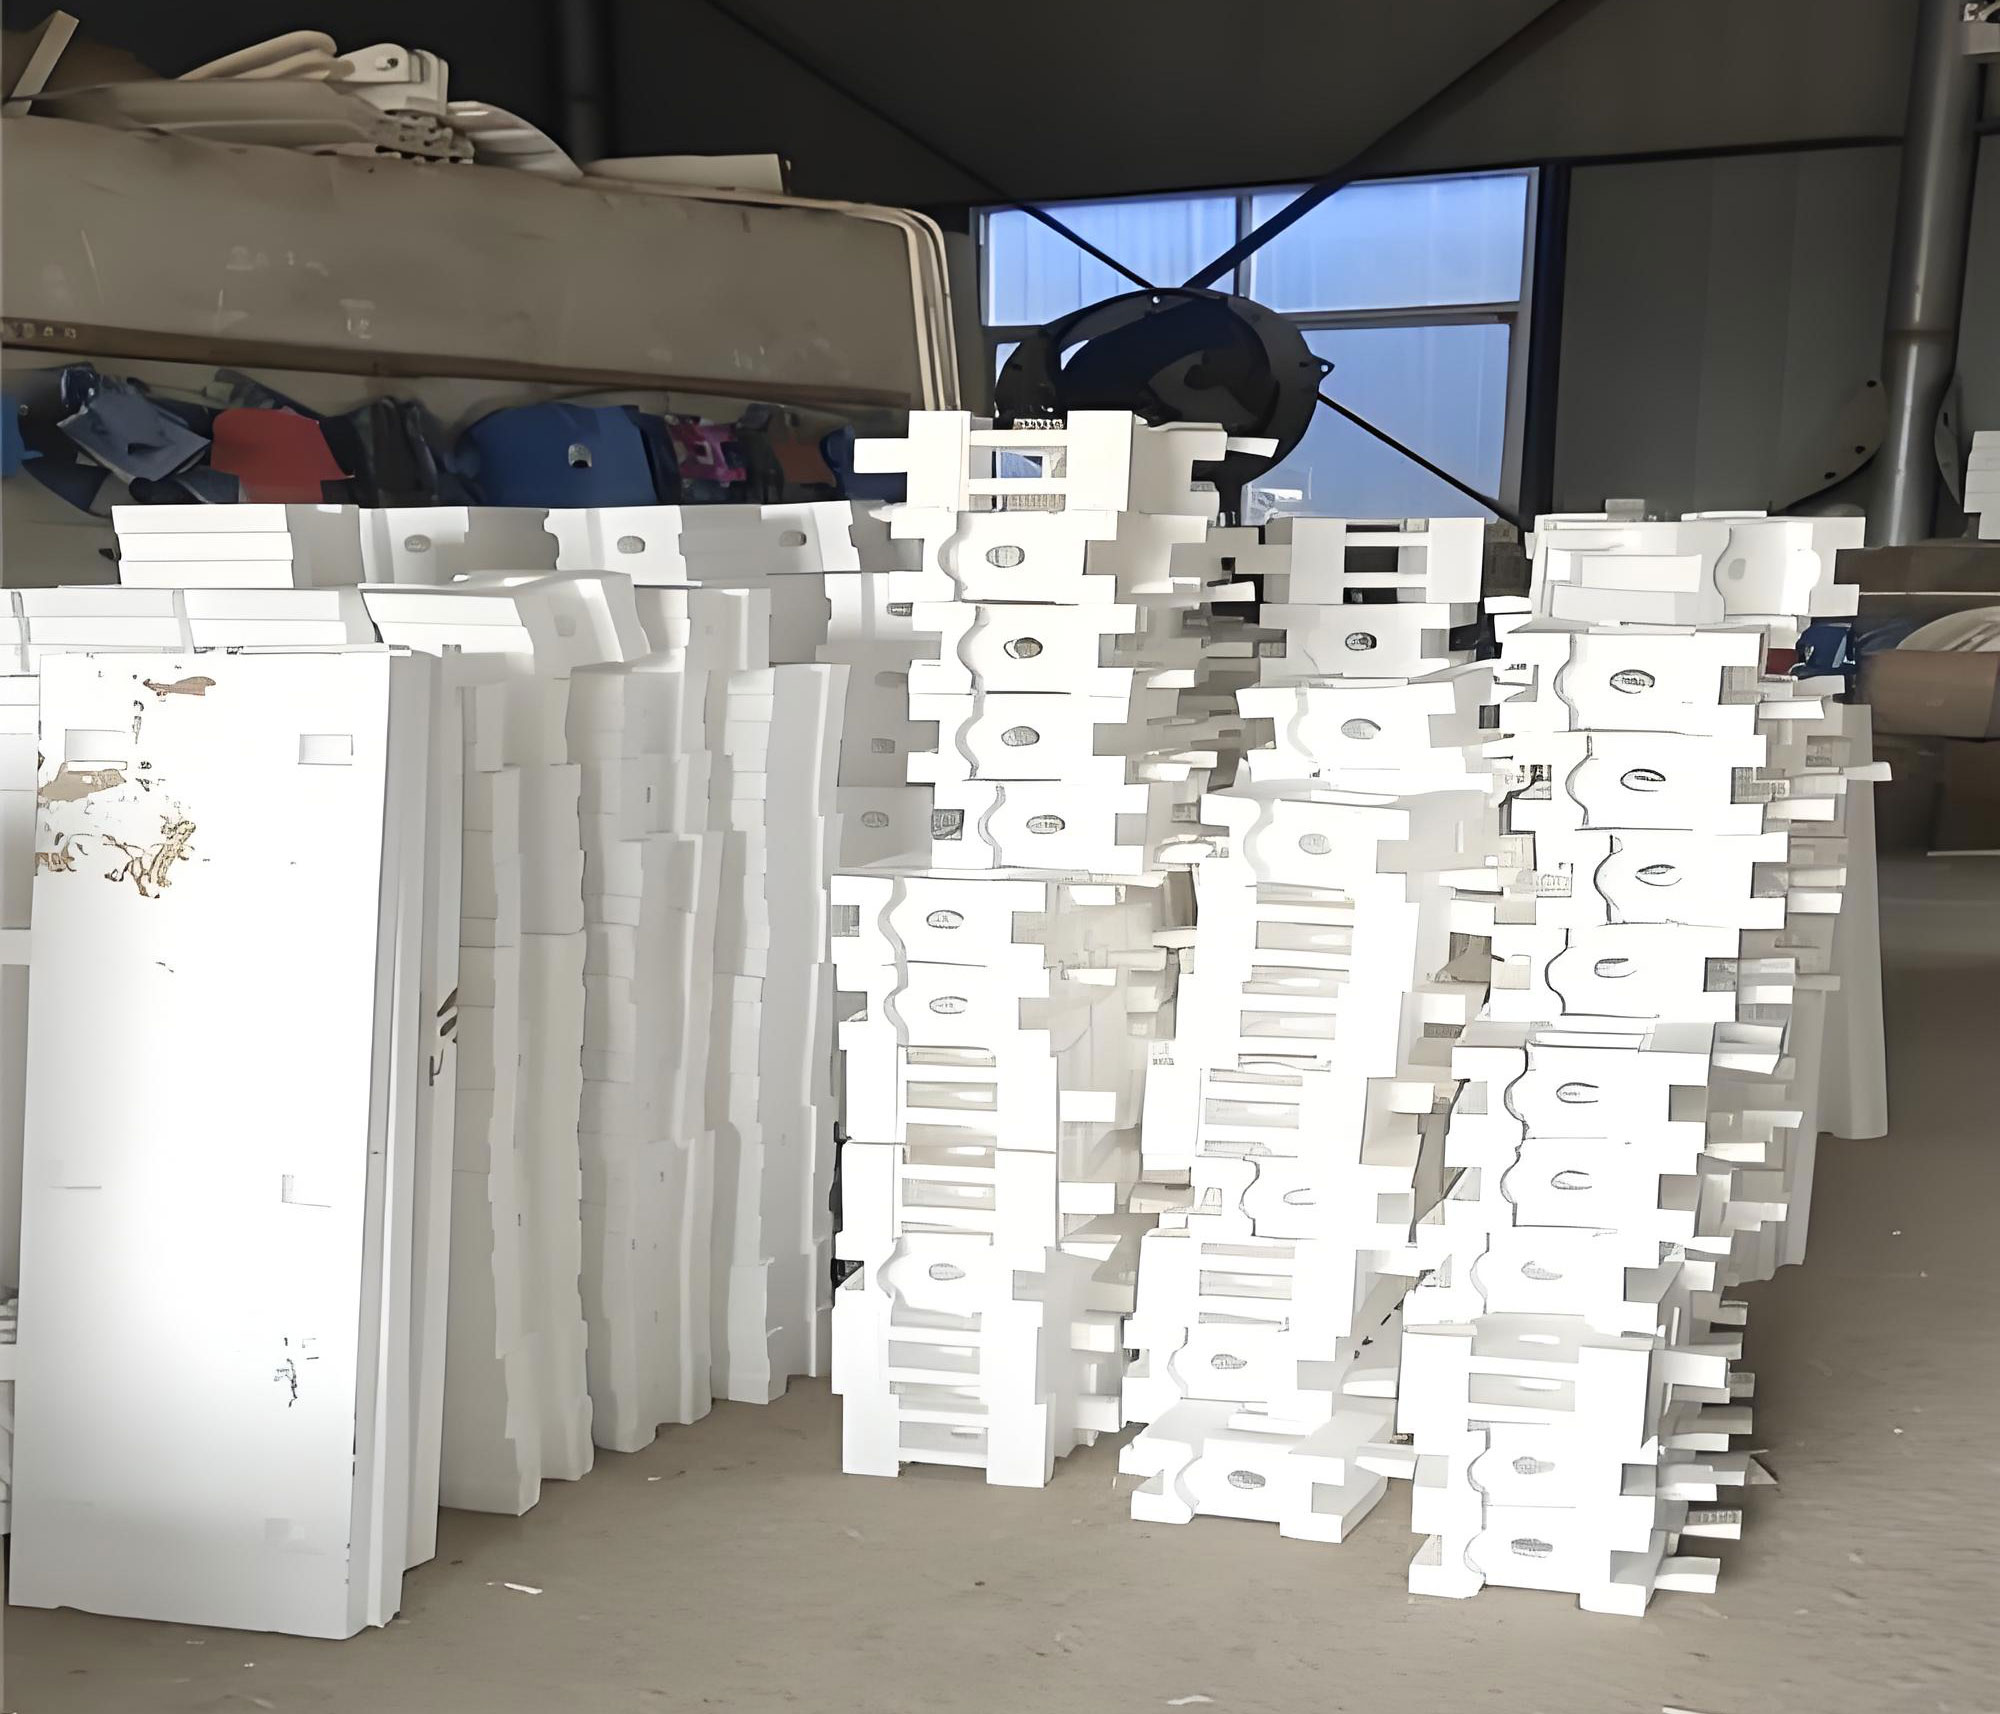
Figure 1 in the original article illustrates the product structure. A similar lost foam casting is shown below.
2. Technical Route for Process Development
Our technical route followed a systematic sequence: from product drawing to casting drawing, then 3D modeling, slice division, CNC milling of foam blocks, bonding, gating system attachment, dip coating and drying, sand filling and vibration, pouring, cleaning, inspection, machining, and finally mold fabrication for mass production. Because we did not yet have a dedicated mold, we first used CNC‑machined foam blocks to create prototype patterns. This allowed us to test and optimize the process parameters before committing to expensive production molds. The entire development was an iterative learning process, where each batch of lost foam castings gave us insights for improvement.
3. Fabrication of Lost Foam Patterns
3.1 Pattern Slicing and CNC Machining
For the 863 box, we started by drawing the casting geometry and then splitting it into multiple slices. The large foam boards were machined on a CNC gantry milling machine. Each slice was carved with high precision, including all internal features and core prints. The slices were then bonded together using hot‑melt adhesive to form the complete pattern. Figure 2 in the original shows the set of carved slices, and Figure 3 shows the assembled pattern. This approach enabled us to produce prototypes quickly without waiting for a metal mold.
3.2 Pre‑embedded Sand Core for Oil Passage
The bent oil passage on the valve face was a critical feature. We fabricated a shaped sand core using existing cores from other products, grinding and bonding them to the required geometry. The core was dip‑coated three times with refractory coating, dried, and then placed inside the foam pattern before bonding. During pouring, the core remained in place to form the oil channel. Once the process was proven, we later designed and produced a dedicated sand core mold for volume production.
4. Gating System Design
4.1 Pouring Position and Metal Head
We chose the same vertical orientation as our earlier 853 box: the oil pan face downward, which is the same as the operational position in the loader. This orientation ensures dense material at the bottom and reduces the risk of oil leakage. However, the 863 box is taller (length becomes height), and the available flask height was insufficient to provide adequate metal head. The standard sprue height gave only about 50 mm of metal head above the top of the casting when placed vertically. To solve this, we reduced the bottom sand layer to 100 mm and adopted a local sand‑weighting method on top of the flask. We placed a steel bucket filled with sand on the highest point of the pattern, which effectively prevented mold expansion during pouring.
4.2 Gating System Layout
Based on the successful design for the 853 box, we adopted a side gating system with multiple step ingates. The 863 box required five step runners and eight ingates to ensure smooth filling and uniform temperature distribution. The gating system was assembled from pre‑formed foam runners cut from existing moldings. The cross‑sectional areas were initially based on the 853 design and later adjusted. Table 2 lists the gating dimensions we used.
| Component | Area (mm²) |
|---|---|
| Down sprue (bottom) | 785 |
| Main runner | 1256 |
| Step runner (each of 5) | 314 |
| Ingate (each of 8) | 113 |
We also ensured that the gating system did not interfere with the oil passage core, to avoid hot metal erosion that could cause sand sticking and blockage.
5. Coating and Drying
The coating for lost foam castings serves multiple functions: it supports the foam pattern during sand filling, prevents metal penetration, and allows pyrolysis gases to escape. Both strength and permeability are critical. We used a proprietary water‑based refractory coating. The coating process was dip‑coating: two persons immersed the pattern slowly, allowing the coating to fill the internal cavities. After each dip, the pattern was drained and placed on a flat ceramic tile with foam supports to prevent deformation. The coating thickness was controlled: 1.0–1.2 mm for the pattern body and 1.6–1.8 mm for the gating system (three dips). Drying was performed in an oven at a controlled temperature profile. We found that proper drying was essential to avoid steam explosions during pouring.
The relationship between coating thickness and gas permeability can be expressed approximately by:
$$
P = \frac{k \cdot d}{\mu \cdot t}
$$
where \(P\) is permeability, \(k\) is a constant related to coating material, \(d\) is mean pore diameter, \(\mu\) is gas viscosity, and \(t\) is coating thickness. Thicker coatings reduce permeability but increase strength. Our two‑layer approach balanced these conflicting requirements for lost foam castings.
6. Sprue Cup Assembly
Traditionally, we attached the sprue cup after the pattern was placed in the flask and partially filled with sand. However, this interrupted the molding cycle and risked sand ingress at the joint. We developed a method to pre‑assemble the sprue cup before molding. A lightweight ceramic funnel (purchased from a specialist supplier) was wrapped with plastic film to prevent sand entry. A short foam tube was attached to the funnel outlet using hot‑melt adhesive, and a foam cap sealed the tube end. The whole assembly was dip‑coated and dried. Just before molding, we removed the cap and attached the tube to the pattern’s sprue, using hot‑melt adhesive and glass cloth reinforced with additional coating. The joint was then dried. This pre‑assembly allowed continuous flask filling and improved reliability.
7. Sand Filling and Molding
Our flask is a bottom‑draw vacuum flask with five‑sided mesh, using rain‑shower sand filling and an American‑made vibration table. A major challenge for the 863 box was that in the vertical orientation, the top face has no openings; sand could not directly enter the internal cavity from above. Only a small amount of sand could flow in through side openings, leaving dead zones at the top of the internal chambers. This caused insufficient sand density and large metal‑sand inclusions.
We implemented several countermeasures:
- Before placing the pattern in the flask, we applied resin‑bonded sand to the dead corners (Figure 9 from the original).
- After positioning the pattern, we added sand around the sides to about one‑quarter of the flask height to stabilize it.
- We used a diversion channel (a metal trough) inserted through the flange opening to pour sand directly into the internal cavities, keeping the internal sand level as high as the external sand (Figure 10).
- During vibration, we used a curved pipe connected to compressed air to blow sand into hard‑to‑reach areas (Figure 11).
These measures effectively eliminated the dead zones and prevented iron‑encased sand defects in lost foam castings.
8. Solving Mold Expansion Issues
Because the available flask height was insufficient, the top of the casting (the riser top) was nearly flush with the flask rim. Under the ferrostatic pressure of the molten iron, the sand on top could lift, causing mold expansion and wall thickness variations. We prevented this by:
- Maintaining a bottom sand layer of 100 mm (minimum).
- Allowing the sprue cup to protrude 30–50 mm above the flask rim to increase effective metal head.
- Piling additional sand on top of the pattern area and placing a steel bucket filled with sand on that pile (Figure 12 in the original). This local weight provided sufficient counter‑pressure to hold the mold down.
The required weight to prevent lifting can be estimated by:
$$
W = \rho_{\text{iron}} \cdot g \cdot h \cdot A
$$
where \(W\) is the minimum weight needed, \(\rho_{\text{iron}}\) is the density of molten iron (≈7000 kg/m³), \(g\) is gravitational acceleration, \(h\) is the height of metal above the pattern top, and \(A\) is the projected area. For our case, the calculation guided us to use about 50 kg of additional sand weight, which proved sufficient.
9. Prototype Production and Results
During the first four months of prototype development, we machined 82 foam patterns using CNC. Seven were damaged during coating, and 75 entered the pouring stage. Out of these, 23 castings were rejected, giving a casting yield of 69.3%. After machining, 12 more were rejected, resulting in an overall yield of 53.3%. Defects included mold expansion (thick‑thin walls), blocked oil passages due to sand adhesion, carbon slag inclusions, dimensional deviations, and eccentric bearing holes. Table 3 summarizes the defect types and their occurrence rates.
| Defect type | Number of rejects | Percentage |
|---|---|---|
| Mold expansion | 6 | 26% |
| Oil passage blockage | 5 | 22% |
| Sand inclusion / iron‑encased sand | 4 | 17% |
| Carbon slag | 3 | 13% |
| Dimensional deviation | 3 | 13% |
| Bearing hole eccentricity | 2 | 9% |
Despite the low yield, the 40 acceptable castings were machined and assembled into loaders for field testing. The experience gained from these prototypes was invaluable for refining the process.
10. Mold Design and Manufacturing
With the process parameters established (machining allowance, foam shrinkage, casting shrinkage, draft angle, etc.), we proceeded to design and manufacture production molds for the lost foam patterns. The molds were designed for a Teubert horizontal molding machine with independent gas heating, water cooling, and vacuum systems. We used CAD/CAM software to create 3D models and generate NC codes for machining. The molds incorporated vacuum‑assisted thermal stripping, allowing zero‑draft design. We also added auxiliary heating at the bottom of the mold to improve temperature uniformity during foam bead expansion. Two molds were built: one for the main body slices and one for the smaller internal cores. The total mold cost was reduced to about 300,000 RMB compared to an external quotation of over 500,000 RMB.
The molds produced high‑quality foam slices with good fusion, accurate dimensions, and smooth surfaces. The measured shrinkage of the foam beads was precisely controlled. The relationship between bead expansion temperature and mold cavity size can be expressed as:
$$
L_{\text{cavity}} = \frac{L_{\text{pattern}}}{1 + \alpha (T – T_0)}
$$
where \(L_{\text{cavity}}\) is the mold dimension, \(L_{\text{pattern}}\) is the desired foam dimension, \(\alpha\) is the coefficient of thermal expansion of the mold material, \(T\) is the steaming temperature, and \(T_0\) is room temperature. Calibration was done using trial runs.
11. Mass Production and Quality
After introducing the production molds, we gradually ramped up the volume. In the first five months of utilizing the new molds, we poured 556 castings, of which 508 were accepted after casting, yielding 91.4%. After machining, 489 were acceptable, giving a machining yield of 96.3% and an overall yield of 87.9%. Table 4 compares the prototype and production yields.
| Phase | Casting yield | Machining yield | Overall yield |
|---|---|---|---|
| Prototype (CNC foam) | 69.3% | 77.0% | 53.3% |
| Production (molded foam) | 91.4% | 96.3% | 87.9% |
The improvement is dramatic. The production molds eliminated dimensional variations and reduced foam defects. However, we continued to monitor the process and made incremental improvements. For instance, we optimized the coating drying cycle to further reduce gas‑related defects. The final product met all technical requirements, including the leak test on the oil passages.
12. Conclusion
Through this project, we demonstrated that lost foam castings can be successfully applied to large, complex transmission cases even when existing equipment is not ideally sized. The key was to use CNC‑machined foam patterns for prototyping, allowing us to identify and solve challenges such as sand filling dead zones, mold expansion, and oil passage blockage before committing to permanent molds. Our step‑by‑step approach—from pattern slicing, gating design, coating, and specialized sand filling techniques—enabled us to produce high‑quality lost foam castings. The final production molds delivered consistent results with overall yields exceeding 87%. This work has significantly contributed to the timeline of the 6‑ton loader development and strengthened our company’s capability in advanced casting technologies. Lost foam castings continue to be a vital process for our future product lines.