
In my work as a casting process engineer, I have concentrated on the vertical line production of ductile iron casting for planetary carriers used in planetary gear transmissions. These parts carry, transmit, and distribute loads, and they experience some of the largest external torques in the entire mechanism. A successful ductile iron casting of this type must be light, rigid, and completely free from shrinkage porosity and shrinkage cavities. The specific component I produce is an integral double-sided plate planetary carrier. Its maximum outer envelope is approximately ϕ245 mm × 98 mm, its wall thickness ranges from about 13 mm to 22 mm, and its rough casting mass is about 9.8 kg. The material is a QT500-7 equivalent ductile iron. The casting geometry consists of two annular side plates and four uniformly arranged support columns, forming a spatial frame. The distance between the two side walls is about 60 mm, and the structure between the side plates is complex. This complexity is exactly why I treat every ductile iron casting of this family as a thermal and feeding problem first, and a geometric problem second.
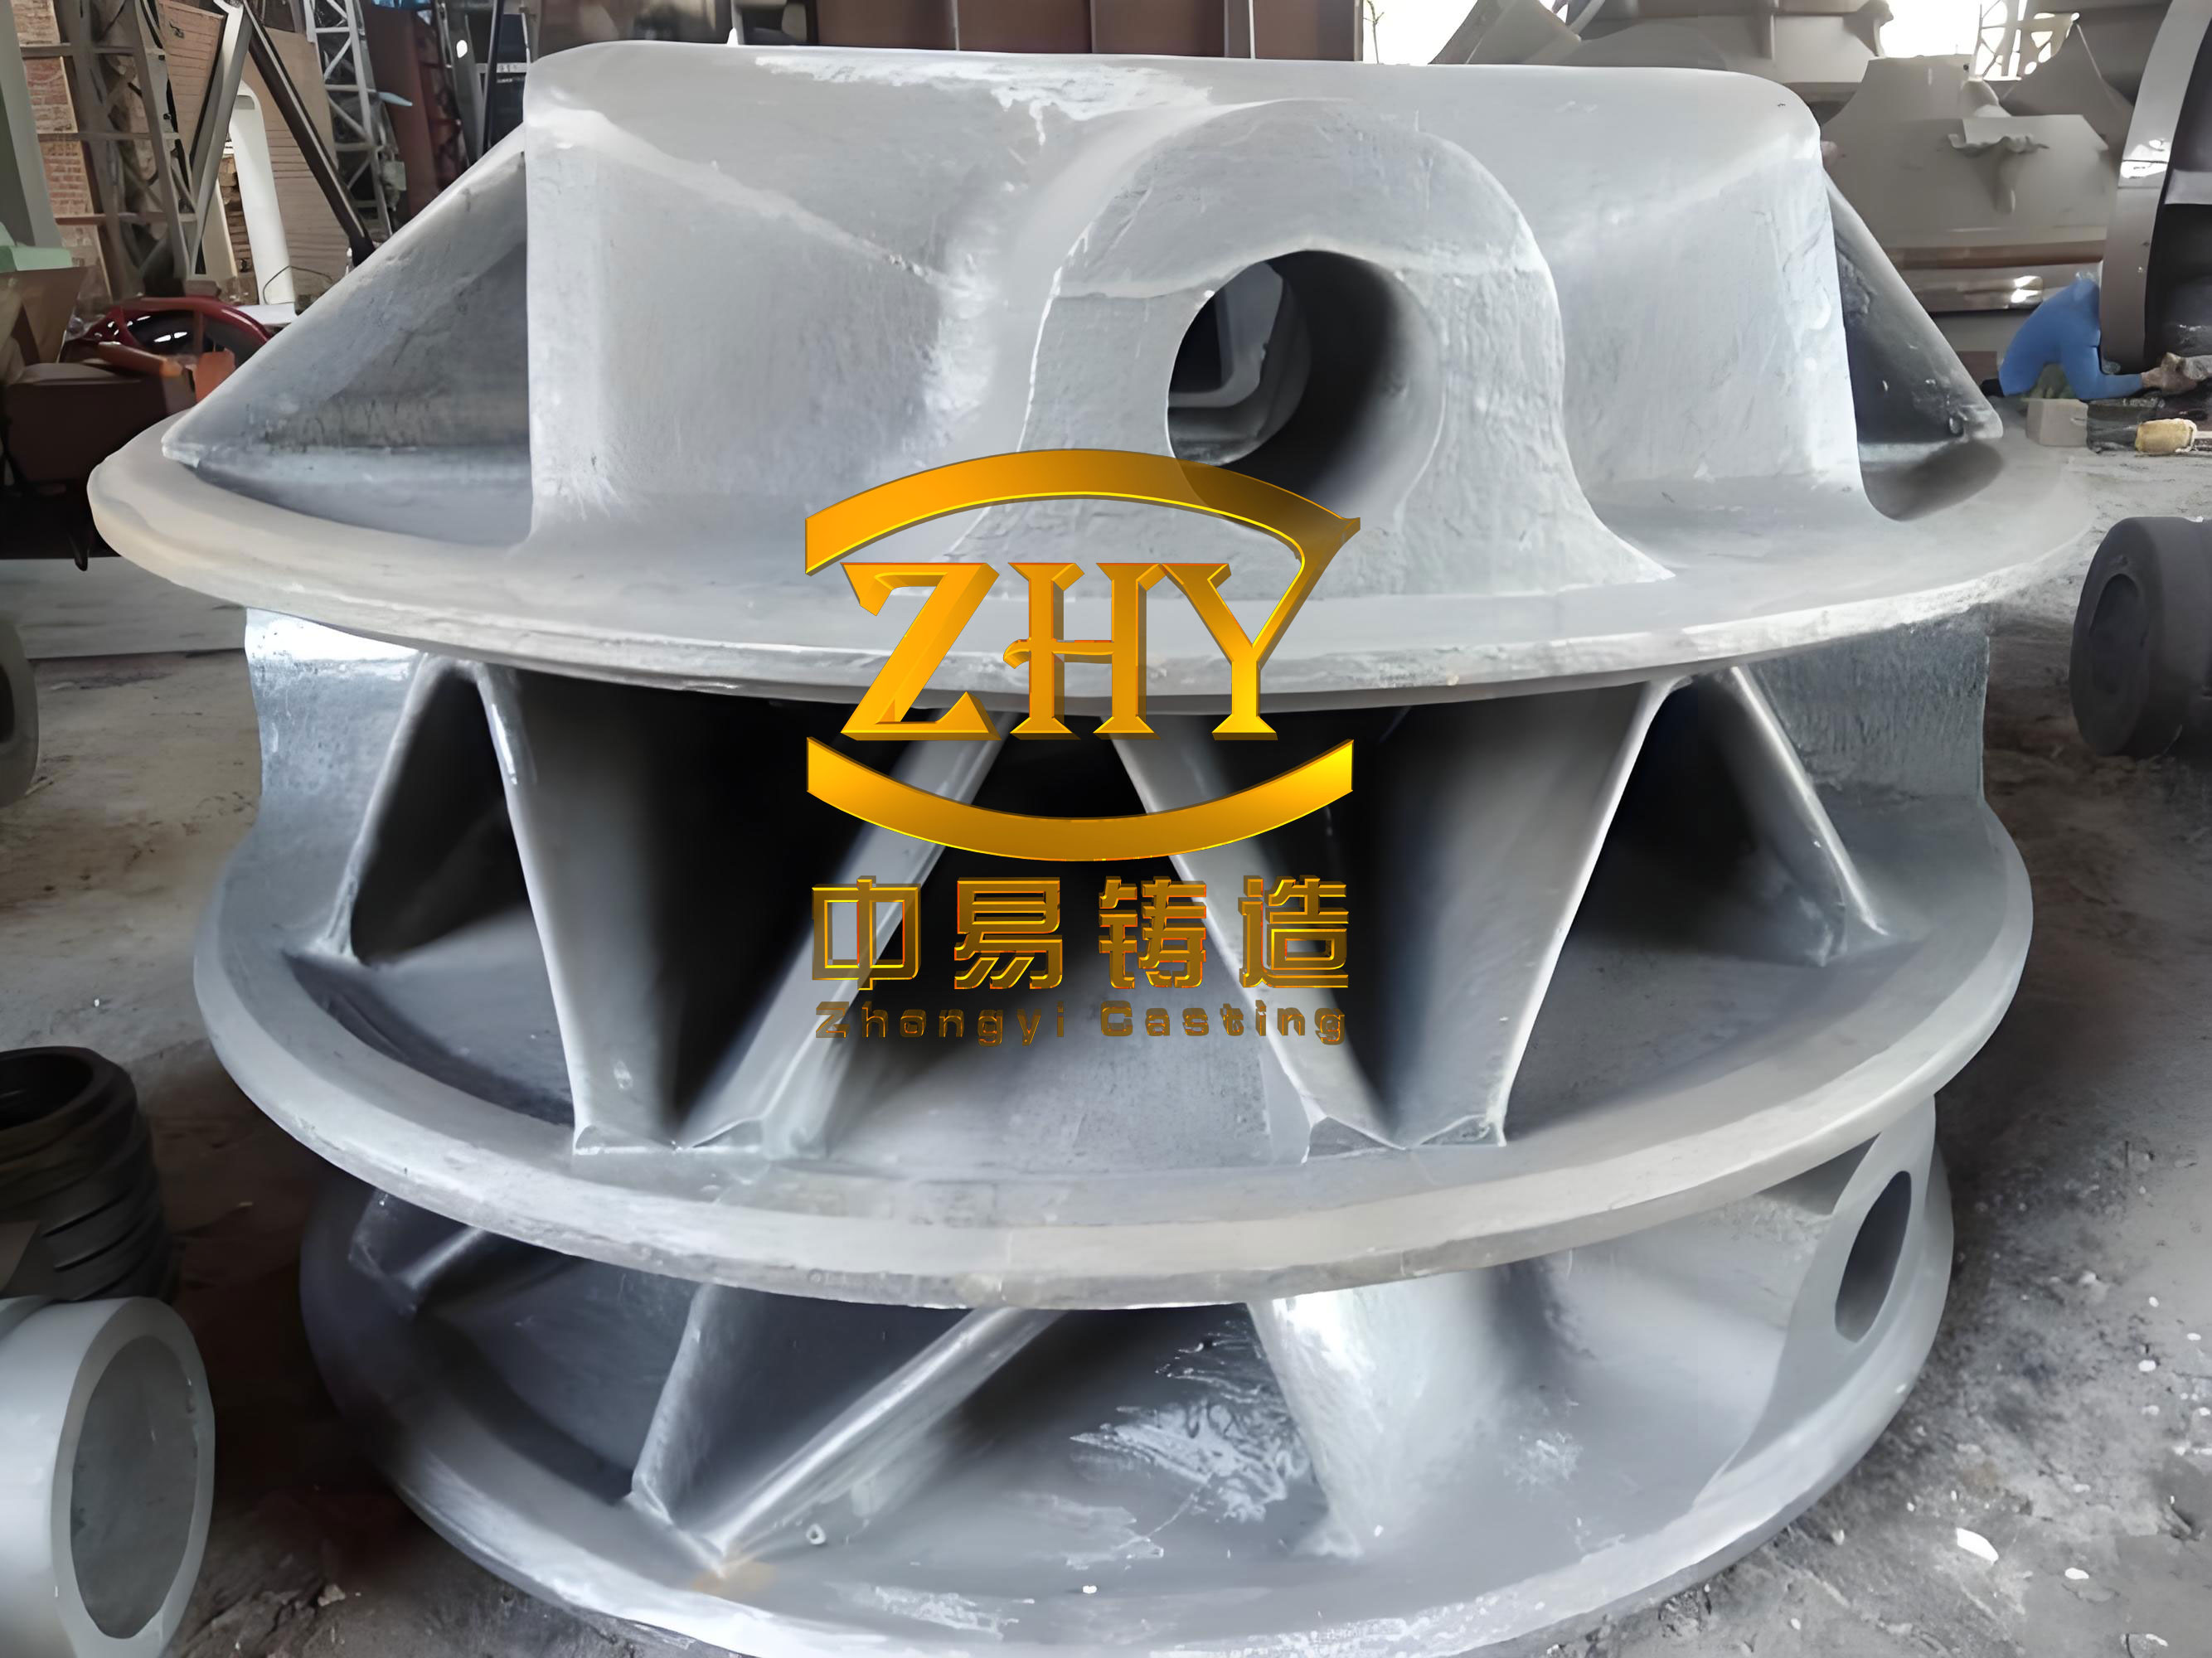
My plant uses green sand molding, 20 L cold box core making, medium-frequency electric furnace melting, and a DISA vertical molding line. The vertical line imposes specific constraints on parting, gating, and core setting, but it also offers excellent productivity and repeatability. For ductile iron casting, the first technical issue is always shrinkage. Therefore, I begin with a thermal analysis of the casting structure and then translate that analysis into a feeding strategy. The following sections explain the product structure, hot spot analysis, numerical simulation, parting surface selection, sand core design, gating and riser design, CAE verification, melting practice, and trial production validation. I use tables and formulas throughout because they make the relationships between modulus, solidification time, feeding distance, and graphite expansion explicit. These relationships are the foundation of a robust ductile iron casting process.
Product Structure and Thermal Modulus
The planetary carrier is a double-sided plate integral design. I divide it into a large end face, a small end face, and four support columns. The large end face and the small end face are both annular side plates. The support columns connect the two plates. The casting has no separate assembly, so the load path is continuous. This is beneficial for stiffness, but it also creates eight structural hot spots where the support columns meet the side plates. Four hot spots are on the large end side, and four are on the small end side. Each hot spot is a region where the metal volume is greater than in the adjacent walls, so the local solidification time is longer. The thermal modulus, defined as the ratio of volume to heat-transfer surface area, is a convenient index for comparing these regions.
I use the classical modulus expression for a casting region:
$$M = \frac{V}{A}$$
where \(M\) is the thermal modulus, \(V\) is the volume of the region, and \(A\) is the effective heat-transfer surface area. For a simple plate of thickness \(t\), the modulus is approximately \(t/2\) when both faces are exposed. For a cylinder of diameter \(D\) and length \(L\), the modulus is \(D L / (2D + 4L)\) when all surfaces are exposed, or \(D/4\) for an infinitely long cylinder. For a sphere of diameter \(D\), the modulus is \(D/6\). These formulas are useful because the hot spots in my ductile iron casting are not simple plates; they are intersections of plates and columns. At an intersection, the effective modulus is larger than the modulus of either individual member. I therefore estimate the local modulus by considering the intersection volume and the surfaces that are actually able to dissipate heat.
The nominal casting modulus is about 1.2 cm. This value is calculated from the overall volume and the overall heat-transfer surface area. However, the nominal modulus does not reveal the local hot spots. The local modulus at the column-to-plate intersections is significantly higher. I estimate that the large end hot spots have a local modulus in the range of 1.5 cm to 1.8 cm, while the small end hot spots have a local modulus in the range of 1.3 cm to 1.6 cm. The difference is caused by the different heat-transfer environments. The small end side plate has a larger exposed area and a shorter path to the mold wall, so it cools faster. The large end side plate is more massive and is partly shielded by the flange region, so it cools more slowly. This difference is critical for feeding design. In ductile iron casting, the graphite expansion can compensate for some liquid and solidification shrinkage, but only if the local modulus and the cooling rate are favorable. If the local modulus is too large, the expansion cannot keep up with the contraction, and shrinkage porosity appears.
Table 1 summarizes the basic geometric and thermal data I use for the initial analysis.
| Parameter | Value | Unit | Notes |
|---|---|---|---|
| Maximum outer envelope | ϕ245 × 98 | mm | Double-sided plate integral carrier |
| Wall thickness range | 13–22 | mm | Side plates and columns |
| Distance between side walls | 60 | mm | Inner gap |
| Rough casting mass | 9.8 | kg | Before machining |
| Material grade | QT500-7 equivalent | — | Ductile iron |
| Nominal casting modulus | 1.2 | cm | Overall V/A |
| Large end hot spot modulus | 1.5–1.8 | cm | Estimated local value |
| Small end hot spot modulus | 1.3–1.6 | cm | Estimated local value |
| Number of structural hot spots | 8 | — | Four large end, four small end |
The thermal modulus alone does not determine solidification time. The solidification time also depends on the mold material, the superheat, the pouring temperature, and the heat-transfer coefficient at the casting-mold interface. I use the Chvorinov rule as a first approximation:
$$t_s = B \left( \frac{V}{A} \right)^n$$
where \(t_s\) is the solidification time, \(B\) is a mold constant, and \(n\) is an exponent typically between 1.5 and 2.0 for castings in sand molds. For ductile iron casting in green sand, I have found \(n \approx 2\) to be a reasonable starting point for comparative purposes. If I set the nominal modulus to 1.2 cm, the large end hot spot modulus to 1.65 cm, and the small end hot spot modulus to 1.45 cm, then the ratio of solidification times is \((1.65/1.2)^2 \approx 1.89\) for the large end and \((1.45/1.2)^2 \approx 1.46\) for the small end. This means the large end hot spots remain liquid about 30% longer than the small end hot spots. That difference is enough to require a dedicated riser on the large end side. The small end side may be able to use graphite expansion self-feeding, but it remains a risk that I must verify by simulation and trial production.
Hot Spot Distribution and Solidification Sequence
The structural hot spots are distributed in two layers, with four hot spots in each layer. The upper layer is on the large end side, and the lower layer is on the small end side. Each hot spot is located at the junction between a support column and a side plate. Because the columns are uniformly arranged, the hot spots are also uniformly arranged. This symmetry is helpful for gating and feeding, but it also means that isolated liquid regions can form simultaneously in several places. If those isolated regions are not fed, they will produce shrinkage porosity. I use a commercial CAE package to simulate the solidification sequence. The initial casting temperature is set to 1385 °C, and the other parameters are the software defaults. The simulation predicts the fraction liquid, the temperature gradient, and the probability of shrinkage defects.
Table 2 shows the predicted solidification sequence from my initial simulation without risers. The times are relative to the start of solidification. The small end side plate begins to solidify first. At about 53 s, the small end side plate is divided into four parts. At about 107 s, the support columns disconnect, and the small end side plate becomes four isolated liquid regions. At about 125 s, the small end liquid is almost gone, while the large end side plate still has four relatively large isolated liquid regions. At about 183 s, the large end liquid is nearly gone. The simulation therefore shows that the large end side plate is the last region to solidify and has the greatest feeding demand. The small end side plate solidifies earlier, but it still has four isolated regions that could become shrinkage defects if the graphite expansion is insufficient.
| Solidification Time (s) | Predicted State | Feeding Risk |
|---|---|---|
| 0–53 | Small end side plate divides into four sections | Low to moderate |
| 53–107 | Support columns disconnect; small end liquid regions become isolated | Moderate |
| 107–125 | Small end liquid almost disappears; large end still has four large isolated liquids | High on large end |
| 125–183 | Large end liquid approaches disappearance | Very high on large end |
| 183–335 | Final cooling and complete solidification | Residual risk at hot spots |
The defect probability analysis shows that more than 30% of the potential defect volume is distributed in the eight structural hot spots. This is a common result for ductile iron casting with complex intersections. The large end hot spots have a higher defect probability than the small end hot spots. The small end hot spots are smaller and cool faster, so they are better candidates for self-feeding. The large end hot spots require a riser. I also examine the thermal gradient and the location of the last liquid. The last liquid is always at the center of the large end hot spots. If I can keep a feeding channel open from the riser to those hot spots until the end of solidification, the shrinkage risk drops dramatically. If the feeding channel freezes early, the hot spots become isolated and shrinkage porosity forms.
For ductile iron casting, the graphite expansion must also be considered. The volume change during solidification is not simply a contraction. As graphite forms, it expands and can partially or fully compensate for the liquid contraction and the solidification contraction. The net volume change depends on the carbon equivalent, the magnesium content, the inoculation practice, and the cooling rate. A simplified expression for the volume change is:
$$\Delta V_{\text{net}} = \Delta V_{\text{liquid contraction}} + \Delta V_{\text{solidification contraction}} + \Delta V_{\text{graphite expansion}}$$
If \(\Delta V_{\text{net}}\) is negative, the casting will tend to form shrinkage porosity unless it is fed by a riser or by expansion from a neighboring region. If \(\Delta V_{\text{net}}\) is positive, the casting may self-feed, but excessive expansion can also cause mold wall movement and dimensional variation. In my process, I aim for a slightly positive net expansion at the small end hot spots and a controlled riser-fed solidification at the large end hot spots. This dual strategy is the core of my ductile iron casting process design for this planetary carrier.
Parting Surface Selection
On a DISA vertical molding line, the parting surface is vertical. The mold is made by squeezing green sand between two pattern plates. The two half-molds are closed vertically, and the pouring basin is on the top. For this double-sided plate planetary carrier, I considered two parting schemes. Scheme 1 places the parting surface through the middle of the carrier, so the large end flange is at a distance from the hot spot. Scheme 2 places the parting surface so that the large end side plate is near the gating system and the small end side plate is away from the gating system. The two schemes have different advantages and disadvantages.
Scheme 1 has the advantage of a simple sand core and uniform machining allowance. Its disadvantage is that the large end flange is about 45 mm away from the hot spot, so a riser has difficulty feeding the hot spot directly. The feeding path is long, and the thermal gradient may not favor directional solidification. Scheme 2 has the advantage that the ingate can be placed directly near the large end side plate hot spots, which improves feeding. Because of the DISA line mold-closing characteristics, the small end side plate has a better heat-transfer environment in Scheme 2. The disadvantage of Scheme 2 is a more complex sand core and a less uniform machining allowance. Table 3 compares the two schemes.
| Feature | Scheme 1 | Scheme 2 |
|---|---|---|
| Sand core complexity | Simple | Complex |
| Machining allowance uniformity | Uniform | Less uniform |
| Distance from large end flange to hot spot | About 45 mm | Short |
| Riser feeding difficulty | High | Low |
| Small end cooling environment | Moderate | Better |
| Ingate placement near hot spot | Difficult | Direct |
| Overall process preference | Not selected | Selected |
I selected Scheme 2. The deciding factor is the feeding distance. In ductile iron casting, the feeding distance from a riser to a hot spot is limited by the thermal gradient and the permeability of the mushy zone. A short feeding distance is always preferable. Scheme 2 allows me to place the ingate between two support columns on the large end side, so one riser can feed two hot spots at the same time. This reduces the number of risers and improves yield. It also places the small end side away from the gating system, where the mold temperature is lower and the cooling rate is higher. The higher cooling rate at the small end promotes earlier solidification and increases the chance of successful graphite expansion self-feeding.
Sand Core Design for the Vertical Line
The DISA vertical line is an automatic core-setting line. The sand core must be designed so that it can be placed accurately and held firmly during mold closing and pouring. I refer to the DISA handbook for core print design. The positive pressure plate core print is used to define the locating and clamping surface. The clearance between the core print and the mold cavity is set to -0.1 mm to -0.3 mm, which creates an interference fit that holds the core in place. The remaining core print areas are given a clearance of 0 mm to 0.5 mm. The core is made with a 20 L cold box process. This process provides good dimensional accuracy and a strong core, which is necessary because the core must withstand the metal flow without deformation.
Table 4 lists the core design parameters I use for this ductile iron casting.
| Core Parameter | Value | Unit | Purpose |
|---|---|---|---|
| Core making process | 20 L cold box | — | Accuracy and strength |
| Locating clamp clearance | -0.1 to -0.3 | mm | Interference fit for core fixation |
| Other core print clearance | 0 to 0.5 | mm | Assembly clearance |
| Core print type | Positive pressure plate | — | DISA line compatibility |
| Core setting method | Automatic | — | Repeatable positioning |
| Core material | Cold box sand | — | Good collapsibility |
I also check the core for adequate venting. The core produces a complex internal cavity, and gas can be trapped if venting is insufficient. I design core vents that connect to the mold venting system. The vents reduce gas pressure and help prevent blowholes and scabbing. In a ductile iron casting, gas defects can be difficult to distinguish from shrinkage defects, so I take extra care to ensure that the core is properly vented and that the metal front does not trap gas in the internal cavity. The core is also designed with a slight taper to facilitate removal and to reduce the risk of core cracking during handling.
Gating System and Riser Design
The gating system must deliver clean metal to the mold cavity at the correct rate and temperature. It must also establish a favorable thermal gradient for directional solidification. I place the ingate on the large end side, between two support columns. This position allows one riser to feed two hot spots. The ingate should not point directly at a hot spot, because that would create a工艺 hot spot and increase the local modulus. Instead, the ingate should be close enough to feed the hot spot but not so close that it creates a new hot spot. I use a wide and thin ingate so that the metal enters the cavity smoothly and fills the large end side plate without excessive turbulence. The ingate dimensions are 60 mm × 12 mm.
The gating ratio is an important parameter. I use a non-pressurized gating system for ductile iron casting because it reduces turbulence and dross formation. A typical gating ratio for ductile iron is:
$$A_{\text{sprue}} : A_{\text{runner}} : A_{\text{ingate}} = 1 : 2 : 2 \quad \text{to} \quad 1 : 2 : 4$$
For this casting, I use a ratio of approximately \(1 : 2 : 3\). This ratio provides a smooth fill and maintains a positive pressure in the runner. I also use a ceramic foam filter to trap inclusions and to reduce the metal velocity. The filter is 82 mm × 82 mm × 12.5 mm with 10 PPI. The filter is placed in the runner before the ingate. It improves the cleanliness of the ductile iron casting and reduces the risk of slag defects.
For the risers, I calculate the required modulus using the feeding criterion:
$$M_r \geq 1.2 M_c$$
where \(M_r\) is the riser modulus and \(M_c\) is the casting modulus at the hot spot. For the large end hot spot, \(M_c \approx 1.65\) cm, so \(M_r \geq 1.98\) cm. A cylindrical riser with diameter \(D\) and height \(H\) has a modulus:
$$M_r = \frac{D H}{2D + 4H}$$
If I use a riser diameter of 70 mm and a height of 70 mm, the modulus is:
$$M_r = \frac{70 \times 70}{2 \times 70 + 4 \times 70} = \frac{4900}{420} \approx 11.67 \text{ mm} = 1.167 \text{ cm}$$
This is too small for the large end hot spot if I use the 1.2 factor. However, I am using two risers, each feeding two hot spots, and the risers are connected by a thin plate. The thin plate acts as a feeding channel and also as a heat bridge. The effective feeding modulus is increased because the risers work together. I also rely on the high graphite expansion of ductile iron casting to reduce the required riser modulus. In practice, I have found that a 70 mm diameter cylindrical riser can feed this hot spot when the ingate is properly placed and the pouring temperature is controlled. The thin plate between the two risers is 30 mm × 8 mm. It prevents the upper riser from feeding the lower riser and improves the feeding efficiency of the upper riser. Table 5 lists the gating and riser design parameters.
| Element | Dimension | Unit | Function |
|---|---|---|---|
| Ingate size | 60 × 12 | mm | Wide and thin, smooth fill |
| Ingate location | Between two support columns on large end | — | Feed two hot spots with one riser |
| Gating ratio | 1 : 2 : 3 | — | Non-pressurized, low turbulence |
| Riser type | Cylindrical | — | Feeding large end hot spots |
| Riser diameter | 70 | mm | Two risers per mold |
| Riser height | 70 | mm | Two risers per mold |
| Riser connecting plate | 30 × 8 | mm | Prevent upper-to-lower riser feeding |
| Ceramic foam filter | 82 × 82 × 12.5, 10 PPI | mm | Clean metal and reduce velocity |
| Exhaust and overflow fins | 18 × 3 | mm | Reduce cavity pressure and prevent sand burn-on |
I also design exhaust and overflow fins for both the mold cavity and the sand core. These fins are 18 mm × 3 mm rectangular sections. They reduce the internal cavity pressure during filling, which improves the feeding effect and prevents sand burn-on. In a ductile iron casting, the internal cavity can be difficult to fill without gas entrapment, so the fins are an important detail. The fins are placed at the highest points of the cavity and at the ends of the internal passages. They allow gas to escape and give the metal a place to flow, which reduces the risk of cold shuts and misruns.
CAE Simulation of the Revised Process
After designing the gating system and risers, I create a 3D model of the complete process and run a new CAE simulation. The simulation predicts the solidification sequence, the location of isolated liquid regions, and the probability of shrinkage porosity. Table 6 shows the solidification sequence with the revised process. The large end now solidifies in a directional manner from the riser toward the hot spots. The riser remains liquid long enough to feed the large end hot spots. The small end solidifies earlier, and the isolated liquid regions are smaller. The graphite expansion is expected to compensate for the remaining shrinkage.
| Simulation Time (s) | Predicted State | Feeding Assessment |
|---|---|---|
| 80 | Small end begins to solidify; large end still liquid | Riser feeding starts |
| 124 | Small end isolated liquid regions form; large end feeding path open | Large end safe |
| 224 | Large end hot spots begin to solidify; riser still liquid | Directional solidification |
| 335 | Final solidification; riser solidifies last | No open shrinkage |
The simulation shows that the small end side plate first begins to solidify. An isolated liquid phase appears in the middle of the solidification process. The graphite expansion self-feeding is expected to eliminate shrinkage porosity, but there is still some risk. If production trials show shrinkage at the small end, I can add a chill to that region. The large end side plate achieves sequential solidification. The riser feeds the hot spots sufficiently, and the simulation predicts no shrinkage porosity risk on the large end. This is exactly the behavior I want in a ductile iron casting: the large end is riser-fed, and the small end is self-fed by graphite expansion.
I also examine the thermal gradient along the feeding path. A positive thermal gradient from the riser to the hot spot is necessary for directional solidification. The gradient is defined as:
$$G = \frac{T_{\text{riser}} – T_{\text{hot spot}}}{L}$$
where \(G\) is the thermal gradient, \(T_{\text{riser}}\) is the temperature at the riser, \(T_{\text{hot spot}}\) is the temperature at the hot spot, and \(L\) is the distance between them. A positive \(G\) means the riser is hotter than the hot spot, so solidification proceeds from the hot spot toward the riser. In my simulation, the thermal gradient from the riser to the large end hot spot is positive throughout the critical period. This confirms that the feeding path remains open until the hot spot solidifies. The gradient is weaker near the end of solidification, but the graphite expansion provides additional compensation. The combination of a positive thermal gradient and graphite expansion is the reason the process works without a larger riser.
Melting, Treatment, and Pouring Practice
The melting practice is as important as the mold design for ductile iron casting. I use a medium-frequency induction furnace. The iron is treated with a wire-feeding unit for spheroidization and inoculation. I also apply stream inoculation during pouring to improve the graphite nodule count and to reduce the risk of chill. The pouring temperature is controlled between 1370 °C and 1390 °C. If the pouring temperature is too low, the metal may not fill the thin walls. If it is too high, the shrinkage risk increases and the sand mold may be damaged. I therefore maintain a narrow pouring temperature window.
Table 7 shows the chemical composition of the molten iron. The carbon content is 3.6% to 3.8%, and the silicon content is 2.5% to 2.8%. The manganese content is 0.1% to 0.4%, and the phosphorus and sulfur are kept below 0.06% and 0.02%, respectively. The magnesium content is 0.03% to 0.05%, and the tin content is 0.02% to 0.04%. The carbon equivalent is an important parameter. I calculate it as:
$$CE = C + \frac{Si + P}{3}$$
For a typical composition of \(C = 3.7\%\), \(Si = 2.65\%\), and \(P = 0.04\%\), the carbon equivalent is:
$$CE = 3.7 + \frac{2.65 + 0.04}{3} = 3.7 + 0.897 \approx 4.60\%$$
This is a slightly hypereutectic composition, which is common for ductile iron casting. A hypereutectic composition promotes graphite expansion and helps self-feeding. However, if the carbon equivalent is too high, graphite flotation and excessive expansion can occur. I therefore keep the carbon equivalent in the range of 4.50% to 4.65%. The magnesium content is controlled to ensure good nodularity without excessive dross. The tin content is kept low because tin can increase pearlite and reduce ductility, but a small amount is useful for stabilizing pearlite when needed.
| Element | Content (mass fraction, %) | Role |
|---|---|---|
| C | 3.6–3.8 | Graphite formation and expansion |
| Si | 2.5–2.8 | Inoculation and matrix control |
| Mn | 0.1–0.4 | Hardenability and pearlite control |
| P | < 0.06 | Minimize embrittlement |
| S | < 0.02 | Minimize spheroidization interference |
| Mg | 0.03–0.05 | Spheroidizing agent |
| Sn | 0.02–0.04 | Pearlite stabilization |
After melting, I perform a nodularity check on a sample. The target nodularity is at least 85%. The graphite nodule size should be small and uniform. A high nodule count improves the mechanical properties and helps distribute the graphite expansion more evenly. I also check the magnesium residual and the inoculation effectiveness. If the nodularity is low, I adjust the wire feed rate and the inoculation practice. If the nodularity is too high, I may reduce the magnesium content to avoid excessive dross. The pouring process is also monitored to ensure that the mold fills smoothly and that the risers receive enough hot metal. I use a pouring basin that maintains a constant head, and I avoid interruption of the stream. A steady pour reduces turbulence and helps the gating system work as designed.
Trial Production and Validation
After the process design and CAE simulation, I conducted a trial production run. The castings were produced on the DISA vertical line with the selected parting surface, sand core, gating system, and risers. The pouring temperature was within the target range. The castings were cleaned and inspected. The results were very positive. The metallographic structure and mechanical properties met the standard requirements. The nodularity was 85%, the maximum graphite nodule diameter was 6 μm, and the pearlite content was 45%. The tensile strength was 527 MPa, the elongation was 11%, and the hardness was 187 HBW. The casting was sectioned, and no shrinkage porosity or shrinkage cavity was found. Table 8 summarizes the trial production results.
| Property | Measured Value | Requirement | Result |
|---|---|---|---|
| Nodularity | 85% | ≥ 80% | Pass |
| Maximum graphite nodule diameter | 6 μm | ≤ 8 μm | Pass |
| Pearlite content | 45% | 40–60% | Pass |
| Tensile strength | 527 MPa | ≥ 500 MPa | Pass |
| Elongation | 11% | ≥ 7% | Pass |
| Hardness | 187 HBW | 170–210 HBW | Pass |
| Shrinkage porosity | None found | None allowed | Pass |
The trial production confirmed that the process is feasible. The large end hot spots were fed by the risers, and the small end hot spots were self-fed by graphite expansion. The thin plate between the risers prevented the upper riser from feeding the lower riser, which improved the feeding efficiency of the upper riser. The exhaust and overflow fins reduced the cavity pressure and prevented sand burn-on. The ceramic foam filter improved the cleanliness of the ductile iron casting. The cold box core produced a strong and accurate internal cavity. The DISA vertical line provided good repeatability and productivity. I was able to produce a high-quality ductile iron casting without shrinkage porosity, and the mechanical properties exceeded the requirements.
Discussion of Key Process Variables
In my experience, the most important variables for this ductile iron casting are the pouring temperature, the carbon equivalent, the inoculation practice, the riser modulus, and the ingate position. I have summarized their effects in Table 9. A low pouring temperature reduces shrinkage risk but can cause misruns. A high pouring temperature improves fill but increases shrinkage. A high carbon equivalent promotes graphite expansion but can cause graphite flotation. A low carbon equivalent reduces graphite expansion and increases shrinkage risk. Good inoculation increases nodule count and improves self-feeding. A larger riser modulus improves feeding but reduces yield. An ingate positioned too close to the hot spot creates a工艺 hot spot, while an ingate positioned too far away cannot feed the hot spot. The optimal process is a balance of these variables.
| Variable | Too Low | Too High | Optimal Range |
|---|---|---|---|
| Pouring temperature | Misrun, cold shut | Shrinkage, sand burn-on | 1370–1390 °C |
| Carbon equivalent | Shrinkage, chill | Graphite flotation | 4.50–4.65% |
| Nodularity | Poor mechanical properties | Excessive dross | ≥ 85% |
| Riser modulus | Shrinkage porosity | Low yield | ≥ 1.2 Mc |
| Ingate distance to hot spot | No feeding | New hot spot | Adjacent but not direct |
I also pay attention to the mold strength and the sand properties. A weak mold can expand under the graphite expansion pressure, which increases the casting dimensions and reduces the effective feeding. A strong mold restrains the expansion and helps the graphite expansion compensate for shrinkage. I control the green sand compactability, permeability, and moisture content. The mold must have enough strength to withstand the metal pressure and the expansion pressure. At the same time, the mold must have enough permeability to allow gas to escape. These requirements are sometimes in conflict, so I maintain a narrow process window. For this ductile iron casting, the mold strength is particularly important because the small end side plate relies on graphite expansion self-feeding. If the mold wall moves, the expansion is lost, and shrinkage porosity can appear. I therefore monitor the mold hardness and the sand properties on a regular basis.
Graphite Expansion and Self-Feeding
The graphite expansion in ductile iron casting is a double-edged sword. On one hand, it can compensate for shrinkage and reduce or eliminate the need for risers. On the other hand, it can cause mold wall movement, dimensional variation, and even internal porosity if the expansion is not controlled. The amount of expansion depends on the carbon equivalent, the nodule count, the cooling rate, and the mold restraint. A simplified expression for the expansion volume is:
$$V_{\text{expansion}} = f_{g} \cdot V_{\text{casting}} \cdot \Delta v_{g}$$
where \(f_{g}\) is the volume fraction of graphite formed, \(V_{\text{casting}}\) is the casting volume, and \(\Delta v_{g}\) is the specific volume change of graphite formation. If the expansion volume is greater than the contraction volume, the casting can self-feed. If it is less, a riser is needed. In my process, I aim for a slightly positive expansion at the small end and a riser-fed condition at the large end. This is possible because the small end cools faster and has a higher nodule count, which promotes graphite expansion. The large end cools slower and has a larger modulus, so it needs the riser to compensate for the longer solidification time. The combination of self-feeding and riser feeding is the key to a sound ductile iron casting.
I also consider the expansion pressure. The expansion pressure can be estimated as:
$$P_{\text{exp}} = \frac{E \alpha \Delta T}{1 – \nu}$$
where \(P_{\text{exp}}\) is the expansion pressure, \(E\) is the elastic modulus of the mold, \(\alpha\) is the thermal expansion coefficient, \(\Delta T\) is the temperature change, and \(\nu\) is the Poisson ratio. This formula is a simplification, but it shows that the mold stiffness and the temperature change affect the pressure. A stiffer mold produces a higher expansion pressure, which can help feeding but also increases the risk of mold wall movement. I therefore design the mold to have sufficient stiffness without being too rigid. The green sand mold on the DISA vertical line has a good balance of stiffness and permeability. I also use a strong core, which helps restrain the internal cavity and directs the expansion toward the hot spots.
Comparison with Alternative Processes
I have also considered alternative processes for this ductile iron casting. One alternative is horizontal molding. A horizontal line would allow a different parting surface and possibly a simpler core. However, the horizontal line would not provide the same vertical filling characteristics. The vertical line fills the mold from bottom to top, which promotes a stable metal front and reduces turbulence. The vertical line also allows the small end side plate to be placed away from the gating system, which improves the thermal gradient. Another alternative is shell molding. Shell molding would provide better dimensional accuracy and surface finish, but the cost would be higher. For the required production volume and the acceptable tolerances, the DISA vertical line is the most economical choice. Table 10 compares the vertical line with horizontal molding and shell molding.
| Process | Dimensional Accuracy | Surface Finish | Cost | Feeding Control | Suitability |
|---|---|---|---|---|---|
| DISA vertical line | Good | Good | Moderate | Excellent | Selected |
| Horizontal green sand | Good | Good | Moderate | Moderate | Alternative |
| Shell molding | Excellent | Excellent | High | Good | Not selected |
The vertical line also has a smaller footprint and higher productivity. The automatic core setting reduces labor and improves consistency. The green sand system is well established in my plant, so the learning curve is short. For this ductile iron casting, the vertical line provides the best combination of quality, cost, and productivity. The only disadvantage is the limited pattern plate size, but the planetary carrier fits within the 600 mm × 480 mm pattern plate, and two castings can be arranged per mold. This arrangement improves the yield and reduces the cost per casting. I therefore continue to use the vertical line for this product family.
Quality Control and Inspection
Quality control is essential for ductile iron casting. I inspect the chemical composition, the nodularity, the microstructure, the mechanical properties, and the internal soundness. The chemical composition is checked with a spectrometer before pouring. The nodularity and microstructure are checked on a sample casting from each ladle. The mechanical properties are checked with a tensile test. The internal soundness is checked by sectioning a sample casting and by non-destructive testing when required. I also monitor the casting dimensions and the surface finish. If any parameter is out of specification, I adjust the process before the next production run. Table 11 lists the quality control plan.
| Check | Method | Frequency | Acceptance Criteria |
|---|---|---|---|
| Chemical composition | Spectrometer | Each heat | Table 7 limits |
| Nodularity | Metallography | Each ladle | ≥ 85% |
| Graphite size | Metallography | Each ladle | ≤ 6 μm |
| Pearlite content | Metallography | Each ladle | 40–60% |
| Tensile strength | Tensile test | Each heat | ≥ 500 MPa |
| Elongation | Tensile test | Each heat | ≥ 7% |
| Hardness | Brinell hardness | Each heat | 170–210 HBW |
| Shrinkage porosity | Sectioning and NDT | Sample casting | None allowed |
| Dimensions | Calipers and gauges | Sample casting | Drawing tolerance |
The inspection results from the trial production were all within the acceptance criteria. The nodularity was 85%, the maximum graphite nodule diameter was 6 μm, and the pearlite content was 45%. The tensile strength was 527 MPa, the elongation was 11%, and the hardness was 187 HBW. The sectioned casting showed no shrinkage porosity. These results confirm that the process is capable and that the ductile iron casting meets the design requirements. I continue to monitor the process and make minor adjustments as needed. For example, if the pouring temperature drifts, I adjust the furnace power or the pouring time. If the nodularity decreases, I adjust the wire feed rate or the inoculation practice. If the small end hot spot shows any sign of shrinkage, I add a chill or adjust the gating ratio. Continuous improvement is part of my daily work.
Lessons Learned and Practical Recommendations
From this project, I have learned several lessons that I apply to other ductile iron casting projects. First, the thermal analysis must come before the detailed gating design. The hot spot locations and the local modulus determine the feeding strategy. Second, the parting surface selection must consider the feeding distance and the thermal gradient. A shorter feeding distance is always better. Third, the ingate should not point directly at a hot spot. It should be close enough to feed the hot spot but not so close that it creates a new hot spot. Fourth, the riser modulus should be calculated and verified by simulation. A riser that is too small will not feed, and a riser that is too large will reduce yield. Fifth, the graphite expansion must be considered as a feeding mechanism, especially for the small end hot spots. The carbon equivalent, nodularity, and mold stiffness all affect the expansion behavior. Sixth, the sand core must be designed for the specific molding line. The core print clearances and the venting are critical for automatic core setting. Seventh, the pouring temperature and the treatment practice must be controlled within a narrow window. Small variations can have a large effect on the final quality of the ductile iron casting.
I also recommend using a ceramic foam filter for this type of ductile iron casting. The filter traps inclusions and reduces turbulence. It improves the surface finish and reduces the risk of slag defects. I recommend using a wide and thin ingate to fill the large end side plate smoothly. I recommend using a thin plate between risers to prevent upper-to-lower riser feeding. I recommend using exhaust and overflow fins to reduce cavity pressure and prevent sand burn-on. I recommend using a cold box core for dimensional accuracy and strength. I recommend monitoring the mold hardness and the sand properties because the graphite expansion self-feeding depends on mold restraint. Finally, I recommend sectioning a sample casting from each trial run until the process is stable. Sectioning is the most reliable way to detect internal shrinkage porosity.
Conclusion
I have developed a robust process for the vertical line production of a double-sided plate integral planetary carrier in ductile iron casting. The process uses a DISA vertical molding line, green sand, a 20 L cold box core, medium-frequency melting, and wire-feeding treatment. The product structure is a spatial frame of two annular side plates and four support columns. The structural hot spots are located at the column-to-plate intersections, with four hot spots on the large end side and four on the small end side. The large end hot spots have a larger modulus and a longer solidification time, so they require riser feeding. The small end hot spots have a smaller modulus and a shorter solidification time, so they can use graphite expansion self-feeding. The selected parting surface places the large end near the gating system and the small end away from the gating system. The gating system uses a wide and thin ingate, a non-pressurized gating ratio, and a ceramic foam filter. Two cylindrical risers, each 70 mm in diameter and 70 mm in height, feed the large end hot spots. A thin plate between the risers prevents upper-to-lower riser feeding. Exhaust and overflow fins reduce cavity pressure and prevent sand burn-on. The CAE simulation confirms that the large end solidifies directionally and that the small end has only a small isolated liquid region. The trial production produced a sound ductile iron casting with 85% nodularity, 6 μm maximum graphite nodule diameter, 45% pearlite, 527 MPa tensile strength, 11% elongation, and 187 HBW hardness. No shrinkage porosity was found. The process is feasible, repeatable, and economical. I continue to use this process for the production of this ductile iron casting, and I apply the same principles to other ductile iron casting projects with similar complexity.