
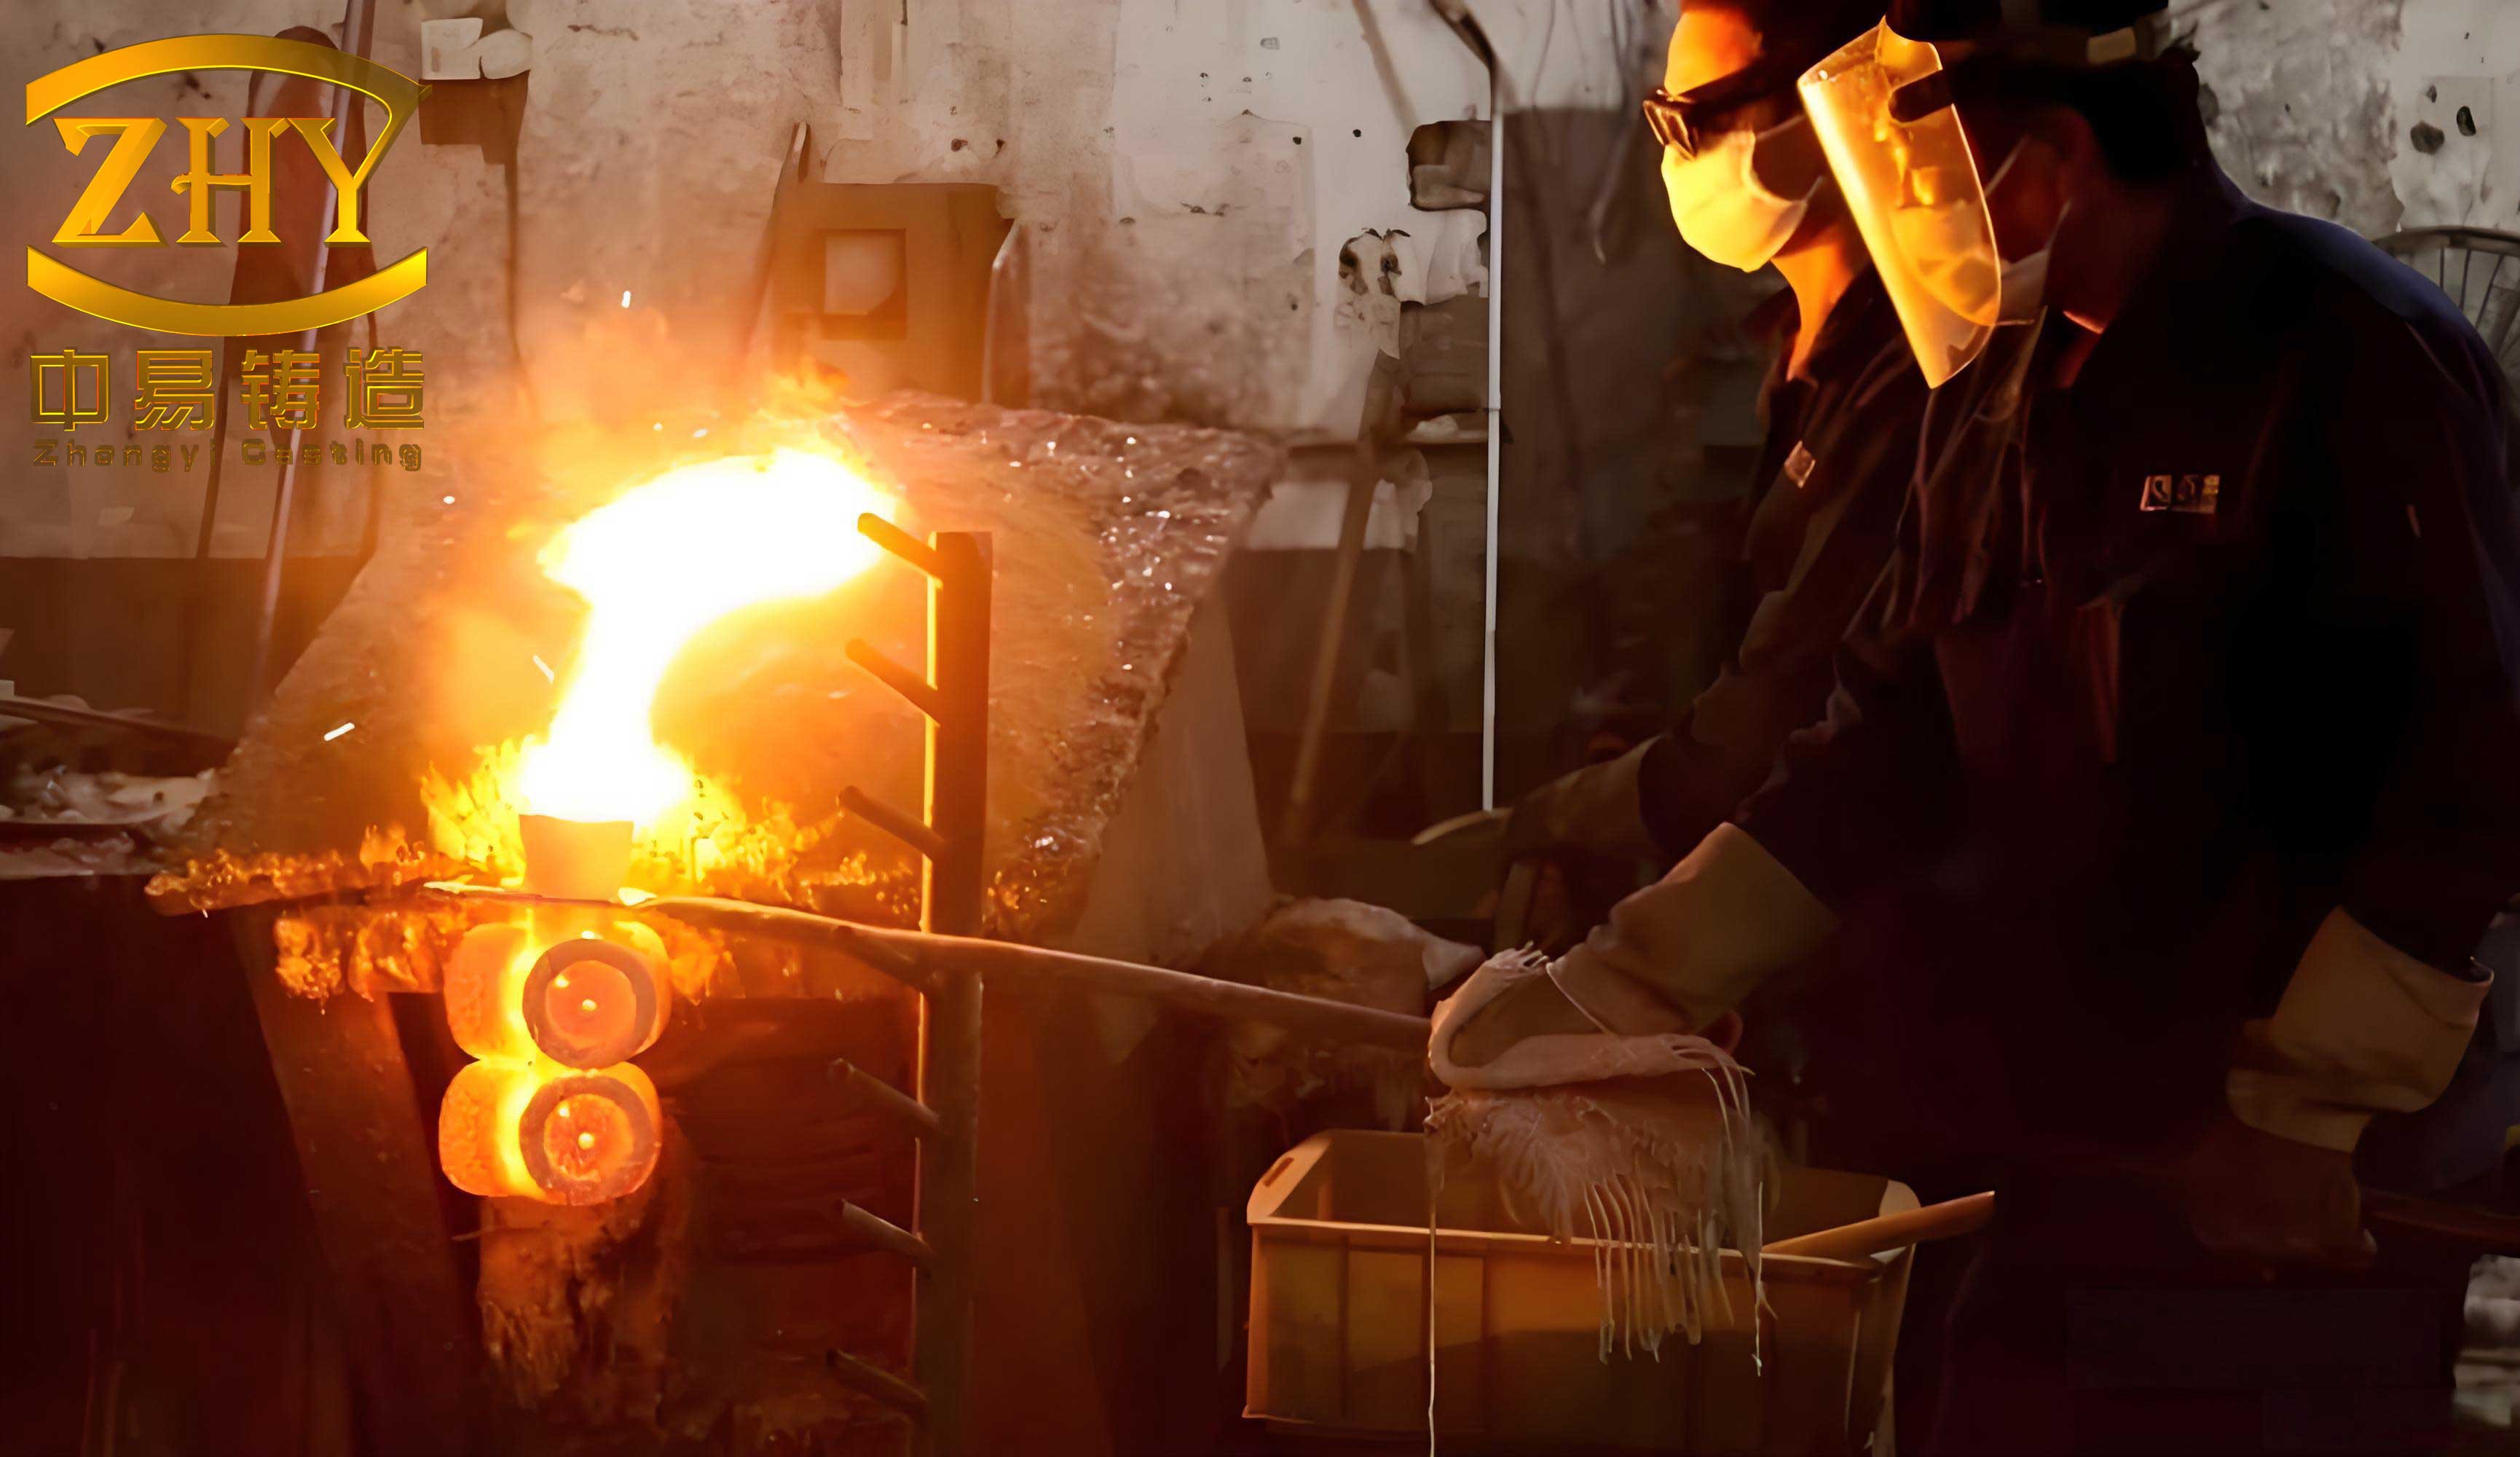
I approached this component as a compact, high-integrity lost wax casting in which the dominant quality risk was not the overall envelope, but the interaction between a very thin wall, a heavy local section, and a narrow groove. The part has an outer envelope of 28 mm x 38 mm x 14 mm, a mass of approximately 6 g, a minimum wall thickness of 2 mm, and a maximum local thickness of 12 mm. The material is ZG35CrMnSi. The customer required magnetic particle inspection and X-ray inspection. In the original production route, the main reject mode was shrinkage porosity in the thin plate region adjacent to the groove. I therefore rebuilt the lost wax casting process around three connected ideas: tree orientation, shell uniformity, and local feeding through an additional inner gate.
My first step was to separate the problem into measurable lost wax casting variables. I did not treat the defect as a random foundry variation. Instead, I treated it as a thermal and fluid-flow imbalance caused by local shell buildup, a hot section that solidified late, and an interrupted feed path. The thin plate cooled quickly, while the thick section and the slurry-filled groove remained hot. Because the shell in the groove became locally thicker than designed, the mold surface acted as an insulating mass. The result was a late-solidifying region with insufficient liquid metal available to compensate for solidification shrinkage. In lost wax casting, this is a classic combination of geometry, shell-making, and gating limitations.
Baseline component and quality data. I recorded the starting conditions before changing the lost wax casting layout. These data formed the basis for all later comparisons.
| Parameter | Value | Lost wax casting implication |
|---|---|---|
| Outer envelope | 28 mm x 38 mm x 14 mm | Small part with limited space for gating and treeing |
| Mass | 6 g | Low thermal mass, rapid cooling, high sensitivity to shell thickness |
| Minimum wall thickness | 2 mm | Fast solidification, difficult feed path |
| Maximum wall thickness | 12 mm | Local hot spot, late solidification, shrinkage risk |
| Material | ZG35CrMnSi | Steel with significant solidification shrinkage and narrow freezing range |
| Nondestructive testing | Magnetic particle inspection and X-ray | High demand for surface and internal soundness |
| Primary defect | Shrinkage porosity at the thin plate near the groove | Local feeding and cooling imbalance |
| Original yield | 6 good parts from 60 | 10% first-pass acceptance |
I calculated the approximate thermal modulus of the controlling regions to compare their solidification behavior. In lost wax casting, the thermal modulus is a practical first-order indicator of how long a region will remain liquid relative to its ability to lose heat. For a simple plate cooling from both faces, the modulus can be approximated as half the thickness. For a heavy section, the modulus rises sharply. The groove, once filled with slurry and stucco, behaves as an external insulation layer and further reduces heat extraction.
$$M = \frac{V}{A}$$
Here, \(M\) is the thermal modulus, \(V\) is the volume of the region, and \(A\) is the heat-transfer surface area. I then used the Chvorinov relationship to relate modulus to solidification time:
$$t_s = B \left(\frac{V}{A}\right)^n$$
For many steel castings, the exponent \(n\) is close to 2, so the expression simplifies to:
$$t_s = B M^2$$
The consequence is direct: if one region has a modulus several times larger than the thin wall, it will remain liquid much longer. The thin 2 mm plate solidifies quickly and can no longer supply liquid to the heavy section or to the groove-adjacent hot spot. If the gate is not positioned to feed that late region, shrinkage porosity forms. In my initial review of the original lost wax casting, the gates were placed at the general hot section, but the critical thin plate between the gates did not receive a dedicated feed path. X-ray inspection confirmed the defect between the inner gates, not directly under them.
| Region | Characteristic thickness | Approximate modulus | Cooling behavior | Feeding risk |
|---|---|---|---|---|
| Thin plate | 2 mm | About 1 mm | Rapid cooling | Low modulus but isolated |
| Heavy local section | 12 mm | About 6 mm | Slow cooling | High shrinkage risk |
| Groove with shell buildup | Variable, locally thick shell | Effective modulus increases | Insulated, delayed cooling | Hot spot formation |
| Gate contact zone | 4 mm x 12 mm gate | Designed feed path | Moderate cooling | Must remain open until late solidification |
Defect mechanism in the lost wax casting shell. I examined the shell-making route because the defect location matched the groove geometry. During slurry immersion and stuccoing, the narrow groove tends to trap slurry and sand. In a lost wax casting, every local shell thickness change alters heat flow. A thicker shell has higher thermal resistance. The heat flux through the mold wall can be written as:
$$q = \frac{\Delta T}{R_{total}}$$
where \(q\) is heat flux, \(\Delta T\) is the temperature difference between the casting surface and the surroundings, and \(R_{total}\) is the total thermal resistance. The shell contribution is:
$$R_{shell} = \frac{\delta_{shell}}{k_{shell}}$$
Here, \(\delta_{shell}\) is local shell thickness and \(k_{shell}\) is the effective thermal conductivity of the shell. When the groove fills with extra slurry and stucco, \(\delta_{shell}\) increases locally. The local thermal resistance increases, heat extraction decreases, and the groove-adjacent metal remains hotter for longer. That region becomes an artificial hot spot. In the original lost wax casting, the shell buildup was not intentional, but it acted exactly like an insulating feeder sleeve with no feed metal. The outcome was shrinkage porosity in the thin plate beside the groove.
I also considered the Niyama criterion as a comparative index for shrinkage behavior:
$$N = \frac{G}{\sqrt{\dot{T}}}$$
In this expression, \(G\) is the temperature gradient and \(\dot{T}\) is the cooling rate. A low \(N\) value indicates a high probability of shrinkage porosity. I did not rely on a single universal threshold for ZG35CrMnSi because the criterion depends on alloy, section size, and mesh assumptions. Instead, I used the Niyama index as a relative tool: the original lost wax casting had a low-gradient, low-cooling-rate zone between the original gates. After adding the dedicated inner gate, the local gradient increased and the cooling rate near the thin plate became more balanced. The X-ray results confirmed the improvement.
| Stage | Observation | Physical effect | Corrective direction |
|---|---|---|---|
| Wax pattern assembly | Groove orientation toward inner side in the original tree | Poor drainage, difficult drying, hidden slurry accumulation | Turn groove outward |
| Slurry coating | Slurry bridging and thickening in the narrow groove | Local shell insulation | Control viscosity, drain, blow out excess sand |
| Stucco application | Sand accumulation in the groove | Increased local shell thickness | Brush and compressed-air cleaning |
| Drying | Uneven drying near the groove | Shell cracks and variable thermal properties | Groove outward, controlled airflow |
| Dewaxing | Potential local wax entrapment if drainage is poor | Shell contamination and hot spots | Fast transfer, stable autoclave cycle |
| Pouring and solidification | Thin plate between gates remains unfed | Shrinkage porosity | Add inner gate at the groove-adjacent hot spot |
Gating design and optimization. The original lost wax casting used inner gates at the hot section. Although that choice is generally correct, the defect appeared between the gates. This told me that the gates were not controlling the last liquid region. The feed path was interrupted by the thin plate and by the locally insulated groove. I therefore added an inner gate directly at the groove-adjacent hot spot. I kept the added gate compact to avoid cleaning problems. The selected cross-section was 4 mm x 12 mm. I placed it on a planar surface and avoided direct contact with the functional casting body. After cut-off, the gate root could be removed by grinding without damaging the thin wall.
| Feature | Original design | Optimized design | Reason for change |
|---|---|---|---|
| Gate location | At general hot section | At groove-adjacent hot spot plus general hot section | Create a direct feed path to the last-liquid region |
| Number of effective gates | Three, but defect between them | Three original gates plus one local gate | Interrupt the isolated hot zone |
| Added gate size | Not applicable | 4 mm x 12 mm | Enough feeding without excessive cleaning difficulty |
| Gate contact surface | Part body in some locations | Planar surface, clear of functional body | Easy removal and lower risk of surface damage |
| Feeding path | Indirect and partially blocked | Direct to the shrinkage-prone plate | Improve pressure transfer and liquid availability |
| Cleaning method | Manual cut-off and grinding | Cut-off and controlled grinding of gate root | Maintain dimensional and surface requirements |
I also reviewed the feeding criteria. For a sound lost wax casting, the gate or feeder modulus should normally exceed the casting modulus by a safe margin:
$$M_g \ge 1.2 M_c$$
Here, \(M_g\) is the modulus of the gate or feeder, and \(M_c\) is the modulus of the casting region being fed. The factor 1.2 is not a universal constant, but it gives a useful starting point. In this small lost wax casting, the gate size could not be increased freely because of cleaning and dimensional constraints. The local 4 mm x 12 mm gate was therefore selected as a compromise between feeding capacity and clean removal.
I estimated the feed pressure available through the gate using a simplified pressure balance:
$$P_{feed} = \rho g H – \Delta P_{friction}$$
where \(\rho\) is the liquid metal density, \(g\) is gravitational acceleration, \(H\) is the effective metal head, and \(\Delta P_{friction}\) is the pressure loss through the gate and shell cavity. A longer, narrower, or partially blocked gate reduces the available feeding pressure. In the original lost wax casting, the shell buildup around the groove effectively increased flow resistance and reduced the local feed path. By placing a gate directly at the hot spot, I shortened the effective feed distance and increased the local pressure available during final solidification.
| Variable | Symbol | Effect on lost wax casting | Optimized direction |
|---|---|---|---|
| Metal head | \(H\) | Higher head increases feeding pressure | Maintain sufficient sprue and pouring cup head |
| Gate cross-section | \(A_g\) | Larger area lowers flow resistance | Use local 4 mm x 12 mm gate |
| Gate length | \(L_g\) | Longer gate increases friction loss | Keep gate short and direct |
| Local shell thickness | \(\delta_{shell}\) | Thicker shell reduces heat extraction | Prevent groove buildup |
| Distance from sprue | \(L_s\) | Too close causes heat radiation and cleaning issues | Keep more than 25 mm |
| Gate modulus | \(M_g\) | Must exceed casting modulus | Verify \(M_g \ge 1.2 M_c\) |
Tree design and orientation. The treeing layout is a decisive part of lost wax casting because it controls both shell-making access and heat radiation. I kept the same basic tree for the original and optimized trials so that the comparison would be valid. The sprue diameter was 30 mm. Each tree carried 12 parts. I maintained a distance of more than 25 mm between each casting and the central sprue. This reduced the thermal radiation from the sprue to the thin wall and gave the slurry and stucco enough space to coat the part evenly.
The most important change was not the tree count but the orientation of the groove. I turned the groove outward. In lost wax casting, an outward-facing groove is easier to coat, drain, inspect, and dry. It also allows the operator to see whether slurry has bridged the groove. When the groove faced inward, the narrow space was hidden and difficult to access. Slurry accumulated, drying was uneven, and the local shell became too thick. After turning the groove outward, the shell thickness around the groove became more uniform. This directly improved the thermal boundary condition during solidification.
| Tree feature | Original layout | Optimized layout | Process effect |
|---|---|---|---|
| Sprue diameter | 30 mm | 30 mm | Same metal head and tree stiffness |
| Parts per tree | 12 | 12 | Comparable productivity |
| Distance to sprue | More than 25 mm | More than 25 mm | Reduce heat radiation to thin wall |
| Groove orientation | Inward in some assemblies | Outward | Better coating, draining, drying, and inspection |
| Shell access | Restricted | Open | Less bridging and less local thickening |
| Cleaning access | Difficult | Easier | Lower risk of damage during gate removal |
I also considered the thermal radiation from the sprue. The sprue remains hot for a long time, especially in a 30 mm diameter tree. If a thin-wall casting is placed too close, the sprue can locally retard cooling and create an unintended hot spot. In lost wax casting, spacing is therefore not only a handling issue; it is a solidification-control issue. The optimized tree kept the required spacing while adding the local inner gate. This separated the thermal effects of the sprue from the thermal effects of the gate.
Shell-making process. I specified five shell layers plus a seal coat. The face coat used zircon powder with a viscosity of 36 s and 120 mesh zircon sand. The intermediate and backing layers used mullite powder and mullite sand with progressively lower viscosity and coarser stucco. The seal coat used mullite powder with a viscosity of 10 s and no stucco. The purpose of the face coat was to produce a smooth, chemically stable surface against the steel. The backing layers provided strength and thermal resistance. The seal coat protected the shell without blocking permeability.
For this lost wax casting, the critical shell-making instruction was to control the narrow groove. Before each intermediate and backing slurry, I required compressed air to clean loose sand from the groove. Where necessary, a brush was used to remove sand bridges. During slurry immersion, the operator had to drain the groove carefully and avoid slurry accumulation. The seal coat was kept thin enough to avoid blocking shell permeability. If the seal coat is too thick, gases cannot escape easily during pouring, and the shell may also become too insulating.
| Layer | Powder | Powder mesh | Slurry viscosity | Stucco | Stucco mesh | Key control |
|---|---|---|---|---|---|---|
| Face coat | Zircon | 320 | 36 s | Zircon sand | 120 | Uniform coverage, no air entrapment |
| Layer 2 | Mullite | 200 | 15 s | Mullite sand | 30 to 60 | Clean groove before slurry |
| Layer 3 | Mullite | 200 | 12 s | Mullite sand | 16 to 30 | Prevent bridging |
| Layer 4 | Mullite | 200 | 12 s | Mullite sand | 16 to 30 | Maintain uniform thickness |
| Layer 5 | Mullite | 200 | 12 s | Mullite sand | 16 to 30 | Build strength without local mass |
| Seal coat | Mullite | 200 | 10 s | None | None | Thin seal, no permeability loss |
I controlled drying with the same care as slurry composition. The face coat required uniform drying across the whole tree. The drying chamber wind speed was maintained at 3 to 5 m/s. This range allows moisture to be removed from the surface without creating excessive differential drying. In lost wax casting, nonuniform drying can cause shell cracks, local strength variation, and dimensional distortion. The groove was especially sensitive because a narrow gap dries more slowly if it faces inward. With the groove outward, airflow reached the critical area more consistently.
The drying process can be approximated by a diffusion-like relationship:
$$t_d = \frac{L^2}{D_{eff}}$$
where \(t_d\) is drying time, \(L\) is the characteristic diffusion length, and \(D_{eff}\) is the effective moisture diffusivity of the shell. The equation is simplified, but it explains why a deep narrow groove requires special attention. If \(L\) is large and \(D_{eff}\) is reduced by packing, the drying time increases. The outward-facing groove reduced the effective diffusion length and improved access to moving air. This helped avoid shell defects and maintained more uniform thermal properties.
| Control item | Target or action | Reason in lost wax casting |
|---|---|---|
| Wind speed | 3 to 5 m/s | Uniform moisture removal without shell cracking |
| Groove orientation | Outward | Better airflow and drainage |
| Slurry drainage | Controlled drain and rotation | Prevent local shell thickening |
| Sand removal | Compressed air and brush | Avoid bridging and sand accumulation |
| Seal coat thickness | Thin, no sand loss | Preserve permeability |
| Shell handling | Stable racks, no impact | Prevent cracks before dewaxing |
Dewaxing. I used a steam autoclave cycle. The shell was placed with the pouring cup downward. The transfer time from the shell-making room to the autoclave was kept to 60 s or less. This minimizes wax cooling and reduces the risk of wax entrapment. The dewaxing parameters were controlled within narrow windows. I paid particular attention to the pressure limits, charging time, dewaxing time, drain time, and preheat pressure. A stable dewaxing cycle protects the shell from cracking and ensures that the narrow groove is emptied cleanly. In lost wax casting, residual wax or incomplete drainage can lead to shell contamination, gas defects, and local hot spots.
| Parameter | Set value | Process purpose |
|---|---|---|
| Autoclave inner temperature | 175 to 185 °C | Melt and evacuate wax |
| Steam boiler pressure upper limit | 0.8 ± 0.1 MPa | Provide stable steam energy |
| Steam boiler pressure lower limit | 0.76 ± 0.1 MPa | Maintain pressure window |
| Autoclave charging time | 1000 ± 20 s | Controlled pressure rise |
| Autoclave dewaxing time | 20 ± 5 s | Complete wax removal at the shell surface |
| Drain preheat pressure | 0.05 to 0.06 MPa | Prepare drainage lines |
| Wax drain time | 100 to 500 s | Remove liquid wax fully |
| Water drain time | 50 ± 2 s | Clear condensate and residue |
Melting and pouring. I used an intermediate-frequency induction furnace with master alloy bars and gravity pouring. Before melting, I checked the furnace body for damage, the cooling water lines for leaks, the tilting mechanism for smooth operation, and the temperature measurement equipment for readiness. The master alloy charge was loaded so that the top of the bars did not exceed the induction coil height. I started the power at about 60% and increased it gradually after the current stabilized. This controlled melting reduces temperature overshoot and protects the alloy from excessive superheat.
For this lost wax casting, I set the pouring temperature to 1630 ± 10 °C, the shell preheat temperature to 1050 ± 10 °C, and the shell preheat time to 50 ± 5 min. The shell was poured directly after removal from the preheat furnace. After pouring, the tree was placed on a sand bed and allowed to cool naturally. I added an insulating covering agent to the pouring cup to enhance the feeding effect of the gating system. The superheat can be expressed as:
$$T_p = T_l + \Delta T_{superheat}$$
where \(T_p\) is the pouring temperature, \(T_l\) is the liquidus temperature, and \(\Delta T_{superheat}\) is the superheat. For a thin-wall lost wax casting, superheat must be sufficient to fill the mold, but not so high that it increases shrinkage and gas defects. The shell preheat temperature is equally important. If the shell is too cold, the thin wall may misrun. If the shell is too hot, the cooling rate is reduced and shrinkage porosity becomes more likely. The selected window was based on the balance between fillability and feeding.
| Parameter | Set value | Effect on quality |
|---|---|---|
| Melting method | Intermediate-frequency induction furnace | Controlled composition and temperature |
| Charge material | Master alloy steel bars | Consistent chemistry |
| Initial power | 60% | Stable melting and reduced overheating |
| Pouring method | Gravity pouring | Simple, repeatable, suitable for small parts |
| Pouring temperature | 1630 ± 10 °C | Balance fillability and shrinkage |
| Shell preheat temperature | 1050 ± 10 °C | Reduce thermal shock and improve fill |
| Shell preheat time | 50 ± 5 min | Uniform shell temperature |
| Cooling method | Sand bed, natural cooling | Controlled solidification after pouring |
| Pouring cup treatment | Insulating covering agent | Improve feeding and reduce top heat loss |
Trial results. I ran five trial groups for each gating design, with 60 parts in each group. The original lost wax casting produced only 6 acceptable parts, a first-pass yield of 10%. The rejects were dominated by X-ray indications of shrinkage porosity in the 2 mm wall plate. The optimized design produced 52 acceptable parts from 60, a first-pass yield of 86.7%. After the process was stabilized with the optimized lost wax casting route, the first-pass yield exceeded 95% in batch production. This improvement was achieved without changing the alloy or the fundamental inspection requirements.
| Condition | Parts poured | Acceptable parts | First-pass yield | Dominant reject mode |
|---|---|---|---|---|
| Original lost wax casting design | 60 | 6 | 10% | Shrinkage porosity at the thin wall |
| Optimized lost wax casting design | 60 | 52 | 86.7% | Minor cleaning and dimensional issues |
| Stabilized batch production | Multiple batches | More than 95% | Above 95% | No dominant shrinkage defect |
The original design had three inner gates, but the defect still appeared between them. This observation is important for lost wax casting process design. A gate must not merely be close to a hot section; it must create a continuous liquid path to the final solidification zone. In the original layout, the thin wall and the insulated groove interrupted that path. The gates fed their immediate surroundings, but they could not feed the central plate region. The added gate at the groove-adjacent hot spot changed the local thermal gradient and provided a direct feed channel. X-ray inspection after the change showed no shrinkage porosity in the previously critical plate area.
I also examined the post-pour shell condition. In the original lost wax casting, the groove had been filled with refractory material after layers 2 and 3. After preheating at 1050 °C for 50 min, the groove-adjacent shell remained hot. During pouring, the metal in the thin plate contacted this thick shell on the inside. The shell had low thermal conductivity, so heat extraction from the plate was poor. This created a hot zone exactly where the thin wall should have cooled first. The optimized process reduced slurry accumulation, turned the groove outward, and added a feed path. The combination of lower local shell thickness and better feeding removed the defect.
| Condition | Original lost wax casting | Optimized lost wax casting | Result |
|---|---|---|---|
| Groove orientation | Inward in some assemblies | Outward | Better drainage and drying |
| Local shell thickness | Excessive due to slurry and sand buildup | More uniform | Improved local heat extraction |
| Feed path to thin plate | Interrupted between gates | Direct gate at hot spot | Liquid metal available during final solidification |
| Temperature gradient | Low between gates | Higher around the added gate | Improved Niyama index |
| Shrinkage defect | Frequent, detected by X-ray | Eliminated in trial batches | Yield increased from 10% to 86.7% |
| Batch stability | Poor | Stable with controlled operation | Above 95% in production |
Process control and inspection. I implemented a control plan that linked each lost wax casting step to a measurable requirement. The purpose was to prevent the process from drifting back toward the original defect condition. The control plan covered wax pattern assembly, slurry viscosity, stucco application, drying, dewaxing, shell preheating, melting, pouring, cut-off, grinding, magnetic particle inspection, X-ray inspection, and final dimensional checks. In my experience, shrinkage defects in lost wax casting are rarely solved by a single change. They are solved by aligning geometry, shell uniformity, thermal gradients, and feeding.
| Process step | Control variable | Target or method | Response if out of control |
|---|---|---|---|
| Wax assembly | Groove orientation | Outward on every pattern | Reassemble pattern |
| Face slurry | Viscosity | 36 s | Adjust and recheck |
| Face stucco | Zircon sand mesh | 120 mesh | Verify sand supply |
| Intermediate slurry | Viscosity | 15 s for layer 2, 12 s for layers 3 to 5 | Correct viscosity |
| Groove cleaning | Loose sand and bridges | Compressed air and brush | Clean before next slurry |
| Drying | Wind speed | 3 to 5 m/s | Adjust airflow |
| Seal coat | Thickness and permeability | Thin, no sand loss | Re-coat if necessary |
| Dewaxing | Transfer time | 60 s or less | Improve logistics |
| Shell preheat | Temperature and time | 1050 ± 10 °C, 50 ± 5 min | Hold until stable |
| Pouring | Temperature | 1630 ± 10 °C | Correct melt temperature |
| Inspection | Magnetic particle and X-ray | Full requirement compliance | Segregate and review |
I used magnetic particle inspection for surface and near-surface indications. I used X-ray inspection for internal shrinkage, gas porosity, and inclusions. The critical thin plate was the primary X-ray focus. After the gate change, the X-ray images showed a more uniform density in that region. The gate root was inspected after grinding to ensure that no surface damage or microcracking remained. Dimensional checks confirmed that the added gate did not distort the thin wall and that the final envelope remained within specification.
| Inspection method | Target defect | Critical area | Acceptance action |
|---|---|---|---|
| Visual inspection | Surface finish, gate remnants, shell inclusions | All surfaces | Rework or reject |
| Magnetic particle inspection | Surface cracks and near-surface discontinuities | Thin wall and gate root | Reject if indication exceeds limit |
| X-ray inspection | Internal shrinkage and gas porosity | 2 mm plate and groove-adjacent zone | Reject if porosity exceeds standard |
| Dimensional check | Envelope and wall thickness | Outer profile and thin wall | Adjust process if drift occurs |
| Gate root inspection | Grinding damage and surface defects | Added gate contact area | Blend and polish if allowed |
Analytical summary of the lost wax casting improvement. I can summarize the optimization with a set of linked equations and process rules. The first rule is that local shell thickness must not be allowed to create an unintended hot spot. The second rule is that the gate must feed the last liquid region, not merely the visually obvious thick section. The third rule is that tree orientation must support shell-making and drying. The fourth rule is that pouring and shell preheat temperatures must be controlled within a window that balances fillability and shrinkage. These rules apply broadly to small, thin-wall lost wax casting components with narrow grooves.
The thermal modulus relationship shows why the thin plate is vulnerable:
$$M_{plate} = \frac{t_{plate}}{2}$$
For \(t_{plate} = 2\) mm, \(M_{plate}\) is approximately 1 mm. For a heavy section with \(t_{heavy} = 12\) mm, \(M_{heavy}\) is approximately 6 mm. The heavy section has a much longer solidification time:
$$\frac{t_{s,heavy}}{t_{s,plate}} \approx \left(\frac{M_{heavy}}{M_{plate}}\right)^2$$
If the moduli differ by a factor of about 6, the solidification time ratio can be on the order of 36. This simplified estimate is not exact for a complex lost wax casting, but it explains the strong tendency for the heavy section to remain liquid after the thin wall has solidified. Without a gate that remains open, the heavy section cannot draw liquid from the thin plate. The added gate provides that necessary liquid path.
I also used a feeding-distance rule as a screening tool:
$$L_f = k M$$
Here, \(L_f\) is the effective feeding distance, \(k\) is an empirical coefficient, and \(M\) is the modulus of the fed section. If the actual distance from the gate to the last liquid zone exceeds \(L_f\), shrinkage porosity is likely. In the original lost wax casting, the defect lay between two gates, so the effective feeding distance to the critical point was too long. Adding a gate at the hot spot reduced the actual distance and brought it within the effective feeding range.
| Rule | Expression or criterion | Application to this component |
|---|---|---|
| Modulus comparison | \(M = V/A\) | Identify late-solidifying regions |
| Solidification time | \(t_s = B M^2\) | Compare thin and heavy sections |
| Feeding modulus | \(M_g \ge 1.2 M_c\) | Ensure gate has enough feeding capacity |
| Feeding distance | \(L_f = k M\) | Check whether the gate can reach the last liquid zone |
| Niyama index | \(N = G/\sqrt{\dot{T}}\) | Rank shrinkage risk in simulation and trials |
| Thermal resistance | \(R_{shell} = \delta_{shell}/k_{shell}\) | Explain why groove buildup causes a hot spot |
| Heat flux | \(q = \Delta T/R_{total}\) | Link shell thickness to cooling rate |
| Drying time | \(t_d = L^2/D_{eff}\) | Support outward groove orientation |
Batch production and reproducibility. After the trial comparison, I released the optimized lost wax casting design for batch production. The process was not simply a new gate drawing; it was a complete set of operating instructions. The groove had to face outward. The added gate had to be 4 mm x 12 mm and placed on the planar surface. The shell had to be built with five layers plus a thin seal coat. The groove had to be cleaned before each intermediate slurry. The dewaxing transfer time had to remain under 60 s. The pouring temperature had to remain within 1630 ± 10 °C. The shell preheat had to remain within 1050 ± 10 °C for 50 ± 5 min. With these controls, the first-pass yield exceeded 95%.
| Batch condition | Key control | Observed result | Action |
|---|---|---|---|
| Normal production | All parameters within window | First-pass yield above 95% | Continue |
| Slurry viscosity high | Face coat above target | Thicker shell, slower drying | Adjust viscosity before next tree |
| Groove cleaned poorly | Sand bridging present | Local shell thickening | Re-clean and inspect before slurry |
| Dewax transfer too slow | Transfer above 60 s | Wax residue risk | Improve transfer logistics |
| Pouring temperature low | Below 1620 °C | Fillability risk | Hold until temperature recovers |
| Shell preheat low | Below 1040 °C | Cold shut risk in thin wall | Extend preheat or hold |
| Shell preheat high | Above 1060 °C | Slower cooling, shrinkage risk | Adjust furnace set point |
I also reviewed the economic effect. Although the optimized lost wax casting added one small gate per part, the additional cleaning time was minor compared with the previous rejection rate. The original 10% yield would have required repeated melting, shell-making, pouring, inspection, and handling for the same delivered quantity. The optimized process reduced scrap, improved capacity, and lowered inspection risk. The added gate was small enough that it did not create a new dimensional problem, and its position on a planar surface made removal straightforward.
| Factor | Original route | Optimized route | Effect |
|---|---|---|---|
| First-pass yield | 10% | 86.7% in trial, above 95% in production | Large reduction in scrap |
| Added gate | None | 4 mm x 12 mm | Small increase in cleaning |
| Shell control | Groove buildup common | Outward groove and cleaning | More stable shell |
| X-ray reject rate | High at thin plate | Low in critical area | Improved internal soundness |
| Batch repeatability | Poor | Stable with control plan | Better delivery confidence |
Risk analysis. I treated the remaining risks as process-control risks rather than design defects. The largest risk is shell thickening in the groove if operators do not clean and drain properly. The second risk is insufficient feed if the added gate is made too small or is partially blocked. The third risk is wax residue if dewaxing transfer is delayed. The fourth risk is thermal drift if pouring or preheat temperatures move outside the window. Each risk has a visible control point and a corrective action. This keeps the optimized lost wax casting process robust in daily production.
| Risk | Cause | Detection | Preventive control | Corrective action |
|---|---|---|---|---|
| Groove shell buildup | Slurry or sand accumulation | Visual inspection during shell-making | Outward orientation, compressed air, brushing | Remove excess and re-coat |
| Insufficient feeding | Added gate too small or blocked | X-ray and section review | Maintain 4 mm x 12 mm gate, clean contact face | Adjust gate size or placement |
| Wax residue | Slow transfer to autoclave | Shell interior inspection after dewaxing | Transfer in 60 s or less | Improve handling or repeat dewaxing |
| Misrun in thin wall | Pouring or shell temperature too low | Visual and X-ray inspection | Temperature window control | Hold melt or shell until within range |
| Shrinkage due to high shell preheat | Shell too hot, slow cooling | X-ray and process logs | 1050 ± 10 °C preheat | Reduce furnace set point |
| Surface damage at gate root | Aggressive grinding | Visual and magnetic particle inspection | Controlled cut-off and grinding procedure | Blend or reject if beyond limit |
Final process definition. The final lost wax casting route for this shell component can be stated as a sequence of controlled decisions. I oriented the groove outward on every wax assembly. I kept the sprue diameter at 30 mm and the distance from the sprue to each casting above 25 mm. I added a 4 mm x 12 mm inner gate at the groove-adjacent hot spot, on a planar surface clear of the functional body. I used five shell layers plus a thin seal coat, with zircon face coat and mullite backing layers. I controlled slurry viscosity, groove cleaning, drying wind speed, dewaxing transfer time, shell preheat, and pouring temperature. I verified the result with magnetic particle inspection and X-ray inspection. The optimized lost wax casting process raised first-pass yield from 10% to 86.7% in trials and above 95% in stabilized production.
| Process element | Final specification | Reason |
|---|---|---|
| Material | ZG35CrMnSi | Component requirement |
| Part envelope | 28 mm x 38 mm x 14 mm | Dimensional control |
| Minimum wall | 2 mm | Fillability and cooling control |
| Maximum wall | 12 mm | Feeding control |
| Sprue diameter | 30 mm | Metal head and tree stability |
| Parts per tree | 12 | Productivity |
| Sprue distance | More than 25 mm | Reduce heat radiation |
| Groove orientation | Outward | Shell-making and drying |
| Added inner gate | 4 mm x 12 mm at hot spot | Direct feeding |
| Shell layers | 5 plus seal coat | Strength and permeability balance |
| Face coat | Zircon, 36 s, 120 mesh zircon sand | Surface quality and thermal stability |
| Backing coat | Mullite, 15 s to 12 s, mullite sand | Shell strength |
| Seal coat | Mullite, 10 s, no stucco | Thin sealing layer |
| Drying wind speed | 3 to 5 m/s | Uniform drying |
| Dewaxing transfer | 60 s or less | Prevent wax entrapment |
| Shell preheat | 1050 ± 10 °C, 50 ± 5 min | Fillability and thermal balance |
| Pouring temperature | 1630 ± 10 °C | Balance fill and shrinkage |
| Cooling | Sand bed, natural cooling | Controlled post-pour solidification |
| Inspection | Magnetic particle inspection and X-ray | Internal and surface quality |
In summary, I found that the shrinkage porosity in this shell component was not caused by a single parameter. It was caused by the combined effect of a narrow groove, local shell thickening, an unfavorable tree orientation, and an incomplete feed path. By treating the component as a lost wax casting system rather than as an isolated part drawing, I was able to correct the shell-making condition and the feeding condition at the same time. The outward-facing groove improved shell uniformity and drying. The added 4 mm x 12 mm inner gate provided direct feeding to the last liquid region. The controlled shell, dewaxing, preheat, and pouring parameters made the result repeatable. The optimized lost wax casting process eliminated the dominant X-ray shrinkage defect and delivered a stable production yield above 95%.