
In my engineering work on gas turbine blade manufacturing, I have repeatedly seen how a conventional precision casting route becomes slow and costly when a geometry change forces a new die, a new wax pattern, and a new shell trial. The traditional sequence is usually: develop an initial process, make the die, produce wax patterns, assemble the tree, build the ceramic shell, dewax, burn out, pour, and inspect. If inspection shows that the blade is out of tolerance, the process must be corrected and the die must be revised. That loop can consume one to three months, and the cost of repeated tooling and trials is difficult to justify for development quantities, repair components, or small production lots. My focus in this article is a rapid precision casting method that replaces the wax blade pattern with an additively manufactured ABS pattern, joins that pattern to a conventional wax gating system, builds a ceramic shell around the assembly, removes the pattern and wax, sinters the shell, and pours molten metal to obtain a gas turbine blade. The method is a form of rapid precision casting because it preserves the dimensional accuracy and surface quality expected from investment casting while removing the die-making bottleneck.
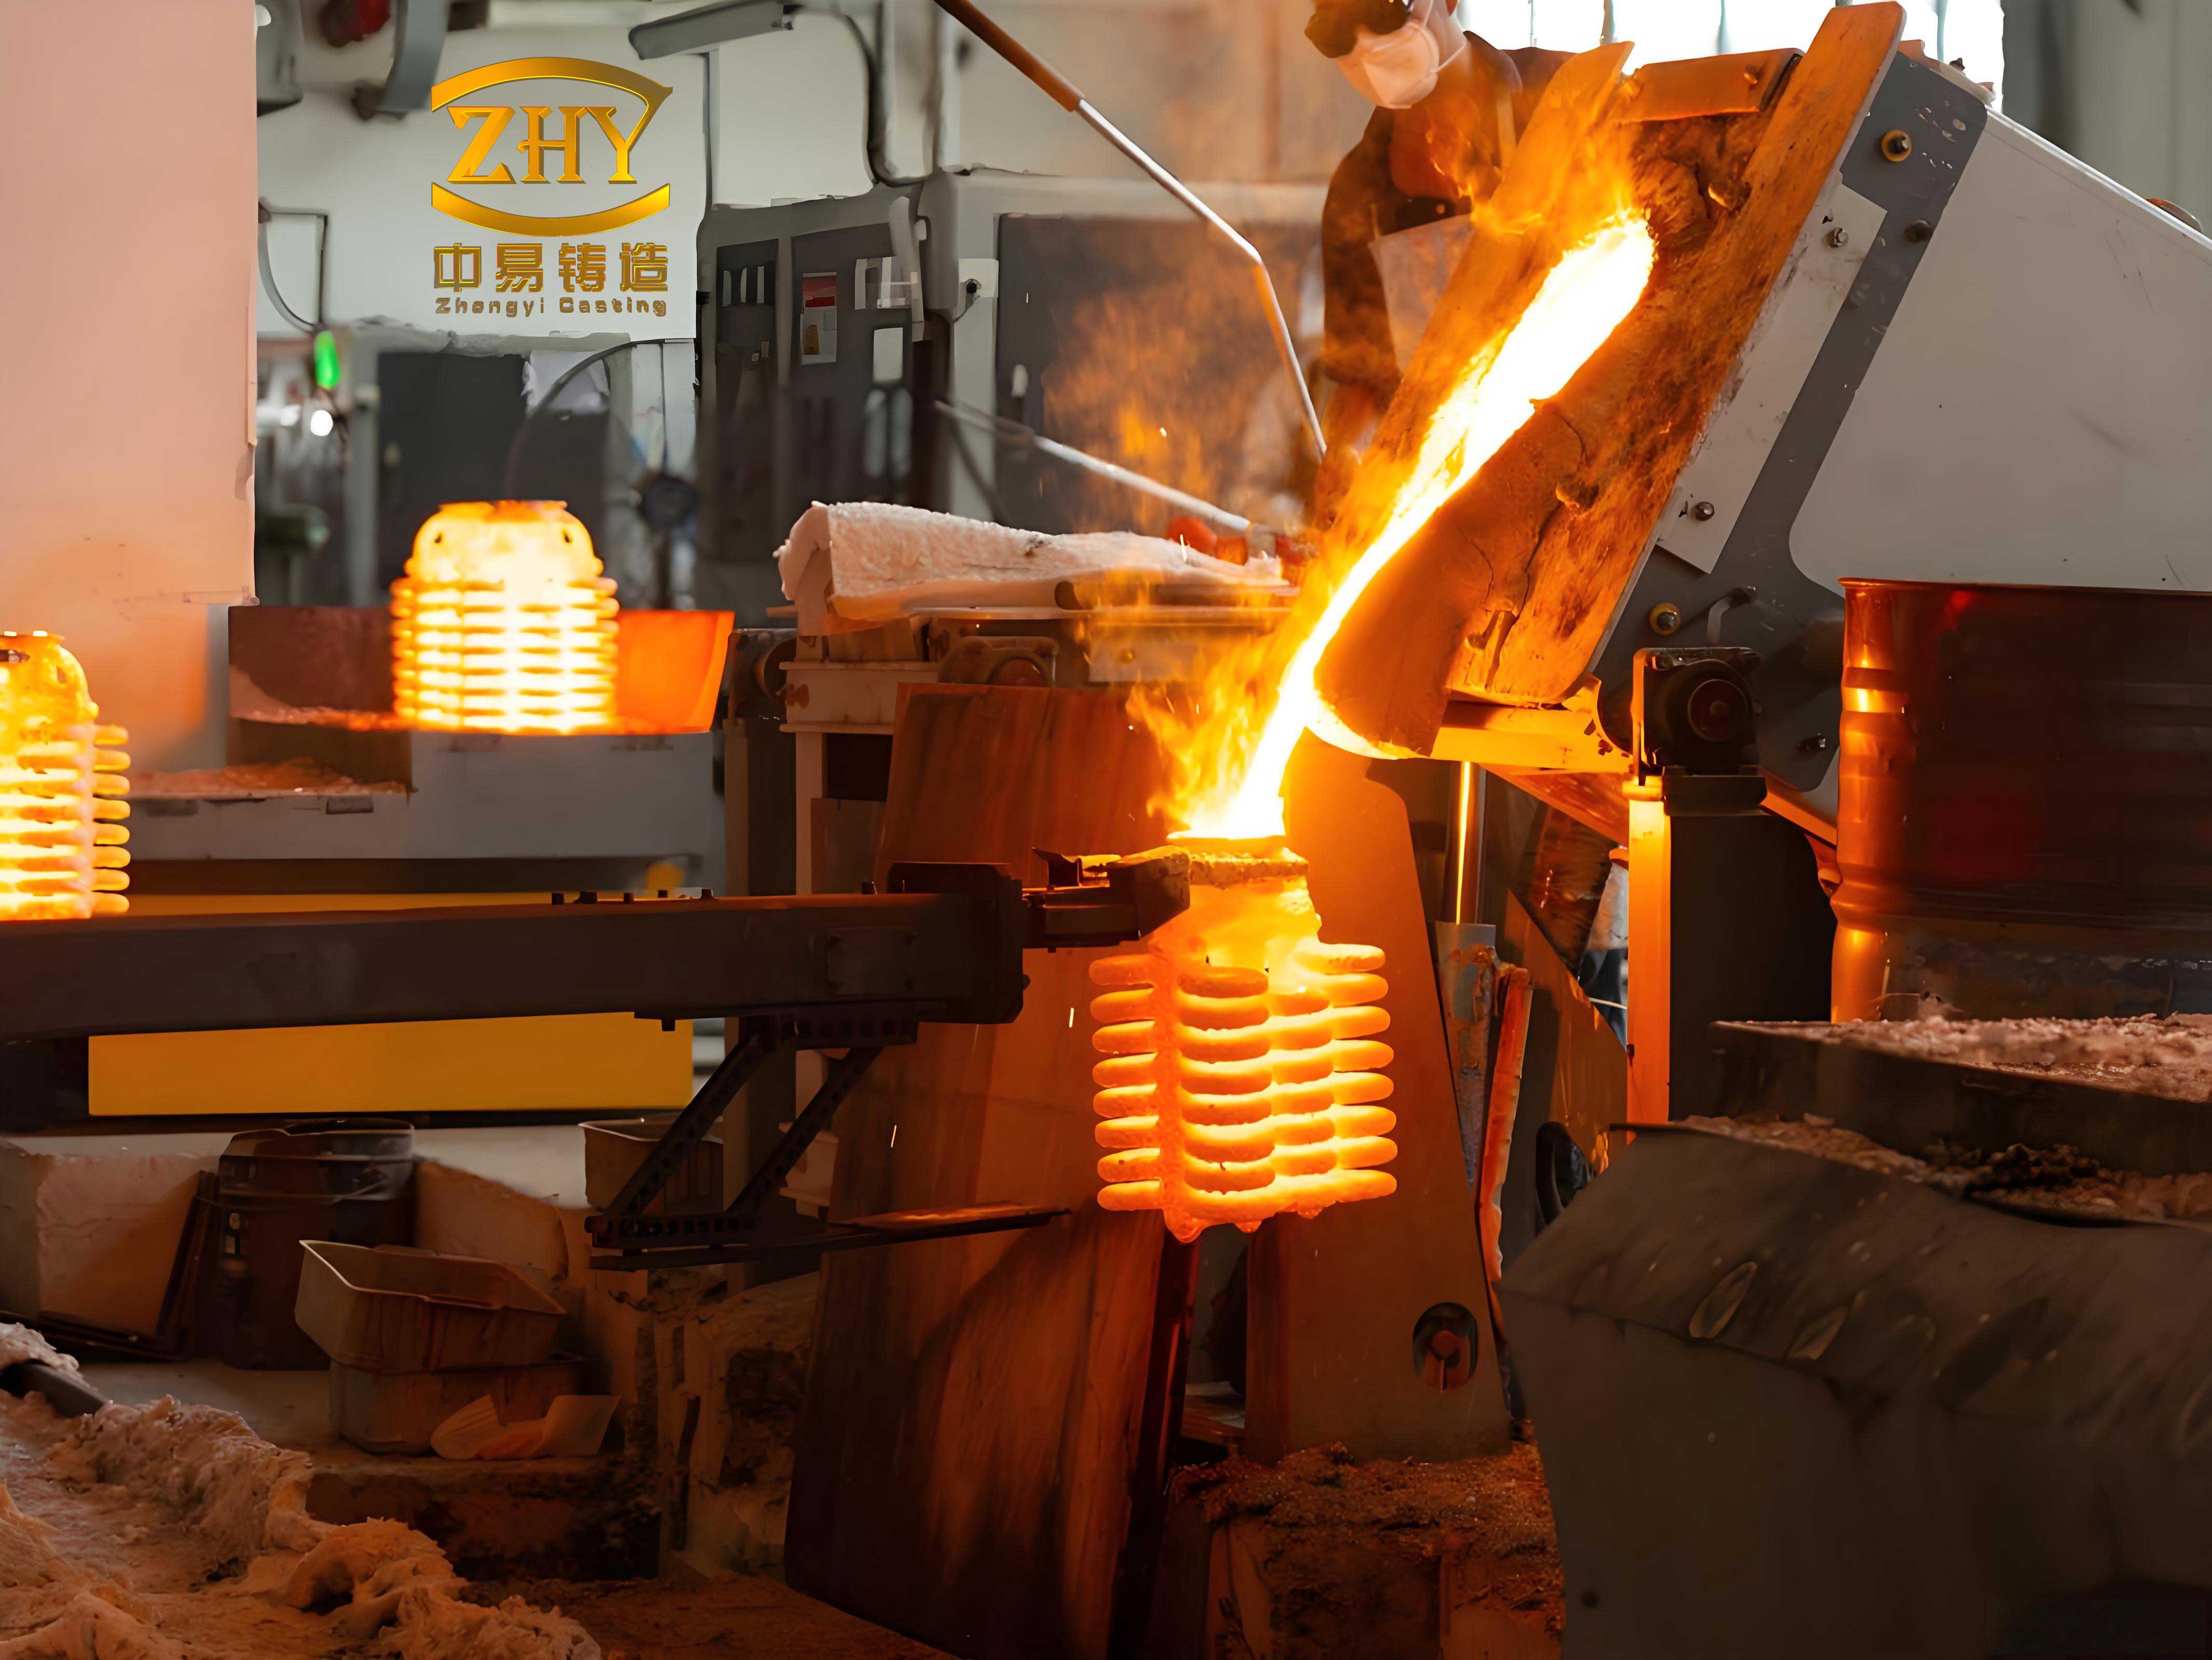
From my perspective, the value of rapid precision casting is not only speed. It is also the ability to iterate on blade geometry, gating, and shell design before committing to hard tooling. In a gas turbine compressor blade, the airfoil has a complex curved profile, a thin trailing edge, a thicker leading edge, a root platform, and sometimes internal passages. Conventional machining struggles with such shapes, while precision casting can produce them economically when the process is stable. The difficulty is that the shell must survive thermal expansion mismatch, dewaxing, burnout, and pouring. In my trials, the shell sometimes cracked during burnout or before pouring, which produced flash, surface defects, and dimensional drift. The rest of this article explains how I diagnosed that cracking with a deformation coordination model and finite element analysis, and how I optimized the rapid precision casting process to obtain a sound blade.
Table 1. Comparison of conventional precision casting and the rapid precision casting route I used.
| Aspect | Conventional precision casting | Rapid precision casting with printed ABS pattern |
|---|---|---|
| Pattern tooling | Machined die and wax injection tooling required | No blade die required; CAD model is printed directly |
| Pattern material | Wax or filled wax | ABS via fused deposition modeling |
| Gating system | Wax runner, sprue, and gate | Wax gating system bonded to ABS blade pattern |
| Iteration time | Weeks to months per major geometry change | Days per geometry change |
| Iteration cost | High due to die rework and new trials | Lower because only the printed pattern and shell are repeated |
| Best application | Mature high-volume production | Development, repair, small batches, complex blades |
| Main risk | Die wear, wax shrinkage, shell cracking | Shell cracking, burnout residues, ABS expansion mismatch |
| Dimensional control | Well established after tooling is mature | Requires compensation for printing, shrinkage, and shell expansion |
| Process flexibility | Limited by die geometry | High because the digital model can be changed freely |
The first question I had to answer was whether the rapid precision casting route could actually produce a blade rather than only a pattern. The route I developed began with a three-dimensional CAD model of a gas turbine compressor moving blade. I converted the model to STL format and printed it in ABS using a fused deposition modeling machine. The printed blade became the positive pattern. I then bonded the ABS blade to a wax gating system, choosing the root as the metal entry region because a large planar area at the root provides a more stable fill and reduces impingement on the airfoil. After assembly, I coated the module with multiple layers of slurry and stucco. Each layer was dried under controlled temperature and humidity. After the shell had enough green strength, I removed the wax and the ABS pattern, cleaned the cavity, and sintered the shell at high temperature. Finally, I poured molten stainless steel into the hot shell and obtained a blade casting. This was the first confirmation that rapid precision casting was feasible for this blade family.
Table 2. Process route for the rapid precision casting trial.
| Step | Action in my trial | Purpose | Critical variables |
|---|---|---|---|
| 1 | Create the blade CAD model and convert to STL | Digital master for rapid precision casting | Shrinkage compensation, datum selection |
| 2 | Print the blade pattern in ABS by FDM | Replace the wax blade pattern | Layer height, extrusion width, infill, orientation |
| 3 | Bond the ABS blade to a wax gating system | Form the investment casting module | Gate location, bond strength, alignment |
| 4 | Build the ceramic shell by dipping and stuccoing | Create the refractory mold | Slurry viscosity, powder size, sand mesh, drying |
| 5 | Dry each layer in a controlled environment | Develop green strength and avoid cracks | Temperature, humidity, airflow, time |
| 6 | Dewax and remove the ABS pattern | Open the mold cavity | Heating rate, pressure, hold time |
| 7 | Burn out and sinter the shell | Remove residues and strengthen the shell | Peak temperature, ramp rate, atmosphere |
| 8 | Pour molten metal into the hot shell | Form the blade casting | Pouring temperature, superheat, fill time |
| 9 | Remove the shell and finish the blade | Obtain the final precision casting | Cutoff, grinding, heat treatment, inspection |
For the shell, I initially used five layers. The first layer was a fine refractory coating to reproduce the airfoil surface. The following layers increased shell thickness and mechanical strength. The slurry was based on silica sol, and the refractory powder and sand were selected to match the thermal expansion and sintering behavior of the shell system. The first layer used a fine sand, while later layers used coarser sand to build thickness. In a typical precision casting shell, each layer must be fully dried before the next dip; otherwise, trapped moisture can generate steam during burnout and cause explosions or cracks. I therefore maintained a controlled drying room and recorded temperature and humidity for each layer. Despite this control, the burnout stage produced cracks in several shells, especially near the leading and trailing edges.
Table 3. Initial shell build used in the rapid precision casting trial.
| Layer | Binder | Refractory powder | Stucco sand | Sand mesh | Function |
|---|---|---|---|---|---|
| 1 | Silica sol | Fine fused alumina | Corundum | 70 | Surface reproduction and airfoil detail |
| 2 | Silica sol | Aluminosilicate powder | Chamotte | 30/60 | Intermediate strength and thickness |
| 3 | Silica sol | Aluminosilicate powder | Chamotte | 30/60 | Build shell body |
| 4 | Silica sol | Aluminosilicate powder | Coarse refractory sand | 16/30 | Increase thickness and thermal mass |
| 5 | Silica sol | Aluminosilicate powder | Coarse refractory sand | 16/30 | Final sealing and handling strength |
After the first pours, I found that some blades had flash on the leading and trailing edges, surface roughness, and small dimensional deviations. These defects pointed to shell cracking rather than a pouring problem. The cracks were not random; they concentrated at the airfoil edges where the radius of curvature is smallest. In a precision casting process, the shell is not a rigid body. It expands and contracts with temperature, and it interacts with the pattern material during heating. Because the ABS pattern has a much larger coefficient of thermal expansion than the ceramic shell, the pattern pushes outward on the shell as the assembly is heated. The shell resists that expansion. If the resulting tensile stress exceeds the shell strength, a crack forms. Once a crack opens, molten metal can escape or the shell can deform, which ruins the precision casting.
Table 4. Defects observed and the probable rapid precision casting causes.
| Observed defect | Location | Probable cause | Consequence for precision casting |
|---|---|---|---|
| Shell crack | Leading edge and trailing edge | Thermal expansion mismatch between ABS and shell | Metal leakage, flash, dimensional error |
| Surface roughness | Airfoil surface | Shell crack or incomplete surface wetting | Poor finish, extra finishing cost |
| Dimensional drift | Chord and thickness | Shell deformation during burnout | Blade outside tolerance |
| Residual ash or gas | Internal cavity | Incomplete ABS removal | Gas defects and inclusions |
| Incomplete fill | Thin trailing edge | Low superheat or shell crack | Mistun and cold shut |
To analyze the shell cracking, I started with a simplified deformation coordination model. I treated the ABS blade pattern as a long hollow cylinder and the ceramic shell as a concentric outer cylinder in intimate contact with it. This is not the exact blade geometry, but it captures the essential thermal expansion mismatch. Before heating, the ABS cylinder has an inner radius \(a\), an outer radius \(b\), and the shell has an outer radius \(c\). The shell thickness is therefore \(c-b\). The assembly is heated from an initial temperature \(T_1\) to a final temperature \(T_2\). The temperature change is:
$$ \Delta T = T_2 – T_1 $$
If the heating is approximately linear with time, I can write:
$$ T(t) = T_0 + a t $$
where \(T_0\) is room temperature, \(a\) is the heating rate, and \(t\) is time. In my trial, \(T_0\) was approximately \(22^\circ C\), and the shell experienced a significant portion of the mismatch before the ABS pattern softened or decomposed. For a first estimate, I considered a temperature rise to \(150^\circ C\), which is below the full burnout temperature but high enough to produce measurable thermal stress.
The free thermal expansion of the ABS pattern at the interface would be \(2\pi b \alpha_1 \Delta T\), where \(\alpha_1\) is the thermal expansion coefficient of ABS. Because the shell constrains the pattern, the pattern is compressed elastically. The net radial displacement of the pattern at the interface is:
$$ X_1 = 2\pi b \alpha_1 \Delta T – \frac{2\pi b \sigma_1}{E_1} $$
The shell wants to expand according to its own thermal expansion coefficient \(\alpha_2\), but it is pushed outward by the pattern. Its net displacement at the interface is:
$$ X_2 = 2\pi b \alpha_2 \Delta T + \frac{2\pi b \sigma_2}{E_2} $$
Because the two bodies remain in contact and do not separate before cracking, the displacements must match:
$$ X_1 = X_2 $$
Substituting the expressions gives the deformation coordination equation:
$$ 2\pi b \alpha_1 \Delta T – \frac{2\pi b \sigma_1}{E_1} = 2\pi b \alpha_2 \Delta T + \frac{2\pi b \sigma_2}{E_2} $$
After canceling \(2\pi b\), I obtained:
$$ \alpha_1 \Delta T – \frac{\sigma_1}{E_1} = \alpha_2 \Delta T + \frac{\sigma_2}{E_2} $$
For equilibrium, the compressive force in the pattern must balance the tensile force in the shell. If the pattern thickness is \(t_1 = b-a\) and the shell thickness is \(t_2 = c-b\), a simple force balance can be written as:
$$ \sigma_1 t_1 + \sigma_2 t_2 = 0 $$
This equation is approximate because the blade is not a perfect cylinder, but it shows the key relationship: a thicker shell reduces the tensile stress in the shell for a given expansion mismatch. That conclusion matched my observation that a five-layer shell was too weak at the thin airfoil edges, while a thicker shell was more resistant to cracking. However, thickness alone is not enough. The curvature of the airfoil also concentrates stress. At the leading and trailing edges, the radius of curvature is small, so the shell must bend sharply around the pattern. The bending stress increases as the radius decreases. A common approximation for bending stress in a curved shell is:
$$ \sigma_b \propto \frac{E t}{2(1-\nu^2)R} $$
where \(E\) is the elastic modulus, \(t\) is shell thickness, \(\nu\) is Poisson’s ratio, and \(R\) is the local radius of curvature. This expression explains why the cracks appeared at the edges: \(R\) was smallest there, so \(\sigma_b\) was largest. Increasing the edge radius in the CAD model, or making the shell more compliant locally, should reduce the stress. Increasing the shell thickness increases bending stiffness, which can be beneficial for global strength but can also increase local bending stress if the shell cannot conform. This trade-off is central to precision casting shell design.
Table 5. Parameters used in the simplified deformation coordination model.
| Parameter | Symbol | Value used for ABS pattern | Value used for ceramic shell | Unit |
|---|---|---|---|---|
| Elastic modulus | \(E\) | 1.0 | 630 | MPa |
| Poisson’s ratio | \(\nu\) | 0.43 | 0.26 | – |
| Thermal expansion coefficient | \(\alpha\) | \(92.0 \times 10^{-6}\) | \(4.0 \times 10^{-6}\) | \(^\circ C^{-1}\) |
| Initial temperature | \(T_1\) | 22 | 22 | \(^\circ C\) |
| Evaluation temperature | \(T_2\) | 150 | 150 | \(^\circ C\) |
| Temperature change | \(\Delta T\) | 128 | 128 | \(^\circ C\) |
| Interface radius | \(b\) | Blade local radius | Shell inner radius | mm |
The elastic modulus of the ABS pattern is much lower than that of the ceramic shell, so the pattern can accommodate some mismatch by compressing or creeping. However, the thermal expansion coefficient of ABS is more than twenty times larger than that of the shell. The product \(\alpha \Delta T\) therefore dominates the problem. For ABS:
$$ \alpha_1 \Delta T = 92.0 \times 10^{-6} \times 128 \approx 0.01178 $$
For the ceramic shell:
$$ \alpha_2 \Delta T = 4.0 \times 10^{-6} \times 128 \approx 0.000512 $$
The free expansion mismatch is approximately:
$$ (\alpha_1 – \alpha_2)\Delta T \approx 0.01127 $$
This means the ABS pattern would expand about 1.13 percent more than the shell if both were free. On a local blade dimension of, for example, 20 mm, that mismatch is about 0.225 mm. That may seem small, but in precision casting, a few tenths of a millimeter can produce a crack when the shell is thin and the local radius is small. The mismatch also occurs while the ABS is softening, so the mechanical response changes with temperature. The shell must survive the period in which the pattern is still rigid enough to push outward but the shell is already brittle. This window is dangerous for rapid precision casting.
To obtain a more detailed stress field, I built a finite element model. I used a two-dimensional plane model of the blade cross-section, including the ABS pattern and the ceramic shell. The model was created in the \(X-Y\) plane because the finite element solver required a true 2-D geometry for the plane element type I selected. I applied a bonded contact condition between the pattern and the shell so that they shared displacement at the interface. I meshed the model with four-node plane elements and refined the mesh near the leading and trailing edges. The mesh refinement was important because the stress gradient at the edges is steep, and a coarse mesh would underestimate the maximum stress. I then applied a thermal load corresponding to a temperature rise from room temperature to the evaluation temperature.
Table 6. Finite element setup for the rapid precision casting shell analysis.
| Item | Setting |
|---|---|
| Analysis type | Sequential thermal stress, static structural after thermal load |
| Model dimension | 2-D plane section of blade pattern and shell |
| Element type | Four-node plane element with thermal capability |
| Contact | Bonded contact at ABS-shell interface |
| Shell thickness cases | 6 mm and 8 mm equivalent thickness |
| Pattern structure cases | Solid ABS and low-density ABS lattice |
| Temperature load | Uniform temperature rise to 150 \(^\circ C\) |
| Boundary condition | No rigid body motion; interface compatibility enforced |
| Output | Equivalent von Mises stress, normal stress, deformation |
The thermal expansion strain in an unrestrained material is:
$$ \varepsilon_{th} = \alpha \Delta T $$
The thermoelastic constitutive relation can be written as:
$$ \varepsilon_{ij} = \frac{1+\nu}{E}\sigma_{ij} – \frac{\nu}{E}\sigma_{kk}\delta_{ij} + \alpha \Delta T \delta_{ij} $$
In the finite element formulation, the thermal load vector is assembled from the thermal strain:
$$ [K]\{u\} = \{F_{th}\} $$
where \([K]\) is the stiffness matrix, \(\{u\}\) is the displacement vector, and \(\{F_{th}\}\) is the equivalent thermal load vector. The thermal load vector is obtained by integrating the thermal strain over the element volume:
$$ \{F_{th}\} = \int [B]^T [D] \{\varepsilon_{th}\} \, dV $$
Here, \([B]\) is the strain-displacement matrix and \([D]\) is the elastic constitutive matrix. The equivalent von Mises stress is calculated from the principal stresses:
$$ \sigma_v = \sqrt{\frac{1}{2}\left[(\sigma_1-\sigma_2)^2 + (\sigma_2-\sigma_3)^2 + (\sigma_3-\sigma_1)^2\right]} $$
The finite element results showed that the maximum equivalent stress occurred at the leading and trailing edges, exactly where the shell cracks appeared. The stress decreased toward the mid-chord region. This distribution is consistent with the curvature argument: the shell must bend around the small-radius edges, and the thermal expansion mismatch adds a tensile component. The result also showed that a solid ABS pattern produced higher shell stress than a low-density pattern. A solid pattern has more material and a higher effective stiffness, so it pushes harder against the shell during heating. A low-density or lattice pattern deforms more easily and reduces the contact pressure. This finding led directly to one of my optimization measures.
Table 7. Finite element stress trend in the rapid precision casting shell.
| Region | Relative curvature | Observed stress level | Crack risk | Reason |
|---|---|---|---|---|
| Leading edge | Very small radius | Maximum | Very high | Bending plus thermal mismatch |
| Trailing edge | Very small radius | Maximum | Very high | Thin shell and sharp curvature |
| Mid-chord suction side | Large radius | Moderate | Medium | Lower bending stress |
| Mid-chord pressure side | Large radius | Moderate | Medium | Lower bending stress |
| Root transition | Moderate radius | Moderate to high | Medium to high | Section change and gating constraint |
After the finite element analysis, I proposed and tested three main optimization measures for the rapid precision casting process. The first measure was to increase the leading-edge and trailing-edge radii in the blade model. In a gas turbine blade, the edge geometry is aerodynamically important, so I could not change it arbitrarily. I therefore increased the radii only within the allowable aerodynamic tolerance and blended the change smoothly into the airfoil. The goal was to reduce the local curvature and thereby reduce the bending stress in the shell. The second measure was to print the ABS pattern with a lattice or low-density internal structure instead of a solid structure. A lower-density pattern has less thermal mass and lower effective stiffness, so it imposes less expansion force on the shell. The third measure was to change the shell build from five layers to six and a half layers, which increased the shell thickness and strength without changing the slurry chemistry. I kept the same powder and sand recipes to avoid introducing new variables.
Table 8. Optimization measures for the rapid precision casting shell problem.
| Measure | Original condition | Optimized condition | Expected effect | Mechanism |
|---|---|---|---|---|
| Edge radius modification | Sharp leading and trailing edges | Enlarged and blended edge radii | Lower local bending stress | Increase \(R\) in \(\sigma_b \propto 1/R\) |
| Pattern internal structure | Solid ABS pattern | Lattice or low-density ABS pattern | Lower contact pressure | Reduce pattern stiffness and thermal mass |
| Shell thickness | Five layers | Six and a half layers | Higher shell strength | Increase load-bearing section and thermal mass |
| Drying control | Standard controlled drying | Tighter humidity and time windows | Fewer green cracks | Remove residual moisture |
| Burnout control | Fixed ramp and hold | Slower initial ramp, controlled hold | Lower thermal shock | Reduce transient temperature gradient |
The mathematical basis for the edge-radius optimization is straightforward. For a curved shell, the bending stress is inversely proportional to the local radius of curvature. If I increase the radius from \(R_1\) to \(R_2\), the approximate stress ratio is:
$$ \frac{\sigma_{b2}}{\sigma_{b1}} \approx \frac{R_1}{R_2} $$
If \(R_2\) is twice \(R_1\), the bending stress is approximately halved. In practice, the stress reduction is less than this ideal ratio because the thermal expansion mismatch still contributes, but the trend is clear. The finite element analysis after the edge-radius change showed a reduction in peak equivalent stress at the edges. The lattice pattern also reduced the peak stress because the pattern could compress more easily. The thicker shell increased the section modulus and reduced the tensile stress for the same contact force. The combination of the three measures produced the best result.
The shell thickness effect can also be approximated by a force balance. If the contact force per unit length is \(F\), and the shell behaves as a membrane of thickness \(t\), the average tensile stress is:
$$ \sigma_{shell} \approx \frac{F}{t} $$
Increasing \(t\) from five layers to six and a half layers increases the load-bearing area and reduces \(\sigma_{shell}\). However, the shell also becomes stiffer, which can increase the contact pressure. In my trials, the net effect was positive because the original five-layer shell was too thin for the thermal mismatch. The thicker shell did not crack during burnout, and it maintained its shape during pouring. This is a practical example of how precision casting shell design requires a balance between strength and compliance.
Table 9. Approximate relative stress factors before and after optimization.
| Factor | Original condition | Optimized condition | Relative change |
|---|---|---|---|
| Edge radius | Small \(R\) | Larger \(R\) | Bending stress reduced |
| Pattern density | Solid ABS | Lattice ABS | Contact pressure reduced |
| Shell layers | 5 | 6.5 | Shell strength increased |
| Thermal mismatch | \(\alpha_1 \gg \alpha_2\) | Same materials, better compliance | Peak stress reduced |
| Crack location | Leading and trailing edges | No visible cracks | Defect eliminated |
After implementing the optimized rapid precision casting route, I repeated the blade casting trial. The shell survived dewaxing, ABS removal, burnout, and pouring. The resulting blade had a clean airfoil surface, no flash from shell cracks, and dimensions that were much closer to the CAD model. The trailing edge, which had been the most vulnerable region, was intact. The root and platform also filled properly. I examined the shell after burnout and found no visible cracks at the leading or trailing edges. The successful trial confirmed that the deformation coordination model and finite element analysis were useful for guiding process optimization. It also confirmed that rapid precision casting can produce gas turbine blades without the long die-making cycle.
Table 10. Results before and after rapid precision casting optimization.
| Response variable | Before optimization | After optimization | Improvement |
|---|---|---|---|
| Shell cracking at edges | Frequent | Not observed | Defect eliminated |
| Surface flash | Present | Absent | Better precision casting surface |
| Dimensional deviation | Large | Reduced | Closer to nominal blade |
| Shell integrity after burnout | Poor | Good | Higher process yield |
| Pattern removal | Some residue risk | Cleaner cavity | Fewer gas defects |
| Iteration time | Weeks to months with die changes | Days with printed patterns | Faster precision casting development |
In my view, the broader lesson is that rapid precision casting is not simply a substitution of materials. It is a coupled thermal-mechanical process. The ABS pattern, the wax gating system, the ceramic shell, and the molten metal all have different thermal expansion coefficients, stiffnesses, and failure strains. When the assembly is heated, the pattern expands much more than the shell. When the metal is poured, the shell is heated from the inside while its outside may be cooler. When the casting solidifies, the metal contracts and the shell constrains it. Every stage can generate stress. A successful precision casting process must manage those stresses, not only the geometry. My deformation coordination equation and finite element model gave me a way to quantify the most dangerous stage and to select optimization measures that addressed the root cause.
I can summarize the thermal stress problem with a few governing relations. The total strain in the shell during heating is the sum of elastic strain and thermal strain:
$$ \varepsilon_{total} = \varepsilon_{elastic} + \varepsilon_{thermal} $$
For a constrained interface, the elastic strain must accommodate the mismatch between the free thermal expansions of the two materials:
$$ \varepsilon_{elastic,shell} \approx (\alpha_1 – \alpha_2)\Delta T – \varepsilon_{elastic,pattern} $$
The shell stress is then approximately:
$$ \sigma_{shell} \approx E_2 \left[(\alpha_1 – \alpha_2)\Delta T – \varepsilon_{elastic,pattern}\right] $$
This equation shows that increasing \(\varepsilon_{elastic,pattern}\) reduces \(\sigma_{shell}\). A compliant or low-density ABS pattern allows more elastic deformation, which is exactly why the lattice pattern helped. It also shows that reducing the effective \(\Delta T\) during the period when the pattern is rigid will reduce stress. A slower burnout ramp can help, but it increases cycle time. The optimization therefore involves a trade-off between stress reduction and productivity.
For the pouring stage, the heat conduction equation governs the temperature field in the shell and casting:
$$ \rho c_p \frac{\partial T}{\partial t} = \nabla \cdot (k \nabla T) + q $$
where \(\rho\) is density, \(c_p\) is specific heat, \(k\) is thermal conductivity, and \(q\) is any internal heat source. In a precision casting shell, the temperature gradients produce thermal strains that can crack the shell or distort the casting. A thicker shell increases thermal resistance and can slow cooling, which may reduce thermal shock but can also affect grain structure. For gas turbine blades, the solidification behavior is critical, so the shell design must be compatible with the desired cooling rate. In my trial, the thicker shell did not harm the blade solidification because the blade section was relatively thin and the pour temperature was high enough to fill the mold.
Table 11. Thermal and mechanical properties used in the approximate calculations.
| Material | Elastic modulus \(E\) | Poisson ratio \(\nu\) | Thermal expansion \(\alpha\) | Role in rapid precision casting |
|---|---|---|---|---|
| ABS pattern | Low, approximately 1.0 MPa near softening | 0.43 | High, approximately \(92 \times 10^{-6}\) | Positive pattern, expands strongly during heating |
| Ceramic shell | Approximately 630 MPa | 0.26 | Low, approximately \(4 \times 10^{-6}\) | Refractory mold, resists expansion |
| Wax gating | Low, temperature dependent | Approximately 0.4 | High, similar to wax systems | Feeds metal and connects pattern to sprue |
| Molten alloy | Temperature dependent | Approximately 0.3 in solid state | Alloy dependent | Fills cavity and forms blade |
Another important practical point is gate location. In rapid precision casting, the gating system must be designed for the printed pattern, not for a wax pattern. The bond between the ABS blade and the wax runner must be strong enough to survive handling and dipping, but it must also disappear cleanly during dewaxing and burnout. I selected the root as the entry region because it is the thickest part of the blade and can feed the thin airfoil. A root gate also avoids direct impingement on the leading edge, which reduces erosion of the shell and turbulence in the metal. If the gate were placed on the thin trailing edge, the shell would be locally heated and stressed, increasing the chance of a crack. The gate design therefore interacts with the thermal stress problem.
Table 12. Gating design considerations for rapid precision casting of blades.
| Consideration | Preferred choice in my trial | Reason |
|---|---|---|
| Entry location | Blade root | Large area, stable fill, feeds thin airfoil |
| Gate orientation | Aligned with root platform | Reduces impingement and shell erosion |
| Runner size | Large enough to avoid premature freezing | Ensures complete fill |
| Bond to ABS pattern | Wax adhesive compatible with both materials | Survives dipping and dewaxing |
| Removal path | Direct path for wax and ABS escape | Prevents residue and gas defects |
| Thermal mass | Balanced with shell thickness | Avoids hot spots and cracks |
The drying process also deserves attention. In precision casting, each shell layer must lose moisture before the next layer is applied. If the drying is incomplete, the residual water turns to steam during burnout. The volume expansion of water to steam is enormous, and the resulting pressure can crack the shell from the inside. I controlled the drying room temperature and humidity and extended the drying time for the early layers. The first layer, which is in direct contact with the blade surface, was especially important because it controls surface finish and must not trap moisture against the ABS pattern. A slower initial burnout ramp further reduces the risk of steam explosions and thermal shock. These process controls are part of the rapid precision casting optimization, even though they do not change the blade geometry.
Table 13. Burnout and drying control variables for rapid precision casting.
| Stage | Variable | Original practice | Optimized practice | Effect on shell cracking |
|---|---|---|---|---|
| Layer drying | Humidity | Standard controlled | Tighter control | Lower residual moisture |
| Layer drying | Time | Fixed schedule | Extended for early layers | Better green strength |
| Dewaxing | Heating rate | Moderate | Slower initial rate | Lower thermal shock |
| ABS removal | Hold time | Standard | Sufficient for complete removal | Less residue and gas |
| Burnout | Peak temperature | 970 to 1030 \(^\circ C\) | Within same range but controlled | Complete sintering without deformation |
| Burnout | Ramp rate | Fast in early stage | Slower in early stage | Lower transient stress |
| Pouring | Shell temperature | Hot shell | Hot shell with uniform soak | Reduced thermal gradient |
The economic benefit of rapid precision casting is also worth quantifying. In the conventional route, the total lead time can be expressed as:
$$ T_{conv} = T_{design} + T_{tool} + N(T_{trial} + T_{rework}) $$
where \(N\) is the number of iterations required to correct the die or process. In the rapid precision casting route, the die-making time is replaced by printing time:
$$ T_{rapid} = T_{design} + T_{print} + T_{shell} + T_{burnout} + T_{pour} + T_{finish} $$
The savings in lead time are:
$$ \eta_T = 1 – \frac{T_{rapid}}{T_{conv}} $$
Similarly, the cost can be approximated as:
$$ C_{conv} = C_{tool} + N C_{trial} + C_{scrap} $$
and
$$ C_{rapid} = C_{print} + C_{shell} + C_{pour} + C_{finish} + C_{scrap} $$
For development quantities, \(C_{tool}\) is often the largest term, so eliminating the die can reduce cost significantly. The exact savings depend on blade size, alloy, and inspection requirements, but the direction is clear: rapid precision casting is economically attractive when the number of parts is small or when the design is still changing. My trial demonstrated this advantage in practice because I could modify the CAD model, reprint the ABS pattern, and rebuild the shell without waiting for a new die.
Table 14. Lead time and cost terms in conventional and rapid precision casting.
| Term | Conventional precision casting | Rapid precision casting | Comment |
|---|---|---|---|
| Design time | \(T_{design}\) | \(T_{design}\) | Same CAD effort |
| Tooling time | \(T_{tool}\) | Eliminated or reduced | No blade die required |
| Print time | Not applicable | \(T_{print}\) | Depends on blade size and FDM parameters |
| Shell time | \(T_{shell}\) | \(T_{shell}\) | Similar layer count and drying |
| Burnout and pour | \(T_{burnout}+T_{pour}\) | \(T_{burnout}+T_{pour}\) | Similar thermal cycle |
| Iteration cost | High due to die rework | Low because only pattern is reprinted | Main advantage of rapid precision casting |
| Scrap cost | \(C_{scrap}\) | \(C_{scrap}\) | Reduced by better shell design |
I also considered the limitations of the rapid precision casting method. The ABS pattern must be removed completely. If any ash or carbon residue remains, it can react with the molten metal or create gas porosity. The burnout schedule must therefore be validated for the specific ABS material and shell system. The ABS pattern also has a rougher surface than a wax pattern because of the FDM layer lines. In my trial, the first slurry layer filled the layer lines, but for critical airfoil surfaces, the pattern may need sanding, vapor smoothing, or a finer print resolution. The thermal expansion mismatch remains a fundamental issue, but it can be managed by compliant pattern structures, optimized edge radii, and sufficient shell thickness. Finally, the mechanical properties of an ABS pattern are temperature dependent, so the finite element model should ideally use temperature-dependent properties rather than a single room-temperature value. Even with these limitations, rapid precision casting is a powerful method for gas turbine blade development and repair.
Table 15. Advantages and limitations of rapid precision casting for gas turbine blades.
| Category | Advantages | Limitations | Mitigation in my process |
|---|---|---|---|
| Tooling | No die required | Print resolution limits surface finish | Fine print parameters, first slurry layer |
| Iteration | Fast geometry changes | Repeated printing and shell building | Use for development and small batches |
| Thermal behavior | Allows low-density compliant patterns | ABS expands much more than shell | Lattice pattern, edge radius increase |
| Shell integrity | Thicker shell can be built | Thicker shell may be stiffer | Balance thickness and compliance |
| Burnout | ABS can be thermally removed | Residue risk | Controlled ramp and hold |
| Cost | Lower tooling cost | Printing and manual assembly cost | Suitable for low volume |
In my final assessment, the most important technical insight was that shell cracking in rapid precision casting is not a random defect. It is a predictable thermo-mechanical response to the expansion mismatch between the printed pattern and the ceramic shell. The deformation coordination equation showed that the shell stress depends on the difference in thermal expansion, the elastic moduli, and the thickness ratio. The finite element analysis showed that the stress concentrates at the leading and trailing edges because of their small radius of curvature. The optimization measures addressed these causes directly: larger edge radii reduced bending stress, a lattice ABS pattern reduced contact pressure, and a thicker shell increased load-bearing capacity. After these changes, the rapid precision casting trial produced a complete and sound blade.
The process route I used can be summarized in a compact sequence. I created the blade model, printed it in ABS, bonded it to a wax gating system, built a six-and-a-half-layer ceramic shell, dried each layer under controlled conditions, removed the wax and ABS, sintered the shell, poured molten stainless steel, and finished the blade. The result was a gas turbine blade produced by rapid precision casting without a machined die. The method is especially valuable for advanced gas turbine and aircraft engine components because it allows engineers to test geometry, gating, and thermal compensation quickly. It also supports repair and remanufacturing, where the required quantity may be small and the available lead time is short.
For future work, I would extend the finite element model to three dimensions and include temperature-dependent material properties for ABS and the shell. I would also measure the actual shell strength at burnout temperature and use that data to calibrate the failure criterion. A coupled thermal-mechanical model with contact evolution could predict when the pattern separates from the shell or when the shell cracks. I would also study the effect of different lattice patterns and print orientations on the contact pressure. Finally, I would optimize the burnout cycle with in-situ temperature measurement to reduce residual stress without increasing cycle time. These steps would make rapid precision casting even more reliable for gas turbine blades and other complex components.
Table 16. Recommended future work for rapid precision casting optimization.
| Area | Recommended action | Expected benefit |
|---|---|---|
| Material modeling | Use temperature-dependent ABS and shell properties | More accurate stress prediction |
| Geometry | Build a full 3-D blade and shell model | Capture edge and root stress concentrations |
| Contact | Model debonding and separation at the interface | Predict crack initiation more realistically |
| Shell strength | Measure high-temperature fracture strength | Calibrate failure criteria |
| Pattern design | Compare lattice densities and print orientations | Minimize contact pressure |
| Burnout | Use in-situ thermocouples and controlled ramps | Reduce transient thermal stress |
| Inspection | Apply computed tomography to green and fired shells | Detect internal cracks before pouring |
In conclusion, my work on gas turbine blades showed that rapid precision casting can replace the conventional die-based route for development and small-batch production. The key challenge was shell cracking caused by the thermal expansion mismatch between the ABS pattern and the ceramic shell. I analyzed the problem with a deformation coordination equation and finite element stress analysis. The results showed that the maximum stress occurs at the leading and trailing edges, where the curvature is highest. I optimized the blade model by increasing the edge radii, optimized the pattern by using a low-density lattice structure, and optimized the shell by increasing the number of layers from five to six and a half. The optimized process produced a complete precision casting with no shell cracks and improved dimensional control. The method reduces lead time and cost, and it provides a practical path for rapid precision casting of gas turbine blades, repair parts, and other complex components.
Table 17. Final rapid precision casting process window used in the successful trial.
| Parameter | Final setting |
|---|---|
| Pattern material | ABS with lattice internal structure |
| Pattern process | Fused deposition modeling |
| Gating system | Wax runner bonded to blade root |
| Shell layers | Six and a half layers |
| First layer sand | Fine corundum, 70 mesh |
| Intermediate layers | Aluminosilicate powder with chamotte sand |
| Outer layers | Coarse refractory sand, 16/30 mesh |
| Drying | Controlled temperature and humidity, extended early drying |
| Burnout | 970 to 1030 \(^\circ C\), slower initial ramp |
| Pouring | Molten stainless steel into hot shell |
| Result | Sound blade casting by rapid precision casting |
The successful blade confirmed that the rapid precision casting method is not limited to prototypes. With proper thermal-mechanical design, it can deliver the dimensional accuracy and surface integrity expected from precision casting. I believe the approach can be extended to other gas turbine hot-section and compressor components, especially where internal cooling passages, complex platforms, or repair geometries make conventional tooling expensive. The combination of additive manufacturing, ceramic shell engineering, and finite element analysis creates a feedback loop that shortens development and improves first-pass yield. In my experience, that loop is the real advantage of rapid precision casting.