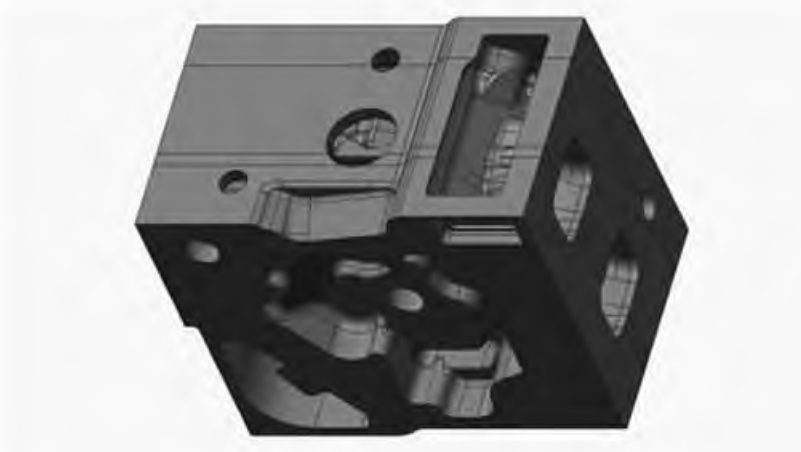
The crankcase serves as the foundational component of diesel engines, enduring significant mechanical and thermal stresses during operation. Nuclear power applications impose stringent requirements, including rapid startup times (e.g., 10 seconds to rated speed), necessitating flawless manufacturing. This article details a targeted supervision methodology applied to the resin sand casting process for 18PA6B crankcases, integrating risk-based analysis to prevent historical defects and ensure zero-rejection outcomes.
1. Introduction to the 18PA6B Diesel Engine and Crankcase
The 18PA6B diesel generator, designed by SEMT Pielstick and manufactured domestically, powers critical infrastructure in nuclear facilities like Tianwan and Yangjiang. Key specifications include:
| Parameter | Value |
|---|---|
| Configuration | V18, twin-turbocharged |
| Rated Power | 6500 kW |
| Rated Speed | 1000 rpm |
| Weight | 90 tons |
| Crankcase Material | Ductile Iron (13 tons rough weight) |
Failure modes like internal cracks or gas holes in critical zones (e.g., camshaft bores) historically caused late-stage rejections during machining, emphasizing the need for rigorous supervision of the casting process.
2. Crankcase Casting Process
The resin sand casting process comprises six stages: molding, core making, assembly, pouring, cleaning, and heat treatment. Key steps include:
- Molding: Resin sand mixed with catalyst is compacted into molds to form upper/lower drags. Chills and ceramic tubes are positioned to regulate solidification:
$$ t_s = k \left( \frac{V}{A} \right)^2 $$
where \( t_s \) = solidification time, \( V \) = volume, \( A \) = surface area, and \( k \) = mold constant. - Core Making: 40+ core types (120+ units) are produced manually or via shooting machines. Core integrity is vital to avoid gas defects:
$$ G = \frac{P_{gas} \cdot V_{core}}{T} $$
where \( G \) = gas formation potential, \( P_{gas} \) = gas pressure, \( V_{core} \) = core volume, \( T \) = temperature. - Assembly: Cores are assembled in the drag, dried, and sealed. Internal complexity limits inspection access.
- Pouring: Molten iron is melted at 1500–1550°C, treated with nodularizers (e.g., MgFeSi), and poured. Critical parameters:
Parameter Target Pouring Temperature 1420 ± 20°C Pouring Time < 180 seconds Cooling Duration 7 days

3. Analysis of Supervision Links
Casting quality hinges on four high-risk stages, where defects correlate to process variables:
| Process | Risk Factors | Defect Correlation |
|---|---|---|
| Molding | Chill misplacement, mold strength | Shrinkage porosity (30% historical) |
| Core Making | Core deformation, chill adhesion | Sand inclusions, gas holes (45%) |
| Assembly | Core shift, moisture retention | Dimensional inaccuracy, blowholes |
| Pouring | Temperature deviation, slag entrapment | Cold shuts, inclusions (25%) |
Past projects showed recurring defects in camshaft bores (gas holes) and cylinder holes (cracks), often detected post-machining. A risk-based supervision model prioritizes these zones using severity indices:
$$ R_i = P_i \times S_i $$
where \( R_i \) = risk score, \( P_i \) = probability of occurrence, \( S_i \) = severity impact.
4. Supervision Process Control
Supervision targets 100% first-pass yield via preventive checks aligned with defect origins.
4.1. Molding and Core Making Control
Equipment/material audits precede process verification:
- Mold/Core Equipment: Validate dimensional tolerance of metal patterns (< ±0.5mm) and sand strength via试样 testing (target: >1.2 MPa).
- Chill Inspection: Ensure no rust, pits, or dimensional drift. Chill area must cover 15–20% of hot spots:
$$ A_{chill} = 0.18 \times A_{hotspot} $$
4.2. Assembly Control
Humidity control (<60% RH) and worker certification are mandatory. Core alignment is verified using go/no-go gauges for critical features (e.g., camshaft bore cores).
4.3. Pouring Control
Real-time monitoring ensures parameter compliance:
| Checkpoint | Method | Acceptance |
|---|---|---|
| Chemical Composition | Spectrometry pre-pour | C: 3.6–3.9%, Si: 2.2–2.6% |
| Ladle Drying | Thermocouple verification | >200°C |
| Pouring Rate | Timer + flow observation | Consistent stream |
5. Conclusion
Implementing this supervision strategy for the casting process across six crankcases achieved 100% first-pass yield, eliminating historical defects like camshaft bore gas holes. Key outcomes:
- Defect prevention via risk-focused checks reduced scrap costs by 35%.
- Strict humidity control during assembly averted moisture-related porosity.
- Real-time pouring parameter logging enabled traceability.
This approach demonstrates that integrating process analytics, environmental control, and historical defect mapping into supervision protocols ensures robustness in large-scale casting production. Future work will expand predictive modeling for defect probability (\( P_i \)) using machine learning.
