
I have spent much of my recent engineering work on the production of heavy, ring-shaped ductile iron casting for wind-power applications. The material concerned is a low-temperature, high-elongation grade equivalent to EN-GJS-400-18U-LT and often specified in national standards as QT400-18L. The parts I focused on included front and rear cover plates for a 4.2 MW wind turbine. These are thick-wall annular components with a large modulus, long solidification time, and a strong tendency to form internal shrinkage cavities and loose zones. Because the internal quality of every ductile iron casting must be controlled with penetrant testing, magnetic particle testing, and ultrasonic testing, even a small shrink defect can cause rejection. My objective was therefore not merely to make the ductile iron casting sound on the surface, but to improve the entire casting process so that the internal structure becomes dense, graphite nodules become fine, and the rejection rate falls.
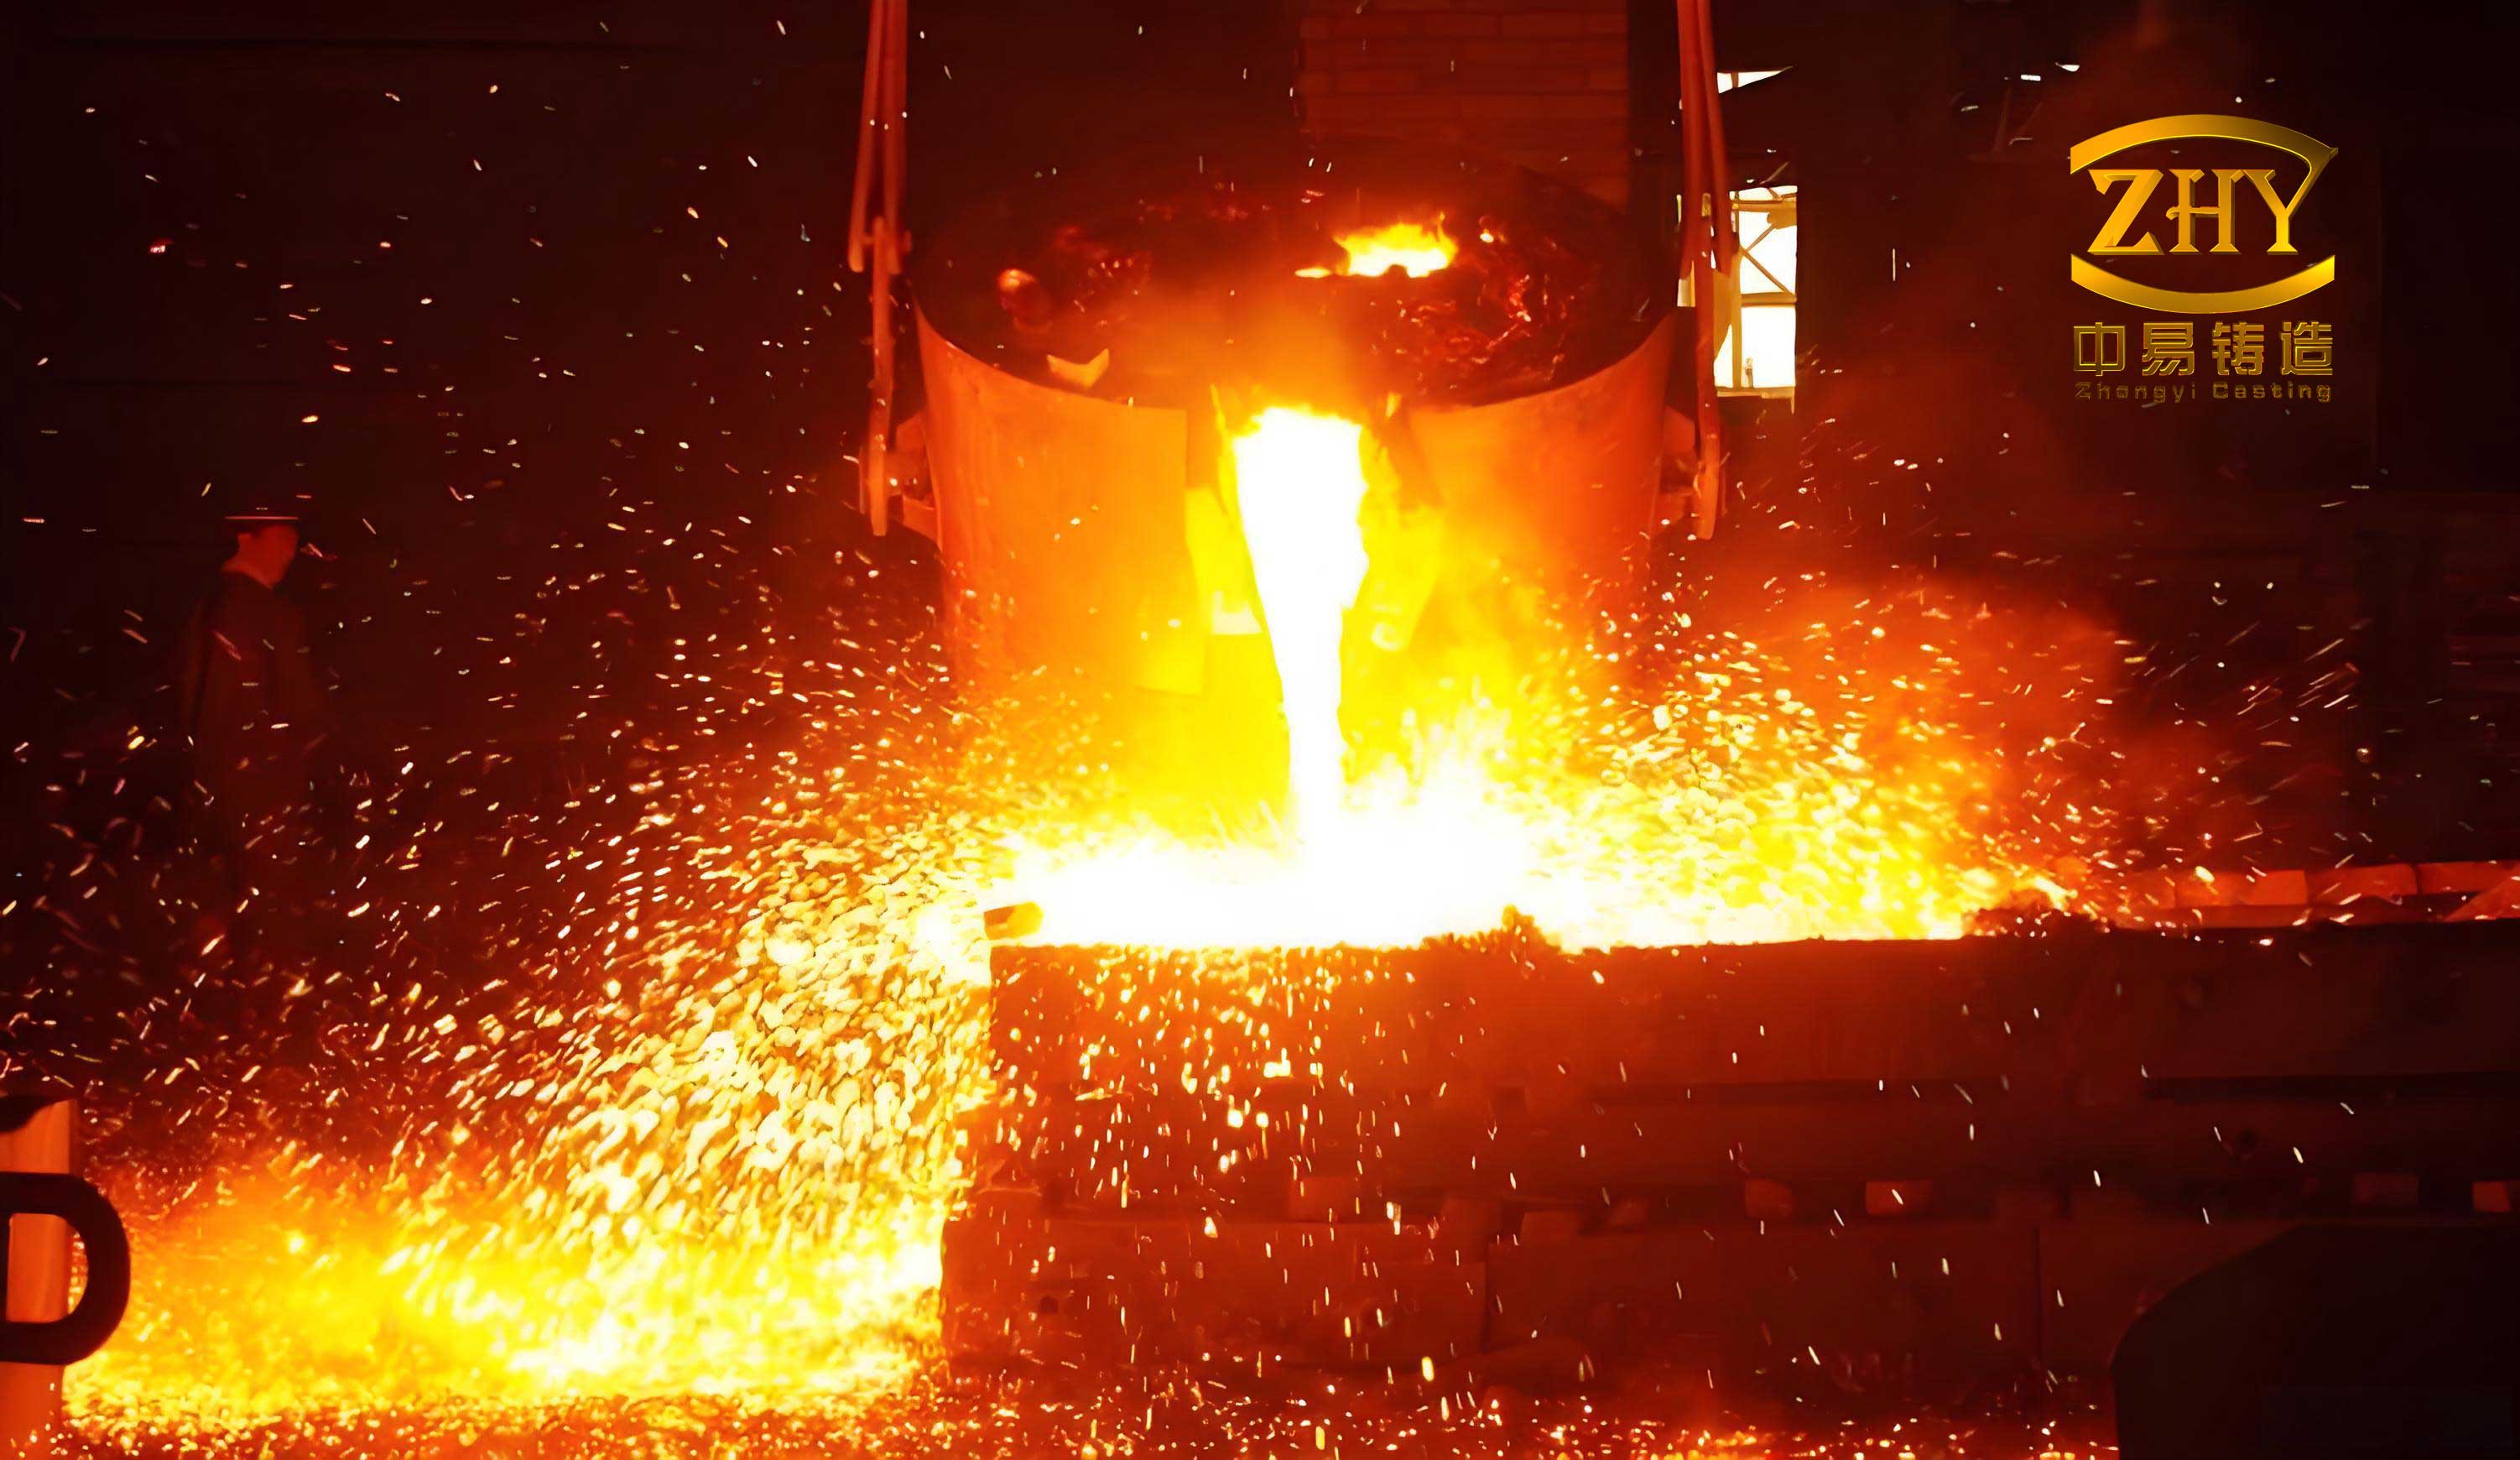
In my experience, a ductile iron casting of this size cannot be improved by a single change. The defect mechanism is coupled to carbon equivalent, inoculation practice, nodularization, mold hardness, chill placement, pouring temperature, gating design, coating permeability, and moisture content in the mold. I therefore treated the problem as a system. I used tables to track every variable, and I used simple thermal and solidification formulas to explain why each change should work. The result was a more stable ductile iron casting process, a higher yield of acceptable castings, and a lower cost per accepted ring.
Defect Formation in Heavy Ring Ductile Iron Casting
Ductile iron casting solidifies in a mushy mode over a wide temperature interval. In a heavy ring, the thermal center remains liquid long after the outer skin has formed. The solid and liquid coexist in a paste-like zone, and the mold wall can be pushed outward by graphite expansion. If the mold is not rigid enough, the casting volume increases, the feeding path is broken, and shrinkage porosity appears. The total volumetric change in a ductile iron casting can be written as a sum of liquid contraction, solidification contraction, solid contraction, graphite expansion, and mold-wall movement:
$$ \epsilon_{net} = \epsilon_{liquid} + \epsilon_{solidification} + \epsilon_{solid} – \epsilon_{graphite} – \epsilon_{mold} $$
Here, \(\epsilon_{net}\) is the net contraction that must be fed. If \(\epsilon_{net}\) is positive, a shrink cavity or loose structure is likely. If graphite expansion can be used to compensate liquid contraction, the ductile iron casting can become self-feeding. However, this compensation only works when the mold has enough hardness, the cooling rate is properly controlled, and the graphite nodule count is high enough.
The carbon equivalent is a first-order variable for any ductile iron casting. For a hypoeutectic or near-eutectic iron, I used the common expression:
$$ CE = C + \frac{Si}{3} + \frac{P}{2} $$
When \(CE\) is too low, the alloy is far from the eutectic point, the freezing range becomes wide, and the ductile iron casting requires more feeding. When \(CE\) is too high, graphite flotation, coarse nodules, and reduced mechanical properties can appear. The optimum for the heavy wind-power ductile iron casting was a narrow window near the eutectic range, combined with strong inoculation and controlled cooling.
The local solidification time can be estimated by the Chvorinov relation:
$$ t_s = B \left( \frac{V}{A} \right)^n $$
where \(V\) is the casting volume, \(A\) is the heat-transfer surface area, \(B\) is the mold constant, and \(n\) is a exponent usually close to 2. The modulus \(M = V/A\) becomes large in the thick ring sections. A large modulus means a long \(t_s\), a wide mushy zone, and a high risk of shrink porosity. I therefore needed to increase the local cooling rate and reduce the effective modulus of the hot spots. The Niyama criterion helped me judge the risk:
$$ N = \frac{G}{\sqrt{\dot{T}}} $$
where \(G\) is the temperature gradient and \(\dot{T}\) is the cooling rate. A low \(N\) value indicates a high probability of shrinkage porosity. For the ductile iron casting, the goal was to raise \(G\) and \(\dot{T}\) in the thick ring sections so that the Niyama value exceeded the critical threshold.
| Defect type | Physical mechanism | Process variable | Countermeasure for the ductile iron casting |
|---|---|---|---|
| Shrinkage cavity | Large liquid contraction cannot be fed through a wide mushy zone | Modulus, pouring temperature, feeding path | External chills at bottom, inner ring, and outer ring |
| Shrinkage porosity | Low temperature gradient and low cooling rate near the thermal center | Niyama value, mold hardness, chill spacing | Uniform chill placement and controlled sand hardness |
| Gas porosity | Moisture, coating gas, or air entrapment creates internal pressure | Mold baking, coating type, pouring cup design | Torch preheating, hot-air baking, dedicated pouring cup |
| Slag inclusion | Turbulent flow folds slag into the mold cavity | Gating design, pouring speed, slag removal | Pouring basin, slag skimming, controlled pouring time |
| Graphite degeneration | Nodularization fades before solidification is complete | Time after nodularization, inoculation | Pour within 15 minutes and use in-stream inoculation |
| Mold wall movement | Graphite expansion pushes the resin sand wall outward | Sand hardness, compaction, binder level | Hardness target of 85 to 90 units and uniform ramming |
This table summarizes the logic I used. Each defect had a metallurgical cause and a process lever. The improvement plan was built by combining these levers rather than by changing one variable at a time. For a large ductile iron casting, the interaction between graphite expansion and mold rigidity is especially important. If the mold yields, the expansion is wasted, and the casting behaves as if it had a much larger shrinkage demand.
Material Requirements and Acceptance Targets
The wind-power ductile iron casting had to meet strict mechanical and internal-quality requirements. The grade is a ferritic ductile iron with high elongation and low-temperature toughness. I set the process targets so that the final casting would not only pass the tensile test but also survive ultrasonic inspection. The mechanical property targets are shown below.
| Property | Symbol | Target for the ductile iron casting |
|---|---|---|
| Tensile strength | \(R_m\) | 400 MPa minimum |
| Yield strength | \(R_{p0.2}\) | 240 MPa minimum |
| Elongation | \(A\) | 18 percent minimum |
| Impact energy | \(KV\) | 12 J minimum at the specified low temperature |
| Graphite shape | Nodularity | 85 percent minimum |
| Graphite size | Nodule count | Fine and uniform, suitable for ultrasonic acceptance |
| Matrix | Ferrite and pearlite | Predominantly ferritic, with controlled pearlite |
The ultrasonic acceptance criterion was the most difficult to satisfy. A ductile iron casting can pass tensile testing and still be rejected if a shrink cavity is located in a critical section. I therefore used the mechanical targets as boundary conditions and the internal soundness as the primary objective. The casting was inspected with penetrant testing, magnetic particle testing, and ultrasonic testing. For the ultrasonic method, the attenuation of the sound wave can be expressed as:
$$ A = A_0 e^{-\alpha x} $$
where \(A_0\) is the initial amplitude, \(A\) is the amplitude after distance \(x\), and \(\alpha\) is the attenuation coefficient. A loose structure increases \(\alpha\), so a dense ductile iron casting gives a cleaner ultrasonic signal. This is why I focused on nodule count and cooling rate, not only on chemical composition.
Chill Placement and Local Cooling Control
The most direct way to reduce shrink porosity in a heavy ductile iron casting is to place external chills so that the hot spots freeze directionally. I placed chills at the bottom of the casting, on the inner ring, and on the outer ring. The purpose was to increase the chilling capacity of the mold, reduce the volume of liquid metal that must be fed, and accelerate crystallization and solidification. When the cooling rate rises, the dendrite or eutectic cell structure becomes finer, the graphite nodules become smaller, and the feeding distance becomes shorter.
The heat removed by a chill can be approximated by:
$$ Q_{chill} = m c_p \left( T_{pour} – T_{solidus} \right) + m L $$
where \(m\) is the mass of the chill, \(c_p\) is the specific heat, \(T_{pour}\) is the pouring temperature, \(T_{solidus}\) is the solidus temperature, and \(L\) is the latent heat. In practice, the chill must be large enough to absorb heat from the hot spot but not so large that it creates a cold shut or excessive carbides. I used a high-quality gray iron chill material and placed it uniformly so that the cooling effect was balanced around the ring.
The local solidification time with a chill can be described qualitatively as:
$$ t_{local} = t_0 e^{-k A_c} $$
where \(t_0\) is the solidification time without a chill, \(A_c\) is the effective contact area of the chill, and \(k\) is an empirical coefficient. This expression is not a precise design formula, but it captures the principle: increasing chill contact area reduces the local solidification time. The chill dimensions and placement used for the ductile iron casting are listed below.
| Location in the ductile iron casting | Chill type | Dimensions in mm | Quantity | Function |
|---|---|---|---|---|
| Bottom of the ring | External chill | 350 x 80 x 30 | 8 | Promote directional freezing from the bottom |
| Inner ring | External chill | 250 x 150 x 40 | 4 | Reduce the thermal center at the inner hub |
| Outer ring | External chill | 250 x 60 x 25 | 4 | Increase cooling at the outer rim and balance heat flow |
I verified the chill placement by observing the solidification pattern and by ultrasonic inspection. The chills had to be clean, dry, and free of rust or coating defects. Any moisture on the chill surface would produce gas defects, so the chills were preheated before pouring. I also checked that the chill did not touch the pouring stream directly, because that would cause local freezing and cold shuts. The result was a more uniform temperature field and a shorter mushy zone in the ductile iron casting.
The effectiveness of a chill depends on the thermal resistance at the chill-metal interface. I controlled this by keeping the chill surface dry and by using a suitable coating. If the chill is too cold or wet, gas defects form. If the chill is too warm, the chilling effect is lost. The preheating step was therefore not optional; it was part of the chill design. For the ductile iron casting, the chills were heated until they could “sweat” slightly, which removed surface moisture and reduced the tendency for gas porosity.
Dedicated Pouring Cup and Gating Improvement
The pouring system for a heavy ductile iron casting must deliver clean metal quickly and smoothly. I designed a dedicated pouring cup for the wind-power cover. The cup keeps the metal stream full, reduces the contact area between liquid iron and air, and prevents gas and slag from being drawn into the mold cavity. It also reduces the impact of the liquid stream on the resin sand mold, which lowers sand erosion and inclusion defects.
The gating area can be estimated with the Bernoulli-type relation:
$$ A_g = \frac{W}{\rho t c \sqrt{2 g H}} $$
where \(A_g\) is the gate area, \(W\) is the casting weight, \(\rho\) is the density of liquid iron, \(t\) is the pouring time, \(c\) is the discharge coefficient, \(g\) is gravitational acceleration, and \(H\) is the effective metal head. This formula helped me check that the pouring time and gate area were consistent with a fast but non-turbulent fill. For a ductile iron casting, too slow a fill causes cold shuts and misruns, while too fast a fill causes turbulence, slag entrainment, and mold erosion.
The pouring cup was designed with a larger basin and a controlled outlet. The basin allows slag to float and be retained at the surface. The outlet maintains a full sprue, which prevents air aspiration. A full sprue is critical because air entrained in the gating system can appear as gas porosity in the final ductile iron casting. The cup also reduces the vertical drop of the stream, so the metal enters the mold with less splashing.
| Feature of the pouring cup | Why it matters for the ductile iron casting | Expected effect |
|---|---|---|
| Large basin volume | Keeps the stream full and allows slag to separate | Less slag inclusion and less air entrainment |
| Controlled outlet diameter | Matches the required pouring time and gate area | Stable fill rate and fewer cold shuts |
| Smooth internal contour | Reduces turbulence and vortex formation | Lower gas pickup and less mold erosion |
| Full sprue design | Prevents air aspiration through the gating system | Lower gas porosity in the ductile iron casting |
| Slag-retaining geometry | Traps floating slag and inclusions | Cleaner metal entering the mold cavity |
I also controlled the pouring temperature and pouring time. For this ductile iron casting, the pouring temperature was kept between 1330 and 1350 degrees Celsius, and the pouring time was controlled to less than 45 seconds. If the temperature was too low, the metal would freeze before filling the thin sections. If the temperature was too high, the mold would be thermally shocked, gas pressure would increase, and the risk of shrinkage would rise because the mold would expand more. The pouring cup helped me achieve a repeatable fill without increasing the pouring temperature unnecessarily.
Mold and Core Hardness Control
Graphite expansion is both a benefit and a danger in ductile iron casting. If the mold is rigid, the expansion can feed the casting and reduce shrinkage. If the mold is soft, the expansion pushes the mold wall outward, increases the casting volume, and creates a demand for more feed metal. I therefore controlled the sand mold and core hardness within a narrow range. The target hardness was 85 to 90 units on the mold hardness tester. The ramming had to be uniform, because a local soft spot can become a local expansion zone and a shrink defect.
The relationship between mold-wall movement and process variables can be represented as:
$$ \Delta V_m = f(H_s, E_s, p_{metal}, t_s) $$
where \(\Delta V_m\) is the mold-wall movement, \(H_s\) is sand hardness, \(E_s\) is the sand elastic modulus, \(p_{metal}\) is the local metal pressure, and \(t_s\) is the solidification time. Increasing \(H_s\) and \(E_s\) reduces \(\Delta V_m\). For the ductile iron casting, the resin sand system had to provide enough strength without becoming so brittle that it caused hot tearing or veining. I used a hardness map for each mold and checked the inner ring, outer ring, and bottom sections separately.
| Mold or core variable | Target | Reason for the ductile iron casting |
|---|---|---|
| Mold hardness | 85 to 90 units | Resist graphite expansion and reduce mold-wall movement |
| Core hardness | 85 to 90 units | Maintain internal dimensions and dense structure |
| Ramming uniformity | No soft spots | Prevent local expansion and shrink porosity |
| Sand compaction | Uniform around the ring | Balance heat transfer and cooling rate |
| Binder level | Controlled within specification | Provide strength without excessive gas generation |
I also paid attention to the mold coating. The original coating was an alcohol-based graphite coating. I changed it to an alcohol-based high-alumina bauxite coating with higher refractoriness. This improved resistance to metal penetration and burn-on. The coating parameters were controlled as follows: flow-coating density of 1.5 to 1.6 grams per cubic centimeter, coating thickness of 0.2 to 0.3 millimeters, and one flow-coating pass. A coating that is too thick can crack and generate gas defects. A coating that is too thin can allow sand burn-on and metal penetration. For the ductile iron casting, the high-alumina coating gave a more stable interface between the metal and the resin sand mold.
Mold Baking and Moisture Removal
Moisture is one of the most common causes of gas porosity in a ductile iron casting. Water vapor can be released from the resin binder, from the coating, or from the chill surface. If the gas pressure exceeds the local metal pressure and the mold resistance, a gas pore forms. The condition can be written as:
$$ P_{gas} \geq P_{metal} + P_{mold} $$
where \(P_{gas}\) is the gas pressure in the mold, \(P_{metal}\) is the local metal pressure, and \(P_{mold} \) is the resistance of the mold. To reduce \(P_{gas}\), I removed moisture by baking the mold and preheating the chills. I qualified two baking routes. The first route used a gasoline torch to preheat the mold, especially the chills, until the chill surface sweated. After the core was set and the mold was closed, a hot-air blower baked the mold for 1.5 to 2 hours at 200 degrees Celsius. The mold was then allowed to cool naturally for 1.5 to 2 hours before pouring. The second route allowed the mold to air-dry naturally for at least one day after molding. Then only the chills were heated with a gasoline torch for about 20 minutes per mold before closing and pouring.
The diffusion of moisture in the mold can be described qualitatively by:
$$ \frac{\partial w}{\partial t} = D \nabla^2 w $$
where \(w\) is moisture content, \(t\) is time, and \(D\) is the diffusion coefficient. Increasing temperature raises \(D\) and accelerates drying. This is why hot-air baking was effective. However, overheating the mold can damage the resin binder and create excessive gas. I therefore kept the baking temperature at 200 degrees Celsius and controlled the time.
| Baking route | Step | Time or temperature | Purpose in the ductile iron casting |
|---|---|---|---|
| Route A | Torch preheat of chills and mold surface | Until chill surface sweats | Remove surface moisture and reduce gas defects |
| Route A | Set core and close mold | Accurate core position | Maintain wall thickness and feeding path |
| Route A | Hot-air baking | 200 degrees Celsius for 1.5 to 2 hours | Drive off binder and coating moisture |
| Route A | Natural cooling before pouring | 1.5 to 2 hours | Stabilize mold temperature and avoid steam generation |
| Route B | Natural air drying after molding | At least one day | Remove bulk moisture at low cost |
| Route B | Torch preheat of chills | About 20 minutes per mold | Prevent chill-related gas defects |
I found that the baking route had a direct effect on ultrasonic results. When the mold was not dry enough, small gas pores appeared near the chill surfaces and in the thick ring sections. After the baking schedule was standardized, those indications decreased. The ductile iron casting became more consistent, and the rejection rate fell.
Melting, Nodularization, and Inoculation Practice
The melting process determines the starting condition of the ductile iron casting. For this grade, I removed scrap steel from the charge to raise the carbon content and obtain a denser graphite structure. A high carbon equivalent near the eutectic point improves graphite expansion and reduces shrinkage. However, the charge must be clean and consistent. I used low-phosphorus pig iron and controlled the addition of ferrosilicon and inoculants. The charge and treatment additions are summarized below.
| Addition | Amount | Particle size | Function |
|---|---|---|---|
| Pig iron | 1075 kg | Below 330 mm | Base charge with low impurity content |
| Nodulizer | 13.5 kg | 5 to 25 mm | Convert flake graphite to nodular graphite |
| Inoculant 1 | 9 kg | 5 to 8 mm | Promote nucleation before nodularization |
| Inoculant 2 | 2.5 kg | 1 to 3 mm | In-stream inoculation during tapping |
| 75 percent ferrosilicon | 13 kg | 40 mm | Adjust silicon content and assist inoculation |
| Covering agent | 10 kg | As specified | Protect the treatment alloy and reduce oxidation |
| Slag remover | 10 kg | As specified | Remove slag and inclusions |
| Silicon steel sheet | 10 kg | As specified | Assist nucleation and adjust silicon |
The pig iron had to be tumbled or cleaned to remove rust and dirt. The nodulizer, inoculant, and silicon steel sheet were preheated at the furnace mouth before being added. The silicon steel sheet had to be free of paint and oil. These details matter because oil, paint, and rust introduce hydrogen, oxygen, and slag into the ductile iron casting. Even a small amount of contamination can increase gas porosity and reduce nodularity.
The melting sequence I used was as follows. First, I charged the weighed pig iron into the medium-frequency furnace and melted it. When melting was nearly complete, I added 13 kg of 75 percent ferrosilicon. After complete melting, I measured the temperature. When the temperature reached 1500 degrees Celsius, I moved the self-made dam-type nodularizing ladle into the tapping pit and preheated it with the tapped iron. I skimmed the surface of the iron in the ladle with a slag remover based mainly on perlite. To ensure complete slag removal, I repeated the skimming at least two or three times. Then I returned the iron to the furnace, raised the temperature, and held it at 1530 to 1550 degrees Celsius for 4 to 5 minutes. During this holding period, I poured a sample for furnace-front chemical analysis and adjusted the iron composition.
Before nodularization, I prepared the ladle by loading the nodulizer and inoculant in sequence. The sequence was nodulizer, compaction, inoculant 1, small silicon steel pieces, and then a 6 mm steel plate cover pressed tightly over the alloy. The surrounding gaps were sealed with a small amount of slag remover. This sandwich method controls the reaction rate and improves magnesium recovery. The magnesium recovery can be expressed as:
$$ \eta_{Mg} = \frac{Mg_{final}}{Mg_{added}} \times 100\% $$
A high and stable magnesium recovery is essential for a consistent ductile iron casting. If recovery is low, nodularity falls and the graphite shape becomes unacceptable. If recovery is too high, magnesium vapor creates violent reactions, slag, and gas defects.
After the ladle preparation, I shut down the furnace to let the iron temperature drop. I skimmed the slag and measured the temperature. When the temperature reached 1460 to 1480 degrees Celsius, I tapped the iron for nodularization. During tapping, I first released two-thirds of the iron. The tapping speed was fast, and the nodularization reaction lasted about 90 seconds. After the reaction became quiet, I released the remaining one-third of the iron while adding inoculant 2 as an in-stream inoculant. This two-stage tapping practice gave good nodularity and minimized fade.
After tapping, I used an iron rake to push and mix the slag and iron, then skimmed the slag. I measured and recorded the temperature before and after skimming. I took a sample from at least 20 centimeters below the iron surface and poured a wedge test block, a cylindrical metallographic specimen, and a mechanical test bar. I examined the wedge fracture. A good wedge showed a silver-white fracture, a dense structure, some central porosity, rounded outer contours, shrinkage depression on the sides and top, and a white chill zone of about 3 millimeters at the tip. It gave a clear metallic sound when struck. Only after the wedge indicated good nodularization did I allow pouring.
| Melting or treatment stage | Control value | Reason for the ductile iron casting |
|---|---|---|
| Melt temperature before transfer | 1500 degrees Celsius | Ensure complete melting and alloy dissolution |
| Holding temperature | 1530 to 1550 degrees Celsius | Homogenize chemistry and allow slag flotation |
| Holding time | 4 to 5 minutes | Stabilize composition without excessive oxidation |
| Nodularization temperature | 1460 to 1480 degrees Celsius | Balance reaction speed and magnesium recovery |
| Nodularization reaction time | About 90 seconds | Complete reaction without excessive magnesium loss |
| Pouring window after nodularization | Within 15 minutes | Prevent nodularization fade and graphite degeneration |
| Pouring temperature | 1330 to 1350 degrees Celsius | Ensure fillability while limiting shrinkage and gas defects |
| Pouring time | Less than 45 seconds | Reduce temperature loss and avoid cold shuts |
The time between the end of nodularization and the end of pouring was kept within 15 minutes. A longer delay causes magnesium fade, promotes abnormal graphite growth, and can lead to exploded or worm-like graphite. This is unacceptable in a low-temperature ductile iron casting. I used a strict time window and organized the pouring crew so that the mold was ready before the treatment ladle was tapped. I also assigned one person to block slag during pouring. The pouring temperature was measured with an infrared pyrometer, and the pouring time was recorded for every mold.
Chemical Composition and Microstructure Control
For a ductile iron casting with 400 MPa tensile strength and 18 percent elongation, the matrix must be predominantly ferritic, and the graphite must be nodular and fine. I controlled carbon, silicon, manganese, phosphorus, sulfur, magnesium, and trace elements. The carbon equivalent was kept close to the eutectic value to encourage graphite expansion. Silicon was controlled to promote ferrite and suppress carbides. Manganese and phosphorus were kept low to avoid segregation and embrittlement. Sulfur and oxygen were controlled because they consume magnesium and reduce nodularity.
The nodularity can be defined as:
$$ Nodularity = \frac{\sum A_i}{A_{total}} \times 100\% $$
where \(\sum A_i\) is the total area of nodular graphite particles and \(A_{total}\) is the total graphite area. A nodularity above 85 percent is generally required for this grade. The nodule count per square millimeter is also important. A higher nodule count means more expansion centers and a more uniform expansion. The nodule diameter can be related to cooling rate by:
$$ d_g = k \dot{T}^{-m} $$
where \(d_g\) is the nodule diameter, \(\dot{T}\) is the cooling rate, and \(k\) and \(m\) are empirical constants. Faster cooling produces finer nodules. This is another reason the chills and mold hardness were so important. They increased \(\dot{T}\) and reduced \(d_g\), which improved both shrinkage resistance and ultrasonic response.
| Element or parameter | Target range | Effect on the ductile iron casting |
|---|---|---|
| Carbon | 3.5 to 3.8 percent | Promote graphite expansion and reduce shrinkage |
| Silicon | 2.2 to 2.8 percent | Promote ferrite and control nodularity |
| Manganese | 0.30 percent maximum | Limit pearlite and segregation |
| Phosphorus | 0.04 percent maximum | Reduce embrittlement and low-temperature impact loss |
| Sulfur | 0.02 percent maximum | Protect magnesium recovery |
| Magnesium | 0.03 to 0.06 percent | Ensure nodular graphite |
| Carbon equivalent | Near eutectic | Balance shrinkage and graphite flotation |
| Nodule count | High and uniform | Improve density and ultrasonic quality |
The microstructure was checked on samples from the wedge and from the casting. I looked for a predominantly ferritic matrix with small amounts of pearlite. A fully ferritic matrix is desirable for elongation and low-temperature toughness, but a small amount of pearlite can help tensile strength if it is uniformly distributed. Carbides were unacceptable because they reduce elongation and impact energy. The combination of high carbon equivalent, strong inoculation, and controlled cooling helped suppress carbides.
Pouring, Solidification, and Feeding Behavior
The pouring process is the final opportunity to influence the ductile iron casting before solidification. I controlled the pouring temperature, pouring time, slag blocking, and stream stability. The pouring temperature was between 1330 and 1350 degrees Celsius. The pouring time was less than 45 seconds. The metal stream was kept full and as short as possible. The dedicated pouring cup helped achieve this. The mold was filled quickly enough to avoid cold shuts, but not so quickly that the flow became turbulent.
The Reynolds number can be used to indicate the risk of turbulence:
$$ Re = \frac{\rho v D}{\mu} $$
where \(\rho\) is density, \(v\) is velocity, \(D\) is a characteristic diameter, and \(\mu\) is dynamic viscosity. High \(Re\) indicates turbulent flow, which increases slag entrainment and gas pickup. The pouring cup and gating design reduced \(v\) and kept the flow more stable. A stable flow is especially important for a ductile iron casting because the metal has a low viscosity and can easily fold air into the mold cavity.
During solidification, the chills, the mold hardness, and the pouring temperature together determine the temperature gradient. The feeding distance can be estimated by a relation of the form:
$$ L_f = C M^n $$
where \(L_f\) is the feeding distance, \(M\) is the modulus, and \(C\) and \(n\) are constants. Increasing the temperature gradient or decreasing the modulus increases the safe feeding distance. In the heavy ring, the chills reduced the local modulus and increased the temperature gradient. The result was a shorter required feeding distance and a lower risk of shrink porosity.
| Pouring variable | Target | Effect on the ductile iron casting |
|---|---|---|
| Pouring temperature | 1330 to 1350 degrees Celsius | Balance fillability, shrinkage, and gas defects |
| Pouring time | Less than 45 seconds | Reduce cold shuts and temperature loss |
| Stream condition | Full and stable | Prevent air entrainment and slag pickup |
| Slag blocking | Dedicated person | Keep slag out of the mold cavity |
| Time after nodularization | Within 15 minutes | Prevent nodularization fade |
| Mold closure | Accurate and tight | Prevent metal flash and mold movement |
I also monitored the mold position and clamping. If the mold halves separate during pouring, metal flash forms, the internal pressure drops, and the graphite expansion is wasted. A tight mold closure is therefore part of the feeding strategy. For the ductile iron casting, the mold was clamped securely and checked before pouring. The core position was verified to ensure the wall thickness was correct. A shifted core can create a thin wall on one side and a thick wall on the other, which changes the modulus and creates a new hot spot.
Quality Inspection and Defect Verification
After pouring and cooling, the ductile iron casting was cleaned and inspected. I used penetrant testing, magnetic particle testing, and ultrasonic testing according to the applicable standard. Penetrant testing detects surface-breaking defects. Magnetic particle testing detects near-surface defects in ferromagnetic materials. Ultrasonic testing detects internal shrinkage, porosity, and inclusions. Because the casting is thick, ultrasonic testing was the most important method for internal quality. A dense ductile iron casting gives a low-noise signal and few indications. A loose structure gives scattered indications and high attenuation.
The ultrasonic attenuation equation shown earlier was used to interpret signal loss. I also compared the back-wall echo height. A clean back-wall echo indicates a sound cross-section. A reduced back-wall echo can indicate porosity, coarse graphite, or a shrink zone. I recorded the indications by location and size. When an indication was found, I checked the corresponding process variable. For example, indications near the chill surface often pointed to moisture or inadequate baking. Indications in the thermal center often pointed to insufficient chilling or low carbon equivalent. Indications near the inner ring often pointed to core hardness or core shift.
| Inspection method | Purpose | Typical defect detected | Process variable linked to the defect |
|---|---|---|---|
| Penetrant testing | Surface-breaking defects | Cracks, surface porosity | Mold coating, cooling rate, shakeout practice |
| Magnetic particle testing | Near-surface defects | Subsurface porosity, cracks | Pouring turbulence, mold moisture |
| Ultrasonic testing | Internal defects | Shrinkage cavity, porosity, inclusions | Chills, carbon equivalent, mold hardness, pouring temperature |
| Metallographic examination | Graphite shape and matrix | Abnormal graphite, carbides, excessive pearlite | Nodularization, inoculation, cooling rate |
| Mechanical testing | Tensile and impact properties | Low elongation, low impact energy | Chemistry, matrix, nodularity |
I used the inspection results to close the loop. The process was not treated as a one-time trial. Every rejected ductile iron casting was mapped and compared with the process record. The most common internal indications were located in the thick ring sections and near the chill boundaries. After the chill placement, baking schedule, and pouring cup were standardized, the frequency of those indications decreased. The ultrasonic acceptance rate improved, and the mechanical properties remained within specification.
Process Control Plan for the Ductile Iron Casting
To make the improvement repeatable, I wrote a process control plan. The plan listed the critical variables, the target values, the measurement method, and the reaction plan when a value was out of range. This was important because a heavy ductile iron casting has a long production cycle. A small drift in mold hardness, pouring temperature, or nodularization time can create a large defect. The control plan is summarized below.
| Process step | Critical variable | Target or limit | Measurement method | Reaction if out of control |
|---|---|---|---|---|
| Charge preparation | Pig iron cleanliness | No rust, oil, or paint | Visual inspection | Reject or clean the charge |
| Melting | Melt temperature | 1500 degrees Celsius before transfer | Thermocouple | Adjust furnace power and wait |
| Holding | Holding temperature and time | 1530 to 1550 degrees Celsius for 4 to 5 minutes | Thermocouple and timer | Correct temperature and repeat analysis |
| Nodularization | Treatment temperature | 1460 to 1480 degrees Celsius | Thermocouple | Do not tap until temperature is in range |
| Nodularization | Reaction time | About 90 seconds | Visual and timer | Check alloy size and ladle preparation |
| Inoculation | In-stream inoculant | 2.5 kg during final one-third tap | Weight and visual | Correct addition before pouring |
| Pouring | Pouring temperature | 1330 to 1350 degrees Celsius | Infrared pyrometer | Hold or return to furnace if too low |
| Pouring | Pouring time | Less than 45 seconds | Timer | Adjust pouring cup or gate area |
| Mold | Mold hardness | 85 to 90 units | Mold hardness tester | Re-ram or repair the mold |
| Mold | Moisture | Dry surface, no free moisture | Visual and baking record | Re-bake the mold |
| Chills | Chill condition | Clean, dry, preheated | Visual and temperature check | Clean or replace the chill |
| Pouring | Slag control | Full stream and slag blocking | Visual | Stop pouring and skim |
I found that the control plan reduced variation more than any single technical change. In ductile iron casting, variability is the enemy. A chill that is sometimes wet and sometimes dry will produce inconsistent results. A pouring temperature that sometimes reaches 1360 degrees Celsius and sometimes drops to 1320 degrees Celsius will produce both gas defects and cold shuts. By standardizing the variables, I made the good result repeatable.
Thermal and Solidification Calculations for the Heavy Ring
I used simple calculations to check the design before trial. The modulus of the heavy ring is large, so the solidification time is long. I estimated the modulus of a section as:
$$ M = \frac{V}{A} $$
For a ring with outer radius \(R_o\), inner radius \(R_i\), and height \(h\), the volume is:
$$ V = \pi h \left( R_o^2 – R_i^2 \right) $$
The heat-transfer area depends on whether the section is exposed to the mold on all sides or only on some sides. In a thick ring, the outer and inner cylindrical surfaces plus the top and bottom faces control the cooling. The modulus can be approximated by:
$$ M = \frac{\pi h \left( R_o^2 – R_i^2 \right)}{2\pi h \left( R_o + R_i \right) + 2\pi \left( R_o^2 – R_i^2 \right)} $$
This expression shows that increasing the height or the radial thickness increases the modulus. A larger modulus requires a longer solidification time and more feeding. The chills reduce the effective heat-transfer area and increase the local cooling rate, which lowers the local solidification time. The pouring temperature also affects the total heat content:
$$ H_{total} = m \left[ c_p \left( T_{pour} – T_{room} \right) + L \right] $$
A higher pouring temperature increases \(H_{total}\), which increases the solidification time and the shrinkage risk. This is why I kept the pouring temperature as low as possible while still filling the mold. The dedicated pouring cup helped maintain fillability at a lower temperature.
| Thermal variable | Effect of increase | Consequence for the ductile iron casting | Control action |
|---|---|---|---|
| Modulus \(M\) | Longer solidification time | More shrink porosity risk | Use chills and reduce hot spots |
| Pouring temperature | More superheat | Longer freezing time, more shrinkage | Pour at 1330 to 1350 degrees Celsius |
| Mold hardness | Higher resistance to expansion | Better graphite expansion compensation | Keep 85 to 90 units |
| Chill contact area | Higher heat extraction | Finer structure and shorter mushy zone | Place chills uniformly |
| Moisture content | Higher gas pressure | More gas porosity | Bake and preheat the mold |
| Nodule count | More expansion centers | More uniform expansion and less shrinkage | Control inoculation and cooling rate |
These calculations are not a substitute for trial pours, but they help explain the observed behavior. When the modulus is high, the thermal center remains liquid for a long time. The chills create local heat sinks and shift the last liquid to a region that can be fed. The mold hardness ensures that the graphite expansion is used to compensate shrinkage instead of deforming the mold. The pouring temperature ensures that the mold fills before the metal freezes. The combination is a balanced thermal design.
Results of the Improved Ductile Iron Casting Process
After the process changes, the heavy wind-power ductile iron casting showed a clear improvement. The shrink cavity and loose structure indications decreased. The ultrasonic acceptance rate increased. The mechanical properties remained within the required range. The production of the 4.2 MW front and rear cover rings became stable. I was able to complete the production task with less rework and lower scrap. The cost per accepted casting fell because fewer heats were lost and fewer castings were rejected after machining.
| Indicator | Before improvement | After improvement | Reason for the change |
|---|---|---|---|
| Shrinkage indications | Frequent in thick ring sections | Reduced and more scattered | Chills, mold hardness, carbon equivalent |
| Gas porosity | Occasional near chills and cores | Reduced | Baking, coating change, pouring cup |
| Nodularity | Variable | Stable and above requirement | Nodularization and inoculation control |
| Ultrasonic acceptance | Low | Improved | Denser structure and finer graphite |
| Pouring time | Variable | Controlled below 45 seconds | Dedicated pouring cup and gating |
| Scrap rate | High | Lower | All process improvements combined |
| Production cost | High due to rejects | Reduced | Higher yield and less rework |
The most important result was not a single number but the stability of the ductile iron casting process. Before the improvement, the foundry could produce a good casting, but not consistently. After the improvement, the process window was defined and controlled. The chills were placed in the same positions, the mold hardness was measured, the coating was standardized, the baking schedule was followed, the melting and nodularization sequence was fixed, and the pouring temperature and time were recorded. This repeatability is what made the production task successful.
I also learned that the graphite expansion mechanism must be respected. A ductile iron casting is not a steel casting. It can self-feed to some extent, but only if the mold is rigid, the carbon equivalent is near the eutectic, the nodule count is high, and the cooling rate is controlled. If any of these conditions is missing, the expansion is lost, and shrinkage returns. The chills and mold hardness are therefore not separate measures; they work together with the chemistry and inoculation.
Practical Lessons for Future Ductile Iron Casting
From this work, I formed several practical rules for heavy ductile iron casting. First, the thermal center must be identified before the process is designed. In a thick ring, the thermal center is often not in the geometric center but near the inner ring or near a boss. Second, the chill must be placed to make the thermal center freeze toward a feeder or toward a region that can be fed. Third, the mold must be hard enough to resist expansion. Fourth, the pouring system must be full and clean. Fifth, the pouring temperature must be low enough to reduce shrinkage but high enough to avoid cold shuts. Sixth, the time after nodularization must be short. Seventh, the process must be measured and recorded.
I also recommend using a simple scoring system for each heat. The score can include carbon equivalent, pouring temperature, pouring time, mold hardness, baking condition, and nodularization time. A heat with a low score is more likely to produce a rejected ductile iron casting. This allows the foundry to hold or rework the mold before pouring. The score can be written as:
$$ S = w_1 CE + w_2 T_p + w_3 t_p + w_4 H_m + w_5 B + w_6 t_n $$
where \(S\) is the process score, \(w_i\) are weights, \(CE\) is carbon equivalent, \(T_p\) is pouring temperature, \(t_p\) is pouring time, \(H_m\) is mold hardness, \(B\) is baking condition, and \(t_n\) is nodularization time. The exact weights depend on the foundry, but the principle is useful: the process is a system, and every variable contributes to the final quality of the ductile iron casting.
| Lesson | Action | Benefit for the ductile iron casting |
|---|---|---|
| Identify the thermal center | Use modulus and Niyama estimates | Place chills where they are needed |
| Control mold rigidity | Maintain hardness of 85 to 90 units | Use graphite expansion effectively |
| Use a proper pouring cup | Keep the stream full and clean | Reduce gas and slag defects |
| Bake the mold | Remove moisture before pouring | Reduce gas porosity |
| Keep the pouring window short | Pour within 15 minutes after nodularization | Prevent graphite degeneration |
| Record every heat | Use a process control plan | Make good results repeatable |
In future work, I would extend the same approach to other heavy ductile iron casting components, such as bearing housings, brake discs, and large ring supports. The material grade may change, and the wall thickness may change, but the principles remain: control the thermal field, control the mold rigidity, control the graphite expansion, control the pouring process, and control the chemistry. When these principles are applied together, the ductile iron casting becomes denser, the ultrasonic inspection becomes cleaner, and the production cost falls.
Conclusion
I improved the casting process for a heavy wind-power ductile iron casting by combining external chills, a dedicated pouring cup, controlled mold and core hardness, a high-alumina coating, a standardized baking schedule, an optimized melting and nodularization practice, and a controlled pouring window. The external chills were placed at the bottom, inner ring, and outer ring to increase the chilling capacity, reduce the solidification volume, and accelerate crystallization and cooling. The dedicated pouring cup reduced contact between liquid iron and air, prevented gas and slag from entering the mold cavity, and reduced the impact of the stream on the resin sand mold. The mold hardness was controlled to reduce graphite self-expansion and mold-wall movement. The baking process removed moisture and reduced gas porosity. The melting process removed scrap steel, raised the carbon content, and produced a denser graphite structure. The pouring process was controlled within a narrow temperature and time window to prevent nodularization fade.
The result was a more reliable ductile iron casting process. Shrinkage cavities and loose structure were effectively prevented, the yield of acceptable ductile iron castings increased, and the cost was reduced. The production task for the 4.2 MW front and rear cover rings and similar thick-wall annular ductile iron casting components was successfully completed. I also gained a deeper understanding of the interaction between graphite expansion, mold rigidity, cooling rate, and feeding. For me, the key message is that a heavy ductile iron casting cannot be improved by a single silver bullet. It must be improved as a system, with every variable measured, every mechanism understood, and every result verified by inspection.