
In this study I focused on a heavy-section cast component used in a nuclear main pump system. The component is a bearing support with an overall envelope near 1,000 mm by 1,000 mm by 1,103 mm, a wall thickness exceeding 200 mm, and a finished weight close to 2.5 t. Because the service environment involves high pressure, high temperature, radiation, and long-term mechanical loading, the allowable level of casting defects is extremely low. The alloy is a microalloyed cast steel designated as ZG12MnMoV, corresponding to a French AFNOR grade 12MDV6. The production route is sand casting with self-hardening resin sand, manual molding, and a gating system built from refractory tubes. In trial production, casting defects such as shrinkage cavities, shrinkage porosity, and sand burn-on were found. My objective was to identify the mechanisms responsible for these casting defects, improve the mold design and coating system, optimize process parameters, and study the microstructural segregation behavior of the alloy.
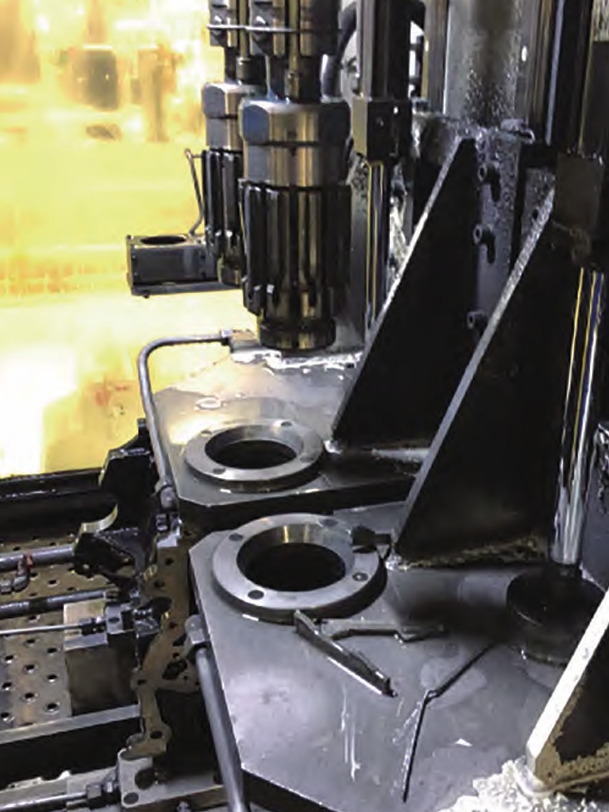
I used computer-aided engineering throughout the work. For macroscopic simulation I used a casting CAE platform capable of filling, solidification, and coupled calculations. For parameter optimization I used uniform design and regression analysis. For microstructural simulation I used a Procast-based micro module to evaluate secondary dendrite arm spacing. The phrase casting defects appears throughout this article because the entire optimization process was organized around preventing and eliminating casting defects. A representative heavy casting with complex internal geometry is shown below to illustrate the general challenge of thermal management in thick-section components.
1. Material and Component Characteristics
The component is a thick and large casting. Its wall thickness is relatively uniform but everywhere exceeds 200 mm, which means that the thermal modulus is high and the local solidification time is long. The most critical geometric feature is the intersection between the triangular ribs and the vertical face of the bearing support. This region behaves as a hot spot. If feeding is insufficient, casting defects such as shrinkage cavities and shrinkage porosity form there. Because the component is used in a nuclear pump, ultrasonic inspection is required, and internal casting defects are not permitted.
The chemical composition of ZG12MnMoV is given in Table 1. The alloy is a low-carbon microalloyed cast steel with manganese, molybdenum, and vanadium additions. The carbon content is kept low to promote toughness and weldability, while manganese and molybdenum increase hardenability and strength. Vanadium contributes to grain refinement and precipitation strengthening.
| Element | C | Si | Mn | P | S | Mo | V |
|---|---|---|---|---|---|---|---|
| Mass fraction, % | ≤0.15 | ≤0.60 | 1.20–1.70 | ≤0.025 | ≤0.020 | 0.20–0.40 | 0.05–0.10 |
The mechanical property requirements are summarized in Table 2. The specified yield strength is at least 400 MPa, the tensile strength is at least 500 MPa, and the elongation is at least 18%. These requirements are not extreme for ordinary structural steel, but they must be achieved in a thick section with no internal casting defects and with a uniform microstructure. That combination is much more difficult than the strength requirement alone.
| Property | Yield strength, MPa | Tensile strength, MPa | Elongation, % |
|---|---|---|---|
| ZG12MnMoV | ≥400 | ≥500 | ≥18 |
From a solidification standpoint, the alloy passes through a peritectic region during cooling. This promotes microsegregation and can lead to microscopic porosity. Manganese also increases the tendency for grain coarsening. Therefore, process design must control both macroscopic feeding and microscopic solidification structure. The thermal behavior of the casting can be described by the transient heat conduction equation:
$$
\rho c_p \frac{\partial T}{\partial t} = \nabla \cdot \left( k \nabla T \right) + \dot{q}
$$
where $\rho$ is density, $c_p$ is specific heat, $T$ is temperature, $t$ is time, $k$ is thermal conductivity, and $\dot{q}$ is the internal heat source or latent heat term. During solidification, the latent heat release strongly affects the local cooling rate and therefore the formation of casting defects.
2. Initial Casting Process Design
I first reviewed the original process. The initial design used a stepped gating system, self-hardening resin sand, manual molding, and a water-based zircon coating applied by brushing. The casting was positioned with the large base plane downward. The parting plane was chosen to simplify molding and core placement. The gating system was assembled from refractory tubes. The main dimensions were as follows: sprue diameter 80 mm, runner diameter 80 mm, ingate diameter 50 mm, ladle nozzle diameter 45 mm, and pouring cup diameter 80 mm.
Risers were placed to feed the hot spots. One waist-shaped insulated blind riser was placed on the upper arc of the support. Two circular insulated blind risers were placed on the triangular ribs. The waist-shaped riser had dimensions $a=200$ mm, $b=300$ mm, and $h=300$ mm, with a 30 mm insulating sleeve. Each circular riser had a diameter of 200 mm and a 15 mm insulating sleeve. External chills were also used. Two bar chills of 700 mm by 50 mm by 50 mm were placed symmetrically near the top of the triangular ribs. Eleven rectangular chills of 200 mm by 160 mm by 80 mm were placed on the sides of the triangular ribs and under the circular base.
The design principles I followed are standard for heavy castings but must be applied carefully. The pouring position should place important surfaces either at the bottom or on the side so that gravity improves density. The parting plane should minimize cores and avoid misalignment. The gating system should fill the mold smoothly without turbulence. The riser system should be designed using modulus calculations:
$$
M = \frac{V}{A}
$$
where $M$ is the modulus, $V$ is volume, and $A$ is heat-transfer surface area. For a sound casting, the riser modulus must be greater than the modulus of the feeding region:
$$
M_r = f M_c
$$
where $M_r$ is the riser modulus, $M_c$ is the casting hot-spot modulus, and $f$ is a safety factor, usually greater than 1. The freezing time can be estimated with Chvorinov’s rule:
$$
t_s = B \left( \frac{V}{A} \right)^2
$$
where $t_s$ is solidification time and $B$ is a mold constant. This relation explains why the thick sections of the bearing support remain liquid much longer than thinner sections. The base, the vertical wall, and the triangular rib intersections all have high $V/A$ values, so they are natural locations for casting defects.
| Design Element | Initial Choice | Main Concern |
|---|---|---|
| Pouring position | Large base downward | Difficulty feeding upper hot spots |
| Parting plane | Selected for molding simplicity | Core placement and dimensional accuracy |
| Gating system | Stepped refractory tube system | Turbulence and mold erosion |
| Risers | One waist-shaped blind riser, two circular blind risers | Insufficient modulus and feeding distance |
| Chills | Two bar chills and eleven rectangular chills | Chill deformation and local cooling control |
| Coating | Water-based zircon coating, brushed once | Burn-on in hot spots |
3. Simulation of the Original Process
I created a three-dimensional model of the casting, gating system, risers, chills, and mold. The model was exported as STL files and imported into the casting CAE environment. I used both uniform and non-uniform mesh strategies depending on the calculation type. For pure solidification calculation, I used a fine mesh with about 8.17 million cells and a cell size near 7.7 mm. For coupled and pure flow calculations, I used a coarser mesh of about 600,000 cells to keep the computation time reasonable. The priority order was set as casting, core, chill, riser sleeve, and mold.
| Calculation Type | Mesh Size | Number of Cells | Purpose |
|---|---|---|---|
| Pure solidification | 7.7 mm | 8,172,840 | Predict shrinkage cavity and porosity |
| Pure flow | Coarser | About 600,000 | Analyze filling sequence and velocity |
| Coupled calculation | Coarser | About 600,000 | Analyze temperature and flow interaction |
For the alloy properties, I used a liquidus temperature of 1511 °C, a solidus temperature of 1469 °C, and an initial pouring time of 90 s. The pouring temperature was initially set near 1550 °C. The gravity feeding function was activated so that shrinkage cavity and porosity could be predicted quantitatively. The calculation was set to stop when the casting solid fraction reached 96%, with automatic saving at regular intervals.
3.1 Filling Temperature Field
The filling simulation showed that the base filled first because the ingates were located below the base. The lowest temperature appeared near the far ends of the base, mainly due to the chilling effect of the external chills. The central part of the base remained hotter because of its larger section. As the metal rose into the vertical wall, the triangular rib region remained hot. The risers stayed at a higher temperature because of the insulating sleeves. However, the circular blind risers on the triangular ribs did not have enough molten metal to feed the large hot spot. The temperature distribution already suggested that casting defects would form in the rib-to-wall intersection.
3.2 Filling Flow Field
The flow simulation showed that the metal entered the mold from the ingates and spread through the base. The base filled slowly because of its large volume. After the base was filled, the metal rose into the vertical wall and then into the upper regions. The velocity was highest near the ingate-to-base connection and near the triangular rib-to-riser connection. High velocity can cause mold erosion, gas entrapment, and inclusion defects. The flow was not fully optimized in the original design. Although the stepped gating system helped reduce turbulence, local high-velocity zones remained.
The filling sequence can be summarized as follows. At about 15% fill, the metal covered the bottom of the base. At about 50% fill, the base was nearly full. At about 87% fill, the metal had entered the vertical wall and the rib region. At about 96% fill, the upper arc and risers were being filled. The flow behavior contributed to the final distribution of casting defects.
3.3 Solidification and Defect Prediction
The pure solidification simulation revealed the main problem. The top waist-shaped riser fed the upper arc reasonably well, but the two circular blind risers on the triangular ribs had insufficient modulus. The rib-to-wall intersection remained liquid for a long time, and the risers solidified before the hot spot was fully fed. As a result, shrinkage cavities and shrinkage porosity formed in the triangular ribs. The simulation result matched the ultrasonic inspection results from trial production. The casting defects were concentrated in the rib region, exactly where the hot spot was largest. This confirmed that the original riser design was inadequate.
| Original Process Observation | Simulation Result | Production Result |
|---|---|---|
| Base cooling | Chills reduced local temperature | No major defects in base |
| Vertical wall filling | Smooth but with local high velocity | Acceptable surface |
| Rib hot spot | Long liquid lifetime | Shrinkage cavities and porosity |
| Circular blind risers | Insufficient modulus | Incomplete feeding |
| Top waist riser | Good feeding of upper arc | No major defect in upper arc |
4. Causes of Casting Defects in the Original Process
I identified several causes of the casting defects. First, the pouring position placed the largest hot spot high in the mold, but the feeding system was not strong enough. Second, the circular blind risers were limited by the geometry of the triangular ribs. Their modulus was too low, and their insulating sleeves were too thin. Third, the riser location made it difficult to remove them later. Fourth, the chilling system did not sufficiently accelerate cooling in the rib-to-wall intersection. Fifth, the coating system did not protect the hot spot from burn-on because the local temperature remained above the decomposition temperature of the zircon filler for a long time.
The main macroscopic casting defects were shrinkage cavity and shrinkage porosity. The main surface casting defect was sand burn-on. Both types of casting defects are related to the local thermal history. The hot spot has a high modulus, so it solidifies last. If it is not fed by a riser with sufficient liquid metal and sufficient modulus, shrinkage cavities form. If the coating breaks down, liquid metal penetrates the sand pores, causing mechanical burn-on. In the rib region, both mechanisms acted together because the high temperature lasted a long time.
5. Improved Casting Process
Based on the simulation and the defect analysis, I redesigned the process. The key change was to invert the casting. The large base was placed at the top, and the vertical wall was placed below. This allowed large open risers to be placed on the base. The parting plane was adjusted accordingly. The new arrangement made feeding easier and also simplified riser removal. The improved process used the following changes.
| Process Feature | Original Design | Improved Design |
|---|---|---|
| Pouring position | Large base downward | Large base upward |
| Riser type | Blind insulated risers | Open insulated risers |
| Riser location | Upper arc and triangular ribs | Top base plane |
| Riser size | Waist-shaped and circular blind risers | Large open riser, diameter 560 mm, height 900 mm, sleeve 112 mm |
| Chills | Bar chills and rectangular chills | 24 cylindrical chills, 10 bar chills |
| Feeding principle | Local feeding with limited modulus | Sequential solidification with strong top feeding |
The new riser was a large open insulated riser with a diameter of 560 mm and a height of 900 mm. The insulating sleeve thickness was 112 mm. This riser had enough modulus and enough liquid metal to feed the entire hot spot. I also added 24 cylindrical chills with dimensions of 30 mm by 70 mm along the fillet between the triangular ribs and the wall. Ten bar chills with dimensions of 180 mm by 120 mm by 90 mm were placed on the four circular bosses and the top arc. These chills accelerated local cooling and helped establish a favorable temperature gradient.
The improved process was simulated with the same CAE platform. For pure solidification, the mesh had about 8.25 million cells with a cell size near 7.8 mm. The filling and coupled calculations used a coarser mesh of about 600,000 cells. The simulation showed that the new pouring position and large open riser produced a better temperature distribution. The metal filled the lower vertical wall first, then rose into the base, and finally filled the risers. The flow velocity was lower and more uniform. No cold shut or misrun was predicted.
The solidification simulation showed that the hot spot in the rib-to-wall intersection solidified before the riser. The riser remained liquid until the end and fed the hot spot effectively. No shrinkage cavity or shrinkage porosity was predicted in the casting. The final predicted result showed a sound casting with all feeding shrinkage concentrated in the riser. The improved process was then validated in production. Ultrasonic inspection according to the required standard showed no internal casting defects. The external surface was also acceptable after cleaning. This confirmed that the improved process eliminated the main casting defects.
| Improved Simulation Stage | Observation | Conclusion |
|---|---|---|
| Filling 10% | Lower vertical wall fills smoothly | No turbulence |
| Filling 55% | Base begins to fill | Stable front |
| Filling 75% | Bosses cool due to chills | Good directional solidification |
| Filling 98% | Riser fills last | Feeding path open |
| Solidification end | No shrinkage in casting | Casting defects eliminated |
6. Coating Optimization to Prevent Sand Burn-on
Sand burn-on was another serious casting defect. In the original process, the mold surface was coated with a water-based zircon coating applied by brushing once. The coating worked well on the flat base and vertical wall, but it failed in the triangular rib hot spot. The local temperature remained above 1540 °C for a long time. Under these conditions, zircon dissociates into silica and zirconia. Iron oxide from the steel reacts with silica to form low-melting iron silicate. This liquid slag consumes the refractory filler and eventually penetrates the coating. Once the coating is broken, liquid metal enters the sand pores and forms mechanical burn-on. The burn-on layer is strongly bonded to the casting and is difficult to remove.
To solve this problem, I changed the molding sand in the hot spot region. I used chromite sand as a facing sand in the area corresponding to the rib-to-wall intersection. The chromite sand was sized between 40 and 70 mesh, and the facing sand thickness was 40 to 50 mm. The backing sand remained furan resin sand. The entire mold cavity was still coated with zircon coating. Chromite sand has excellent refractoriness and high thermal conductivity. Under the action of liquid steel, it forms a dense sintered layer that blocks metal penetration. This prevents mechanical burn-on. Because chromite sand is expensive, I used it only in the hot spot. This kept the cost increase small while eliminating the casting defects.
I also improved the coating binder system. The original binder was sugar syrup, which loses bonding strength at high temperature and can ferment in summer. I replaced the room-temperature binder with water-soluble phenolic resin and used silica sol as the high-temperature binder. The coating was applied by brushing, but the number of brush passes was increased from one to five. The final coating thickness was controlled between 1.2 and 1.5 mm. This thickness provided enough thermal barrier and enough physical separation between the liquid metal and the sand. The improved coating system successfully eliminated burn-on in production trials.
| Coating Parameter | Original Process | Improved Process |
|---|---|---|
| Facing sand | Furan resin sand | Chromite sand in hot spot |
| Facing sand thickness | Not applicable | 40–50 mm |
| Refractory filler | Zircon powder | Zircon powder |
| Carrier | Water | Water |
| Room-temperature binder | Sugar syrup | Water-soluble phenolic resin |
| High-temperature binder | Sugar syrup | Silica sol |
| Application method | Brush, one pass | Brush, five passes |
| Coating thickness | Not controlled | 1.2–1.5 mm |
| Result | Severe burn-on | Burn-on eliminated |
The mechanism of burn-on can be expressed in a simplified way. The penetration depth of liquid metal into the sand pores depends on pressure, pore size, surface tension, and wetting angle. A simplified capillary penetration model is:
$$
h = \frac{2 \gamma \cos \theta}{r \rho g}
$$
where $h$ is penetration height, $\gamma$ is surface tension, $\theta$ is contact angle, $r$ is pore radius, $\rho$ is density, and $g$ is gravitational acceleration. If the coating blocks the pores, the effective $r$ decreases and the penetration height becomes very small. If the coating reacts and dissolves, $r$ increases and burn-on becomes severe. Chromite sand reduces pore size through sintering and also increases thermal conductivity, which lowers the local temperature. Both effects reduce casting defects.
7. Uniform Design Optimization of Process Parameters
After the main process changes, I optimized the key process parameters. The parameters that most strongly influence filling and solidification are pouring temperature, pouring time, and initial mold temperature. I used uniform design because it can handle multiple factors and multiple levels with far fewer experiments than a full factorial design. In a full factorial design with three factors and five levels, the number of trials would be $5^3 = 125$. A uniform design table can reduce this to ten trials while still covering the experimental space. This is important because each CAE simulation of a thick casting is computationally expensive.
The uniform design method is based on number theory and uniform distribution. It selects experimental points so that they are evenly distributed in the factor space. The general model for the regression analysis is:
$$
Y = \beta_0 + \sum_{i=1}^{k} \beta_i x_i + \sum_{i<j} $$="" +=""
where $Y$ is the response, $x_i$ are the factors, $\beta$ are coefficients, and $\epsilon$ is the error. I selected three factors: A, pouring temperature; B, pouring time; and C, initial mold temperature. Each factor had five levels. The ranges were chosen as follows: pouring temperature from 1550 °C to 1570 °C, pouring time from 80 s to 120 s, and mold temperature from 10 °C to 50 °C. The factor levels are shown in Table 6.
| Level | A: Pouring Temperature, °C | B: Pouring Time, s | C: Mold Temperature, °C |
|---|---|---|---|
| 1 | 1550 | 80 | 10 |
| 2 | 1555 | 90 | 20 |
| 3 | 1560 | 100 | 30 |
| 4 | 1565 | 110 | 40 |
| 5 | 1570 | 120 | 50 |
I used the uniform design table $U_{10}^*(10^8)$ and selected columns 1, 5, and 6 according to the usage table. The resulting experimental plan is shown in Table 7. Each row represents one CAE simulation. I then recorded two responses: total shrinkage cavity volume and total Niyama porosity volume. Both are indicators of casting defects. Smaller values mean better casting quality.
| Trial | A, °C | B, s | C, °C |
|---|---|---|---|
| 1 | 1550 | 120 | 20 |
| 2 | 1555 | 120 | 30 |
| 3 | 1560 | 110 | 50 |
| 4 | 1565 | 110 | 10 |
| 5 | 1570 | 100 | 20 |
| 6 | 1550 | 100 | 40 |
| 7 | 1555 | 90 | 50 |
| 8 | 1560 | 90 | 10 |
| 9 | 1565 | 80 | 30 |
| 10 | 1570 | 80 | 40 |
The shrinkage cavity volume results are given in Table 8. The values are in cubic centimeters. The lowest shrinkage volume occurred in trial 1, which used the lowest pouring temperature and the longest pouring time. The highest shrinkage volume occurred in trial 10, which used the highest pouring temperature and the shortest pouring time. This trend already suggests that lower pouring temperature and longer pouring time reduce casting defects.
| Trial | A, °C | B, s | C, °C | Shrinkage Volume, cm³ |
|---|---|---|---|---|
| 1 | 1550 | 120 | 20 | 25,680 |
| 2 | 1555 | 120 | 30 | 25,940 |
| 3 | 1560 | 110 | 50 | 26,370 |
| 4 | 1565 | 110 | 10 | 26,640 |
| 5 | 1570 | 100 | 20 | 26,980 |
| 6 | 1550 | 100 | 40 | 25,960 |
| 7 | 1555 | 90 | 50 | 26,430 |
| 8 | 1560 | 90 | 10 | 26,620 |
| 9 | 1565 | 80 | 30 | 27,140 |
| 10 | 1570 | 80 | 40 | 27,420 |
The Niyama porosity results are given in Table 9. Niyama criterion is widely used to predict shrinkage porosity in castings. A common form is:
$$
N_y = \frac{G}{\sqrt{\dot{T}}}
$$
where $G$ is the temperature gradient and $\dot{T}$ is the cooling rate. If $N_y$ is below a critical value, shrinkage porosity is predicted. The total Niyama porosity volume is another measure of casting defects. In this set of experiments, the influence of pouring time was dominant, while pouring temperature and mold temperature had weaker effects on the Niyama response.
| Trial | A, °C | B, s | C, °C | Niyama Porosity Volume, cm³ |
|---|---|---|---|---|
| 1 | 1550 | 120 | 20 | 4,450 |
| 2 | 1555 | 120 | 30 | 4,523 |
| 3 | 1560 | 110 | 50 | 4,432 |
| 4 | 1565 | 110 | 10 | 5,482 |
| 5 | 1570 | 100 | 20 | 5,931 |
| 6 | 1550 | 100 | 40 | 7,157 |
| 7 | 1555 | 90 | 50 | 6,956 |
| 8 | 1560 | 90 | 10 | 6,742 |
| 9 | 1565 | 80 | 30 | 5,920 |
| 10 | 1570 | 80 | 40 | 6,482 |
I first checked whether interactions among the three factors were significant. The factor design analysis showed that the main effects of A and B were significant for shrinkage volume, while the interaction terms and factor C were not significant at the 0.05 level. The normal probability plot and Pareto chart confirmed that pouring temperature and pouring time were the dominant factors. Based on this result, I built a linear regression model for shrinkage volume. The initial model was:
$$
Y = -56022 + 53.9A – 15.9B + 1.21C
$$
The coefficient of determination was $R^2 = 99.6\%$, indicating an excellent fit. The ANOVA results are shown in Table 10. The P-value for the regression was 0.000, so the model was statistically significant.
| Source | Degrees of Freedom | Sum of Squares | Mean Square | F Value | P Value |
|---|---|---|---|---|---|
| Regression | 3 | 2,805,524 | 935,175 | 508.42 | 0.000 |
| Residual error | 6 | 11,036 | 1,839 | ||
| Total | 9 | 2,816,560 |
Because factor C had a P-value of 0.290, it was not significant. I removed it and refit the model. The final regression equation for shrinkage volume was:
$$
Y = -54421 + 52.9A – 16.4B
$$
The final ANOVA showed that both A and B were significant. The F-values were much larger than the critical value. The residual versus order plot showed random scatter, which confirmed that the model was adequate. To minimize shrinkage volume, I needed to minimize A and maximize B. Since the initial model indicated that C had a small positive coefficient, the smallest mold temperature within the experimental range was preferred. Therefore, the optimal combination was pouring temperature 1550 °C, pouring time 120 s, and mold temperature 10 °C.
| Term | Coefficient | Standard Error | T Value | P Value |
|---|---|---|---|---|
| Constant | -54,421 | 3,598 | -15.13 | 0.000 |
| A | 52.933 | 2.269 | 23.33 | 0.000 |
| B | -16.367 | 1.134 | -14.43 | 0.000 |
I validated the optimal combination with an additional simulation. The predicted shrinkage volume was lower than any of the ten original trials. The simulated shrinkage volume was about 25.66 cm³, which confirmed the optimum. This demonstrated that uniform design combined with regression analysis can effectively reduce casting defects and identify the best process parameters.
8. Microstructure Simulation of ZG12MnMoV
The alloy ZG12MnMoV solidifies through a peritectic reaction. The solidification path can be summarized as:
$$
L \rightarrow L + \delta \rightarrow L + \delta + \gamma \rightarrow \gamma \rightarrow \gamma + \alpha \rightarrow \alpha + P
$$
where $L$ is liquid, $\delta$ is high-temperature ferrite, $\gamma$ is austenite, $\alpha$ is ferrite, and $P$ is pearlite. Because the peritectic reaction is often incomplete, microsegregation is common. The most important form of microsegregation is dendritic segregation, also called intercrystalline segregation. It reduces impact toughness and ductility and increases hot cracking tendency. Secondary dendrite arm spacing, $\lambda_2$, is a key parameter for describing microsegregation. The relationship between secondary dendrite arm spacing and local solidification time is often written as:
$$
\lambda_2 = K t_f^n
$$
where $K$ is a material constant, $t_f$ is local solidification time, and $n$ is an exponent. When $\lambda_2$ is small, the diffusion distance for solute redistribution is short, and heat treatment can more easily homogenize the microstructure. When $\lambda_2$ is large, microsegregation is severe, and casting defects such as microscopic porosity are more likely.
I used the Procast micro module to simulate secondary dendrite arm spacing. I created a finite element model with 445,088 elements and 89,219 nodes. The material properties included density 7.9 g/cm³, solidus temperature 1469 °C, and liquidus temperature 1511 °C. The thermal conductivity, density, enthalpy, viscosity, and solid fraction were all defined as temperature-dependent functions. The boundary conditions were a pouring velocity of 1.2 m/s and pouring temperatures of 1550 °C, 1565 °C, and 1580 °C. The calculation was run for 5,000 steps with a stop temperature of 300 °C.
| Microstructure Simulation Parameter | Value |
|---|---|
| Number of elements | 445,088 |
| Number of nodes | 89,219 |
| Density | 7.9 g/cm³ |
| Solidus temperature | 1469 °C |
| Liquidus temperature | 1511 °C |
| Pouring velocity | 1.2 m/s |
| Pouring temperatures studied | 1550 °C, 1565 °C, 1580 °C |
| Stop temperature | 300 °C |
The simulation results showed that as pouring temperature increased, both the primary grain radius and the secondary dendrite arm spacing increased. At 1550 °C, the secondary dendrite arm spacing was smallest and the structure was finest. At 1580 °C, the dendrites were coarse and the microsegregation was more severe. The results are summarized in Table 12. The lowest pouring temperature produced the most uniform and dense structure, which is beneficial for impact toughness, ductility, and hot cracking resistance. Therefore, I selected 1550 °C as the optimal pouring temperature for microstructure control.
| Pouring Temperature, °C | Primary Grain Radius | Secondary Dendrite Arm Spacing | Microsegregation Tendency | Recommended |
|---|---|---|---|---|
| 1550 | Smallest | Smallest | Lowest | Yes |
| 1565 | Medium | Medium | Medium | No |
| 1580 | Largest | Largest | Highest | No |
The microstructural results agreed with the macroscopic parameter optimization. Lower pouring temperature reduces the thermal gradient and shortens the local solidification time, which refines the dendrite structure. A finer dendrite structure reduces casting defects such as microporosity and segregation. It also makes subsequent heat treatment more effective. This is important for the bearing support because the component must satisfy stringent ultrasonic inspection requirements and must operate reliably under severe conditions.
9. Discussion and Practical Implications
The work showed that casting defects in heavy-section components are controlled by the interaction of process design, thermal management, mold materials, and process parameters. I found that the original process failed because the feeding system did not match the hot spot modulus. The two circular blind risers were too small, and their location limited the insulating sleeve thickness. The result was incomplete feeding and shrinkage cavities. Inverting the casting and using a large open riser solved the problem. This change also made riser removal easier and improved the yield of the cleaning operation.
The coating study showed that sand burn-on is not only a surface problem. It is a direct consequence of local thermal history and chemical reaction. In the rib hot spot, the zircon coating reacted with iron oxide and silica, forming a low-melting phase. Chromite sand facing in the hot spot created a dense sintered layer that blocked metal penetration. Increasing the coating thickness and changing the binder system further improved the thermal barrier. These measures eliminated burn-on and reduced cleaning labor.
The uniform design study showed that pouring temperature and pouring time are the most important parameters for shrinkage cavity volume. The regression equation provided a quantitative basis for selecting the best parameters. The optimal combination was 1550 °C pouring temperature, 120 s pouring time, and 10 °C mold temperature. The validation simulation confirmed that this combination produced the lowest shrinkage volume among all trials. The Niyama porosity response was dominated by pouring time, which suggests that filling rate affects feeding behavior and local cooling in a complex way.
The microstructure study showed that secondary dendrite arm spacing increases with pouring temperature. A lower pouring temperature promotes a finer dendritic structure, which reduces microsegregation and microscopic casting defects. This finding supports the parameter optimization result. Taken together, the macro-scale and micro-scale optimizations point to the same conclusion: a relatively low pouring temperature and a well-designed feeding system are essential for producing a sound heavy casting.
| Optimization Area | Main Problem | Solution | Result |
|---|---|---|---|
| Pouring position | Hot spot poorly fed | Invert casting and place base on top | Better feeding |
| Riser system | Insufficient modulus | Large open insulated riser | Shrinkage moved to riser |
| Chill system | Slow cooling in rib intersection | Cylindrical and bar chills | Favorable thermal gradient |
| Coating | Burn-on in hot spot | Chromite facing sand and thicker zircon coating | Burn-on eliminated |
| Process parameters | High shrinkage volume | Uniform design and regression | Optimal parameters found |
| Microstructure | Dendritic segregation | Lower pouring temperature | Finer dendrites |
10. Conclusions
I successfully optimized the casting process for a heavy nuclear pump bearing support. The original process produced casting defects such as shrinkage cavities, shrinkage porosity, and sand burn-on. By using CAE simulation, I identified the hot spot in the triangular rib and the insufficient modulus of the original risers. I redesigned the pouring position, replaced blind risers with a large open insulated riser, and added an improved chill arrangement. The improved process eliminated the internal casting defects and produced a sound component that passed ultrasonic inspection.
For the surface casting defects, I analyzed the burn-on mechanism and changed the coating strategy. I used chromite sand as facing sand in the hot spot, kept furan resin sand as backing sand, and applied a thicker zircon coating with improved binders. The burn-on defect was eliminated, and cleaning labor was reduced.
I also optimized the process parameters using uniform design and regression analysis. The final regression equation for shrinkage volume was:
$$
Y = -54421 + 52.9A – 16.4B
$$
The optimal combination was pouring temperature 1550 °C, pouring time 120 s, and mold temperature 10 °C. A validation simulation confirmed the optimum. The Niyama porosity analysis showed that pouring time had the strongest effect on porosity volume, while the other factors had weaker effects.
Finally, I simulated the microstructure of ZG12MnMoV using a Procast micro module. The secondary dendrite arm spacing increased with pouring temperature. At 1550 °C, the dendrites were finest and the microsegregation tendency was lowest. This confirmed that a lower pouring temperature within the feasible range helps reduce microscopic casting defects, refine the structure, and improve mechanical properties.
The overall conclusion is that casting defects in heavy-section microalloyed steel components can be controlled through an integrated approach: CAE-based process design, modulus-based riser design, local chilling, coating optimization, statistical parameter optimization, and microstructural control. This approach reduced trial production, shortened the development cycle, lowered cost, and improved the reliability of the final component.
11. Limitations and Future Work
The simulation used constant interfacial heat transfer coefficients in some calculations, while in reality the coefficient changes with temperature, contact pressure, and coating condition. This introduces some difference between simulation and production. Future work could include temperature-dependent interfacial heat transfer and more detailed mold-metal interaction models.
The coating study could be extended by varying the ratio of refractory filler, binder, and additive. The effect of small changes in coating composition on burn-on resistance and surface quality could be investigated quantitatively. A full factorial or mixture design could be used to optimize the coating for different hot spot sizes.
Microstructure simulation in casting CAE is still less common than macroscopic simulation. More work is needed to link secondary dendrite arm spacing to mechanical properties and ultrasonic inspection results. A multi-scale model that couples macroscopic heat transfer with microscopic segregation and porosity would be valuable. Such a model would help predict casting defects more accurately and would support the design of heavy castings for nuclear and other safety-critical applications.
| Future Research Direction | Potential Benefit |
|---|---|
| Temperature-dependent interfacial heat transfer | More accurate solidification prediction |
| Mixture design for coating composition | Better burn-on control |
| Multi-scale casting defect model | Link microstructure to mechanical properties |
| In-situ thermal monitoring | Validate simulation and improve control |
| Automated parameter optimization | Reduce engineering time |
In summary, this study demonstrated that careful process design and systematic optimization can eliminate casting defects in thick microalloyed steel castings. The methods I used can be transferred to other heavy components where casting defects are unacceptable and where reliability is critical.