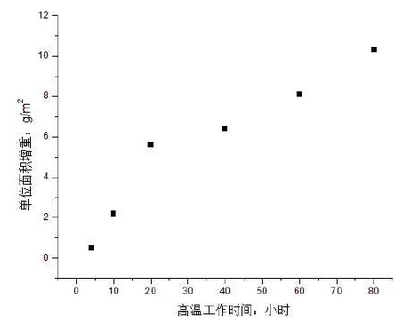
The prepared sample is heated in a resistance furnace and weighed with an electronic balance.Figure 1 shows the measurement results of high silicon molybdenum ductile iron at 900 C.It can be seen from the diagram that the weight gain of the sample increases as the working time at high temperature increases in general, and a turning point of weight change occurs at 20 hours. The surface cracking of the sample is severe, which results in a large amount of oxygen intruding into the interior of the material, thus the weight gain is obvious at this stage.
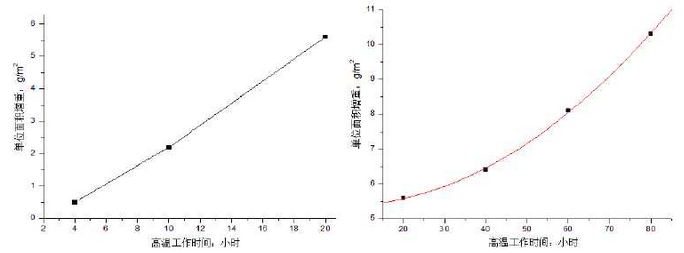
Fig. 2 shows the fitting curve of high silicon molybdenum ductile iron. The fitting curve basically changes linearly at the beginning of the experiment, but after more than 20 hours it conforms to the following equation.

Where Y is the unit area gain and X is the working time at high temperatures.


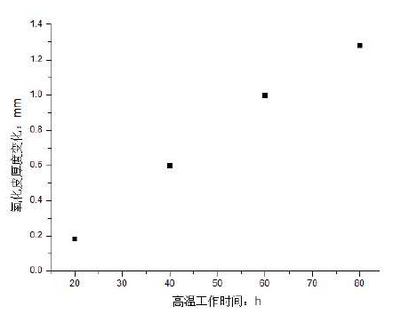
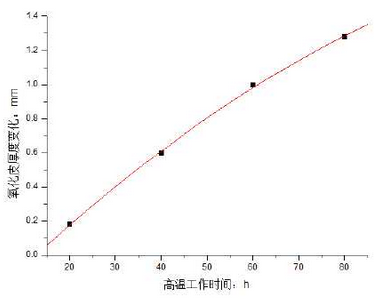
During the above measurements, the thickness of the oxide scale is also measured. Because the initial oxidation is not very obvious and there is no obvious boundary between the oxide scale and the matrix, the oxide composition is used to distinguish the measurement results, as shown in Figure 3.The thickness of oxide scale becomes thicker with the prolongation of working time at high temperature. The thickness increases quickly at the beginning of oxidation, which is mainly due to the absence of oxide film.The fitted curve is shown in Fig. 4 and basically conforms to Wagner’s parabola law.

Where Y is the thickness of the scale and X is the working time at high temperature.


