
Our foundry, affiliated with a large machinery group in Shandong Province, China, originally operated three resin sand production lines with a combined annual capacity of 15,000 tonnes, alongside two 8 t/h cupolas. The product portfolio encompassed compressors, machine tools, sand boxes, agricultural machinery, and various other castings, with annual output exceeding 20,000 tonnes. As the manufacturing industry advanced, increasingly stringent requirements were imposed on casting quality. The resin sand process gradually failed to meet the dimensional accuracy and surface finish demands of certain high-end castings, thereby restricting market expansion. A major heavy industry group emerged as our largest customer, placing orders for FT700 and FT800 series rear bridge and transmission case castings, with an annual demand exceeding 6,000 tonnes. Since the customer mandated that all export models adopt lost foam castings, we inaugurated a new 5,000 tonnes/year lost foam casting production line in 2009, dedicated exclusively to producing these components.
The project was implemented as a renovation within an existing workshop. Nevertheless, the entire line—encompassing the white zone (pattern molding), yellow zone (coating and drying), and black zone (molding and pouring)—was laid out compactly and rationally, facilitating smooth process flow. All equipment was PLC-automated, achieving a high degree of automation. Compared with other domestic lost foam casting lines, this facility started from a higher technological baseline and incorporated comparatively advanced equipment.
As is universally acknowledged in the foundry industry, lost foam casting possesses specific process adaptability and inherent limitations. Not all castings are suitable for production by this method. The determination must be based on comprehensive consideration of the casting material, casting dimensions, production batch size, structural complexity, and a case-by-case technical analysis before finalizing the process route.
Structural Characteristics of Transmission Case and Rear Bridge Shells and Their Adaptability to Lost Foam Castings
The FT700 and FT800 transmission and rear bridge shell castings feature highly complex geometries. Their internal cavities contain numerous bosses, rib plates, and localized small structural recesses. Dimensional accuracy requirements are stringent; even minor deviations can lead to assembly interference. The overall envelope dimensions approximate 800 mm × 750 mm × 600 mm. The material is HT250 gray cast iron, with each casting weighing approximately 200 kg. The batch size is exceptionally large, with an annual demand exceeding 30,000 pieces. Production via the resin sand process consistently failed to achieve the required dimensional precision and yielded an unacceptably high scrap rate. From the perspectives of casting material, size, production volume, and structural intricacy, these components are ideally suited for lost foam castings. Consequently, we made the strategic decision to adopt the lost foam casting process for these products.
Determination of Production Process Parameters
Selection of Pattern Materials
Two primary pattern material categories exist: expandable polystyrene (EPS) and polymethyl methacrylate (EPMMA) or their copolymer (STMMA). EPS offers lower cost, ease of molding, and abundant supply, making it the most widely used pattern material. It is suitable for aluminum, copper alloys, gray iron, and general steel castings without special carburization requirements. The latter materials, though more expensive, are preferred for low-carbon steel castings requiring minimal surface carburization—STMMA being the typical choice, and EPMMA reserved for special alloy steels with extraordinarily stringent surface carbon limits.
The selection of virgin bead size depends on the minimum pattern wall thickness. Thinner walls demand smaller bead diameters. The bead size fundamentally governs the critical minimum wall thickness of the pattern; below this threshold, pronounced bead-to-bead mesh lines appear on the pattern surface. As a general engineering rule, the virgin bead diameter should not exceed one-tenth of the minimum casting wall thickness. For the FT800 rear bridge and transmission case, the primary wall thickness measures 9 mm, with a minimum wall thickness of 6 mm. We therefore selected Belong P-4S grade EPS beads with a particle size range of 0.3–0.6 mm, offering an expandable ratio of 25–40 times in a single expansion step.
| Pattern Material Property | Specification | Rationale |
|---|---|---|
| Material Grade | EPS (Belong P-4S) | Cost-effective; adequate for gray iron without special carbon restrictions |
| Particle Size Range | 0.3 – 0.6 mm | Min. wall thickness 6 mm; bead diameter ≤ 1/10 wall thickness |
| Pre-expansion Ratio | 25 – 40 times | Optimal density after pre-foaming: 22–24 g/dm³ |
| Blowing Agent Content | 6% – 6.5% by mass | Ensures adequate expansion capability during steam molding |
Selection of Base Sand
Lost foam castings utilize dry sand for mold filling, imposing stricter requirements on the sand compared to conventional sand casting. The sand must exhibit excellent permeability, superior flowability during filling, and minimal compaction settling. Refractoriness, while important, is a secondary consideration. The primary criterion is grain shape: perfectly spherical grains are imperative. Rounded grains facilitate lateral sand feeding and result in minimal sand subsidence during vibration compaction. Angular or multi-faceted sands frequently cause nodular defects at casting corners due to excessive subsidence and prolonged vibration times. The second criterion is grain size uniformity, which ensures good permeability and low compaction settling coefficients. Non-uniform sand gradations substantially increase settlement. After comprehensive evaluation of these factors alongside economic considerations, we selected washed and dried silica sand (10/30 mesh) from the Rongcheng Xukou silica sand mine.
Mold Design and Fabrication
Foaming molds are the most direct determinant of pattern quality. CAD/CAM-based mold manufacturing is the most critical tooling component in the pattern production process. For complex castings such as cylinder heads and blocks, CAD/CAM systems are mandatory. Our tender documentation explicitly required the use of CAD/CAM systems and CNC machining methods.
Based on the existing transmission case and rear bridge shell geometries, the molds were designed in upper and lower halves with thin-shell conformal cavity structures, enabling uniform and rapid heating and cooling. Sprue gun positions were strategically arranged to guarantee unobstructed material flow, allowing the pre-foamed beads to completely fill every pattern recess. Exhaust valve positions and exhaust area dimensions were carefully determined to produce dense patterns with uniform heating and cooling. The molds were fabricated from corrosion-resistant metal with adequate strength and rigidity, capable of withstanding the cyclic steam heating and water spray cooling environment while providing long service life.
We selected ZL108 aluminum alloy as the mold material. The key foaming mold parameters were established as follows: machining allowance — 5 mm on bottom and side surfaces, 6 mm on top surfaces; mold shrinkage rate comprising both foam pattern shrinkage and casting shrinkage — 1.6% in the length direction, 0.5% in the width direction, and 1.0% in the height direction. The mold structure incorporated automatic ejection for full automation, featuring a proprietary Teflon surface coating that provides superior surface smoothness and wear resistance.
Pre-Foaming
Pre-foaming was performed using an SJ-KF-450 batch-type steam semi-automatic pre-foaming machine. The EPS beads containing 6%–6.5% blowing agent were preheated to 100°C, with the vessel exterior at approximately 30°C. The pre-foaming temperature ranged from 100°C to 150°C. Steam was supplied at a gauge pressure of 0.06 MPa, with the pre-foamed bead density controlled within 22–24 g/dm³. Experimental determination established a processing time of 40–48 seconds to achieve this target density.
After pre-foaming, beads underwent maturation in storage hoppers. These hoppers were constructed with metal frames, properly grounded, and maintained under excellent ventilation conditions to prevent electrostatic buildup. Maturation temperature was maintained at 20–25°C, with maturation time controlled between 12–24 hours. Matured beads were preferably consumed within two days; if stored longer, sealed plastic containers were used, but total storage never exceeded three days.
Foam Molding
Prior to foam molding, the feed material density was verified against process specifications. Critical utility parameters were confirmed: steam pressure ≥ 0.5 MPa, air pressure ≥ 0.4 MPa, and water pressure ≥ 0.2 MPa. The heating steam quality was carefully controlled to ensure relatively dry steam penetrated the beads efficiently; therefore, the water-vapor separator received frequent inspection. The mold was preheated to an appropriate temperature, and all moisture on both mold halves was thoroughly dried. Steam injection time and cooling duration were strictly regulated. Material was first charged through the primary filling port, followed by the auxiliary port, ensuring uniform bead packing throughout the mold cavity. Mold handling procedures mandated careful insertion and removal to prevent impact damage to loose parts. Upon ejection, proper pattern posture was maintained during loose-part removal to prevent distortion.
Coating Preparation, Application, and Pattern Drying
Coating Formulation
Through extensive iterative experimentation under actual production conditions, we developed a coating formulation that satisfies all production requirements. This coating possesses excellent anti-penetration properties, high strength, good permeability, and minimal gas evolution.
| Component | Role | Specification | Addition (wt%) |
|---|---|---|---|
| Refined quartz powder | Refractory aggregate | SiO₂ > 98%; 180–200 mesh | 25 |
| Bauxite clinker | Refractory aggregate | Al₂O₃ > 78%; 180–200 mesh | 75 |
| Silica sol | Binder | SiO₂ 24%–31%; Na₂O ≤ 0.5% | 4 |
| White latex (PVAc) | Binder | pH 4–6; viscosity 2.5–7.0 Pa·s | 8 |
| Sodium bentonite | Suspension agent | — | 2 |
| CMC | Suspension agent | Grade FM6 or above | 0.5 |
| OP-10 | Surfactant | — | 0.2 |
| n-Butanol | Defoamer | — | 0.02 |
The charging sequence was: sodium bentonite → CMC → silica sol → white latex → OP-10 → refractory materials.
The preparation procedure was as follows. First, one part sodium bentonite was mixed with ten parts water under high-speed agitation for 1–2 hours to form a uniform bentonite slurry. Simultaneously, one part CMC was soaked in thirty parts water for 24 hours to form a liquid suspension. The hydrated CMC was added to the bentonite slurry in the coating mixer and blended thoroughly. Pre-weighed silica sol, white latex, and OP-10 were then added sequentially with continuous stirring for 30 minutes to ensure complete homogenization. The quartz powder and bauxite clinker were added in batches with thorough mixing for over 4 hours. For the first, thinner coating application, 30 kg of water was added; for the second, thicker application, 25 kg of water was used. Water addition was adjusted empirically based on the desired coating thickness, with water added in 5 kg increments. An appropriate quantity of defoamer could be introduced prior to use if surface foaming occurred. Prepared coating was ideally consumed within two days; prolonged storage was avoided. During mixing, the coating temperature was maintained above 10°C, with freezing prevented in winter—any coating that had frozen was discarded. Water was added exclusively through the mixer; direct addition into the coating tank was strictly prohibited. Residual coating was returned to the mixer for any adjustments.
Coating Application
A combined dipping, drizzling, and brushing methodology was adopted, ensuring complete coverage without any exposed white pattern. The specific approach depended on casting size and geometry. Two dip-coating passes were standard. The first pass utilized the thinner coating formulation to achieve a uniform thin base layer. The second pass employed the adjusted, thicker coating to build the required total thickness. For the gating system, coating thickness reached 2 mm. The gating system was pre-coated and dried before bonding to the pattern, after which the entire assembly received additional coating—resulting in at least three coating passes on the gating. Coating thickness was determined by casting size and wall thickness: small castings generally required 0.5–1 mm, while large castings required 1–2 mm. For the FT800 rear bridge and transmission case, the specified coating thickness was 1–1.5 mm.
Several critical precautions were observed during application. The pattern orientation and handling position were selected to prevent deformation. The coating was applied uniformly with no exposed white areas. After dip coating, patterns were transported and positioned with utmost care to maintain shape integrity. Excess coating accumulating at corners and grooves was smoothed using brushes. The first coating layer was thoroughly dried before the second application. Particular attention was paid to the interface between the ingate and the white pattern—this area required complete sealing with no exposed foam or porosity, with the coating thickness in this region exceeding 2 mm.
Pattern Drying
A spacious, well-ventilated drying room was essential. In principle, four separate drying rooms were desirable: one for as-molded white patterns, one for first-coat drying, one for second-coat drying, and one for assembled, coated pattern clusters awaiting burial in sand. Because the coating is highly hygroscopic, patterns dried and then stored in a non-dry environment would absorb moisture, resulting in reduced strength and even peeling. Moisture-laden coatings would inevitably cause pouring defects. Furthermore, ventilation was critical—without proper airflow, humidity would remain excessive and drying would be prolonged. Conversely, excessively confined spaces with patterns placed too close to heat sources would cause pattern deformation.
Given the actual workshop area, we designed and constructed three drying rooms equipped with temperature controllers and exhaust fans. Boiler steam served both the foam molding machines and the drying rooms. The drying process was as follows:
| Drying Stage | Temperature | Duration | Critical Control Points |
|---|---|---|---|
| White pattern initial drying | 45°C ± 5°C | 72 h total (with intermediate weighing) | Weight change between consecutive 24 h weighings ≤ 5–6 g |
| First coat drying | 55°C ± 5°C | 3–4 h until touch-dry; full drying 24 h | First layer must be completely dry before second coat |
| Second coat drying | 55°C ± 5°C | 36–40 h until fully dry | Pattern support and positioning to prevent deformation |
| Assembled cluster drying | 55°C ± 5°C | > 8 h after final assembly | Humidity ≤ 30%; continuous ventilation |
The white patterns were initially air-dried to remove surface moisture before entering the drying room. The drying room temperature was maintained at 45°C ± 5°C. Foam patterns were sealed with tape and placed in the drying room. After 24 hours, the mass was recorded; the mass was measured again after another 24 hours. The pattern was considered adequately dry when the difference between consecutive 24-hour weighings was less than 20 g; exceeding this threshold required continued drying. Experimentally, FT800 rear bridge and transmission case patterns required 72 hours of drying. After 24 h and 48 h drying, intermediate weighings were recorded. When successive weighings differed by only 5–6 g, the patterns were removed for half-bonding and then returned to the drying room for the remaining time to complete 72 hours before coating.
Coated patterns were transferred to another drying room maintained at 55°C ± 5°C. After the first coat, patterns were dried for 24 hours, then removed for the second coating application, and returned to the drying room. The second coat required more than 8 hours of drying before any subsequent handling. Experimentally, the first coat dried through within 3–4 hours, while the second coat required 36–40 hours for complete drying. Throughout drying, patterns were properly supported to prevent sagging or warping. Completely dried patterns were stored in a low-humidity environment to prevent moisture absorption. Humidity control at ≤ 30% was maintained through continuous ventilation, with regular inspection of temperature controllers and exhaust fans; any malfunction was immediately repaired.
Gating System Design
Rear Bridge Shell
The rear bridge dimensions were 841 mm × 430 mm × 276 mm, with a finished weight of 181 kg and poured weight of 245 kg. A bottom-gating system without a runner bar was employed. The ingates were positioned in the oil sump area beneath a 220 mm rectangular window. The gating system was calculated as follows:
$$$ \sum F_{\text{ingate}} = \frac{G}{0.31 \mu t \sqrt{H_p}} \quad (\text{cm}^2) $$$
where:
- ∑Fingate — minimum total ingate cross-sectional area, cm²
- G — weight of liquid metal flowing through the ingate (casting weight + gating system weight), kg
- μ — flow coefficient, typically taken as 0.3–0.4
- Hp — static pressure head, cm
- t — pouring time, seconds, calculated from:
$$$ t = k(G^{1/2} + G^{1/3}) $$$
where k is a correction factor: with vacuum assistance, k < 1, typically approximately 0.85.
The flask height was 1000 mm with approximately 150 mm of bottom sand. The casting height in the pouring position was 430 mm. Tilted pouring at 18° yielded: sin 18° × 841 ≈ 260 mm rise on one end. Thus: 150 + 430 + 260 = 840 mm, leaving 160 mm of top sand. With a 200 mm pouring cup, the actual casting height in the pouring position was 430 + 260 = 690 mm. The static pressure head was:
$$$ H_p = 69 + 16 + 20 – \frac{69}{2} = 70.5 \ \text{cm} $$$
$$$ \sum F_{\text{ingate}} = \frac{245}{0.31 \times 0.35 \times 18 \times \sqrt{70.5}} \approx 14.9 \ \text{cm}^2 $$$
An open gating system was adopted with Asprue : Aingate = 1 : 1.1. Therefore, 14.9 / 1.1 = 13.5 cm². A sprue of Ø 40 mm was selected, and the ingates were knife-type gates measuring 140 mm × 10 mm.
Transmission Case
The transmission case measured 785 mm × 596 mm × 380 mm, with a finished weight of 185 kg and poured weight of 250 kg. The pouring time was 18 seconds with 18° tilt pouring. The bottom sand height was 100 mm. The casting height in the pouring position was 555 mm. With sin 18° × 785 mm = 240 mm, the actual height became 555 + 240 = 795 mm. The top sand thickness was 1000 − 795 − 100 = 105 mm. With a 200 mm pouring cup:
$$$ H_p = 79.5 + 20 + 10.5 – \frac{79.5}{2} = 70.25 \ \text{cm} $$$
$$$ \sum F_{\text{ingate}} = \frac{250}{0.31 \times 0.35 \times \sqrt{70.25}} \approx 15.3 \ \text{cm}^2 $$$
A sprue of 40 mm × 40 mm was selected, with a runner of 50 mm × 35 mm and five ingates of 35 mm × 10 mm each. Side-gating was employed. The system was open with a cross-section ratio of Asprue : Arunner : Aingate = 1 : 2 : 1.09.
Pattern Assembly and Gating Bonding
Immediately after demolding, the two pattern halves were joined and transferred to a calibration fixture to correct any ejection-induced distortion. The joint was secured with tape and the assembled pattern was placed in the drying room to shorten maturation. After 48 hours of drying, patterns could be removed for assembly and gating bonding. Cold adhesive was used for white pattern assembly and gating connections; hot-melt adhesive was used when connecting the gating system during flask packing. Foam reinforcement ribs functioned primarily during casting solidification shrinkage, while wooden reinforcement ribs maintained pattern rigidity during transportation, coating, and molding operations.
For sprue bonding, the pre-coated and dried sprue (brushed three times) was used. Both upper and lower sprue sections had 1 cm trimmed from their mating ends, with coating drilled out of the holes. Hot-melt adhesive bonded the joint surfaces, which must be flat. A minimum of two layers of tape was applied over the bonded joint. All joints between the pattern and gating system were carefully inspected. Any weak coating areas or damaged spots were covered with tape and subsequently treated with alcohol-based quick-drying coating to ensure no exposed white foam.
Foam ceramic filters were incorporated into the gating system bonding step. The filter was positioned at one-third of the total gating system height from the bottom. Two truncated cones were cut and used to sandwich the filter, with the entire assembly wrapped with at least two layers of tape at the junctions. After coating application, the assembly was conveyed to the drying room.
When refractory ceramic tubes were used for the gating system, a short tube segment (approximately 4–5 cm) had adhesive applied to its inner diameter. Once the adhesive became tacky, the tube was slipped over the foam sprue, leaving 3–4 cm of exposed foam sprue above the tube. Repair paste was applied at the interface between the tube and foam, and after drying, two layers of tape were wrapped around this region. The assembly was then coated and dried, with the exposed 3–4 cm sprue section protected by tape without coating. Immediately before flask packing, the tape was removed from the upper section, and an upper ceramic tube section was fitted over the 3 cm exposed sprue, joining to the lower tube. The junction was wrapped with at least two layers of tape. The fully assembled pattern cluster was returned to the drying room for final moisture removal.
Flask Packing and Molding
Once the coated patterns were thoroughly dried, they were ready for flask packing. Dry sand filling and compaction demanded that sand reach every internal cavity of the pattern. For areas difficult to fill, pre-placed resin sand was applied. For the FT800 rear bridge and transmission case, two castings were packed per flask.
Through experimentation, we established the following vibration parameters: vibration frequency of 50 Hz, vibration acceleration of 1.2 m/s², amplitude of 0.5–1.5 mm, and vibration duration of 4–6 seconds. These parameters consistently produced molds with appropriate compaction density.
Pouring
Before pouring, the vacuum pump was activated. The vacuum level was determined based on casting size: for the FT800 rear bridge and transmission case, the vacuum was controlled at 0.04–0.05 MPa. Vacuum was maintained for 10 ± 2 minutes after pouring before release. Pouring temperature requirements: gray iron above 1400°C, ductile iron above 1420°C. For these shell castings, a maximum of six molds could be poured per ladle.
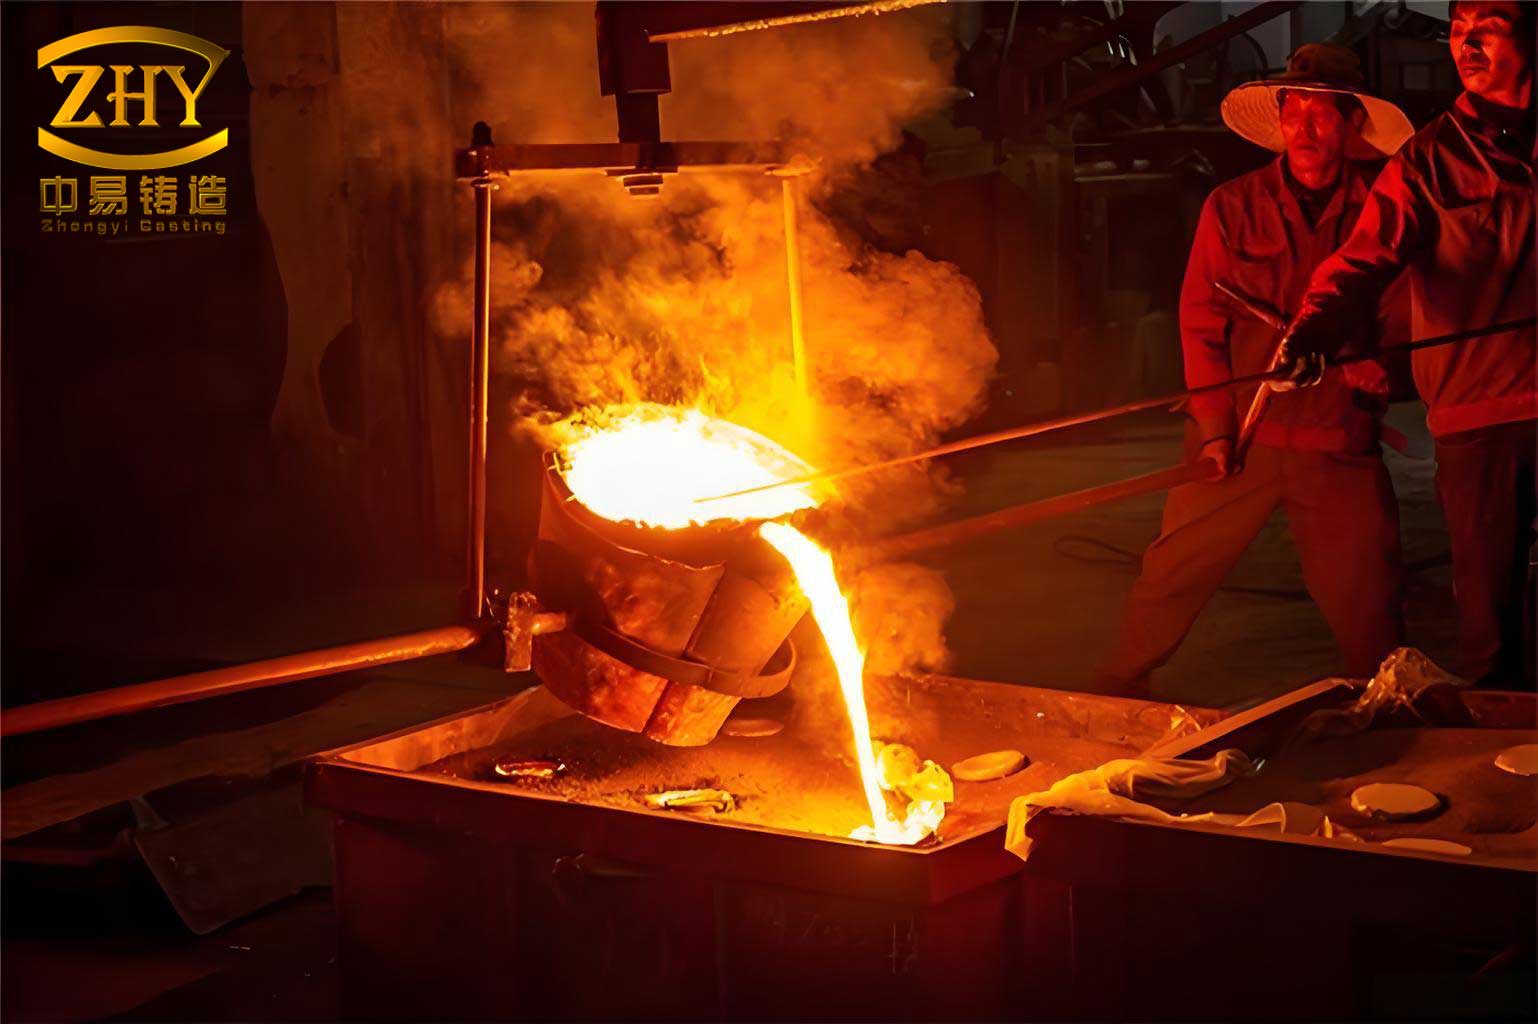
The pourers strictly followed the “slow-fast-slow” principle—a critical operational guideline for lost foam castings, particularly for cast iron. During the initial pouring stage, excessively fast pouring caused gas explosions (or back-flaming) and metal splashing. The pour began with a thin, slow stream until the gating system was fully filled with metal. At this point, a characteristic suction sound was audible, signaling that full-rate pouring could commence. The objective was to pour as rapidly as possible while maintaining a full pouring cup without overflow. The sprue was filled as quickly as possible at the start to prevent vacuum loss. Pouring never stopped once initiated; continuous metal flow until complete mold filling was mandatory to avoid mold collapse. After pouring completion and holding for the required duration, the plastic film was lifted to achieve full pressure equalization.
Shakeout and Sand Reclamation
The FT800 rear bridge and transmission case castings were held in the mold for a minimum of 4 hours after pouring. Reclaimed sand temperature was controlled below 50°C. Loss on ignition of reclaimed sand was maintained below 0.5%, with dust content below 1%.
Process Trials: Defects Encountered and Corrective Measures
Mold Collapse
Both the transmission case and rear bridge shell exhibited mold collapse during initial trials. The root causes were identified as insufficient vacuum level and intermittent pouring flow. Systematic trials progressed from 0.025 MPa through 0.032, 0.034, and eventually 0.04, 0.045, and 0.05 MPa. At a vacuum of 0.04 MPa, collapse defects were eliminated. This established that FT800 rear bridge and transmission case castings, being medium-to-large by lost foam standards, required comparatively high vacuum levels—small castings might function adequately at 0.02–0.03 MPa, but these larger components demanded more. Additionally, pouring had to be continuous and unbroken to prevent collapse.
Deformation and Dimensional Deviation
The rear bridge shell exhibited expansion at the central 270 mm dimension, with approximately 5 mm bulging at the middle, causing the side bosses and pads to become misaligned, resulting in scrap. The transmission case displayed non-perpendicularity between the two large mounting ears and the main axis, appearing as lateral bowing. Both defects were capable of generating rejected castings. The following corrective measures were implemented:
- Anti-deformation ribs: Three wooden ribs were added at the top opening of the rear bridge across the 270 mm span, with two foam ribs in the spindle bore area. The transmission case received two wooden ribs at the top opening and two additional wooden ribs at the large end of the gearbox housing, plus two foam ribs at the case middle. Wooden ribs primarily enhanced the rigidy of the foam pattern itself, preventing deformation during drying, coating, and sand packing. Foam ribs functioned to prevent deformation caused by solidification shrinkage stresses. Wooden ribs were preferred at the upper openings because foam ribs presented difficulties in cross-section control, and their solidification timing relative to the casting body was unpredictable—the ribs could locally pull the casting during shrinkage, creating wavy rather than straight surfaces at the upper openings.
- Enhanced pattern rigidity: Pre-foaming density and post-molding density were strictly controlled. Excessive density hindered gasification, while insufficient density caused pattern flexibility and trembling. The optimal pre-foamed density range was confirmed as 22–24 g/dm³. Foam molding parameters were adjusted to extend cooling times, ensuring complete cooling and solidification before ejection.
- Deformation prevention during intermediate steps: White patterns were pre-assembled with tape before drying. Coating handling avoided lifting patterns at unsupported positions. During coating drying, the rear bridge was placed horizontally (flat) while the transmission case was placed upright with the large end down. Coating thickness was maintained within specification—neither too thick nor too thin.
- Pattern shelf-life control: White pattern storage was limited to 20 days maximum. Prolonged storage caused excessive pattern shrinkage leading to dimensional non-conformance.
- Mold shrinkage redesign: At the 270 mm square opening and the 220 mm internal dimension, the mold shrinkage rate was reduced from 1% to 0.5%.
- Extended holding time: Holding time after pouring was increased to 5–10 minutes to prevent deformation from premature shakeout before complete solidification.
Nodulation (Inclusions)
Nodulation defects appeared primarily at ingate locations in the gating system and at areas difficult to fill and compact during molding. For the rear bridge, this occurred beneath the upper opening; for the transmission case, at the two side ears. Two contributing factors were identified. First, the initial gating system placement within the internal cavity, connected to the bottom wall, created confined spaces around the ingates. Extended exposure to metal flow and erosion caused local sand overheating, inducing foam melting in regions yet to be filled by metal, leading to local collapse and mixing of sand with molten metal to form nodular defects—often accompanied by local wall porosity. Second, inadequately compacted sand at difficult locations permitted the coating to rupture during pouring due to lack of sand support, allowing metal penetration into the sand to form nodules.
Corrective actions included:
- Relocating the rear bridge gating system from internal bottom-gating to external bottom-gating.
- Moving the transmission case gating system from the confined area of the case to the spacious end of the gearbox housing.
- Pre-filling difficult compaction areas with resin sand prior to flask packing.
- Implementing 15° tilt pouring to improve sand filling and vibration compaction within internal cavities.
Sand Penetration (Metal Penetration)
Both the transmission case and rear bridge shell exhibited sand penetration in internal blind holes, corners, and other recessed areas, with varying severity. Analysis confirmed that the primary cause was inadequate coating anti-penetration performance. Secondary contributors included coating cracks and thin coating areas through which molten metal penetrated into the sand. The following measures were enacted:
- Improved coating formulation: The yellow dextrin was removed from the formulation and replaced with white latex. Silica sol was increased from 2% to 4% to enhance high-temperature strength.
- Enhanced coating inspection: After coating application, patterns were thoroughly inspected. Cracks were smoothed with additional coating. Areas prone to penetration and thin spots received an additional coating pass, increasing local thickness.
Carbon Deposition and Carburization
Machined rear bridge and transmission case castings exhibited carbon black or large carbon dross patches and gas porosity on the upper surfaces (in the pouring position). The root causes were identified as excessive pattern density and insufficient molten metal temperature, resulting in incomplete pattern gasification. Corrective measures focused on two fronts:
- Lower pre-foamed density: The pre-foamed bead density was strictly controlled at 22–24 g/dm³.
- Higher pouring temperature: The furnace discharge temperature was increased to above 1500°C, with the pouring temperature maintained above 1400°C. Coating permeability was increased, and additional vent slots were provided.
These measures substantially eliminated carbon deposition defects. While carburization in iron castings is less severe than in steel castings, poor control could still cause issues. The charge formulation for lost foam castings was adjusted accordingly: increased steel scrap proportion, reduced pig iron proportion, and increased return scrap ratio. Post-adjustment testing confirmed no fluctuation in hardness, mechanical properties, or structural composition, validating the effectiveness of the charge adjustment.
Sand Inclusions and Coating Inclusions
Machined castings occasionally displayed sand inclusions and coating inclusions on the upper surface. These were attributed to sand particles eroded from the sprue and fragmented coating particles entering the mold. The following remedies were applied:
- The sprue received 3–4 coating passes, achieving a coating thickness of 1.5–2 mm.
- All gating connections were sealed tightly, with no exposed white foam after coating.
- The joint between the pouring cup and sprue was pre-filled with resin sand.
These measures effectively resolved the inclusion defects.
Summary of Defect Analysis and Prevention
| Defect Type | Root Cause | Preventive Measures |
|---|---|---|
| Mold collapse | Insufficient vacuum (below 0.04 MPa); interrupted pouring | Vacuum ≥ 0.04–0.05 MPa; continuous, unbroken metal stream |
| Deformation/dimensional deviation | Insufficient pattern rigidity; inadequate cooling; improper handling; excessive shrinkage | Wooden and foam reinforcing ribs; strict density control; extended mold cooling; careful handling; shrinkage rate redesign; extended holding time |
| Nodulation | Local sand overheating from poorly positioned gating; unsupported coating rupture | Relocated gating to open areas; resin sand pre-fill; 15° tilt pouring |
| Sand penetration | Inadequate coating anti-penetration; coating cracks and thin spots | Reformulated coating (white latex instead of dextrin; increased silica sol); local coating build-up |
| Carbon deposition/gas porosity | Excessive pattern density; low pouring temperature | Density 22–24 g/dm³; discharge temperature >1500°C; pouring temperature >1400°C; increased coating permeability |
| Sand/coating inclusions | Sprue erosion; degraded coating particles entering mold | Enhanced sprue coating (3–4 passes); sealed joints; resin sand at pouring cup/sprue junction |
Conclusions
Through this extensive research and development program on lost foam castings for the FT700 and FT800 transmission case and rear bridge shells, the following conclusions have been drawn:
- The use of CAD/CAM-designed and CNC-machined molds provides high dimensional accuracy, uniform heating, and automatic ejection capability, reliably producing uniform, dense, high-quality foam patterns. Manual mold making that compromises pattern quality must be avoided.
- Control of all raw materials—particularly EPS bead quality and process parameters—forms the foundation of successful lost foam castings production.
- High-performance lost foam castings coating possessing good strength, permeability, and anti-penetration characteristics is an essential prerequisite for producing quality castings.
- Careful, comprehensive gating system optimization and supporting process measures not only ensure successful lost foam castings production but also effectively prevent mold collapse, gas porosity, deformation, carbon deposition, and other defects.
- Under cupola melting conditions, achieving molten iron temperatures above 1500°C is a critical technical measure ensuring complete pattern gasification and preventing carbon deposition, gas porosity, and slag inclusion defects.
- Lost foam castings production, while appearing deceptively simple, constitutes a large integrated system engineering endeavor. Extensive, iterative process trials to establish specific parameters and achieve qualified castings are mandatory before mass production. Meticulous, disciplined adherence to process protocols is the cornerstone of consistent quality.
The experience gained from this project reinforces that the successful implementation of lost foam castings technology requires a holistic approach—integrating material selection, pattern production, coating technology, gating design, molding practice, and melting control—into a harmonized manufacturing system. The transition from resin sand to lost foam castings for these transmission and rear bridge components has demonstrated marked improvements in dimensional accuracy, surface quality, and process yield while satisfying the customer’s stringent requirements for export-grade castings. The methodology and technical insights presented here provide a valuable reference for foundries contemplating similar process conversions or implementing lost foam castings for complex iron castings.