
In my years of working with the full-cycle production of lost foam castings, I have learned that success depends on far more than simply pouring molten metal into a foam-lined mold. Lost foam castings require precise coordination among pattern manufacturing, refractory coating, dry-sand vibratory compaction, vacuum control, pouring strategy, and cooling management. The process was successfully developed in the 1980s as a new casting technique. The general principle is to create a foam pattern whose geometry matches the final casting, glue the pattern components together, coat the assembly with a refractory slurry, dry it, embed it in dry sand under vibration, and pour under negative pressure. After solidification and cooling, the foam pattern has been replaced by the metal and the casting is revealed. I use this article to explain the main quality control points that I consider essential for repeatable production of reliable lost foam castings.
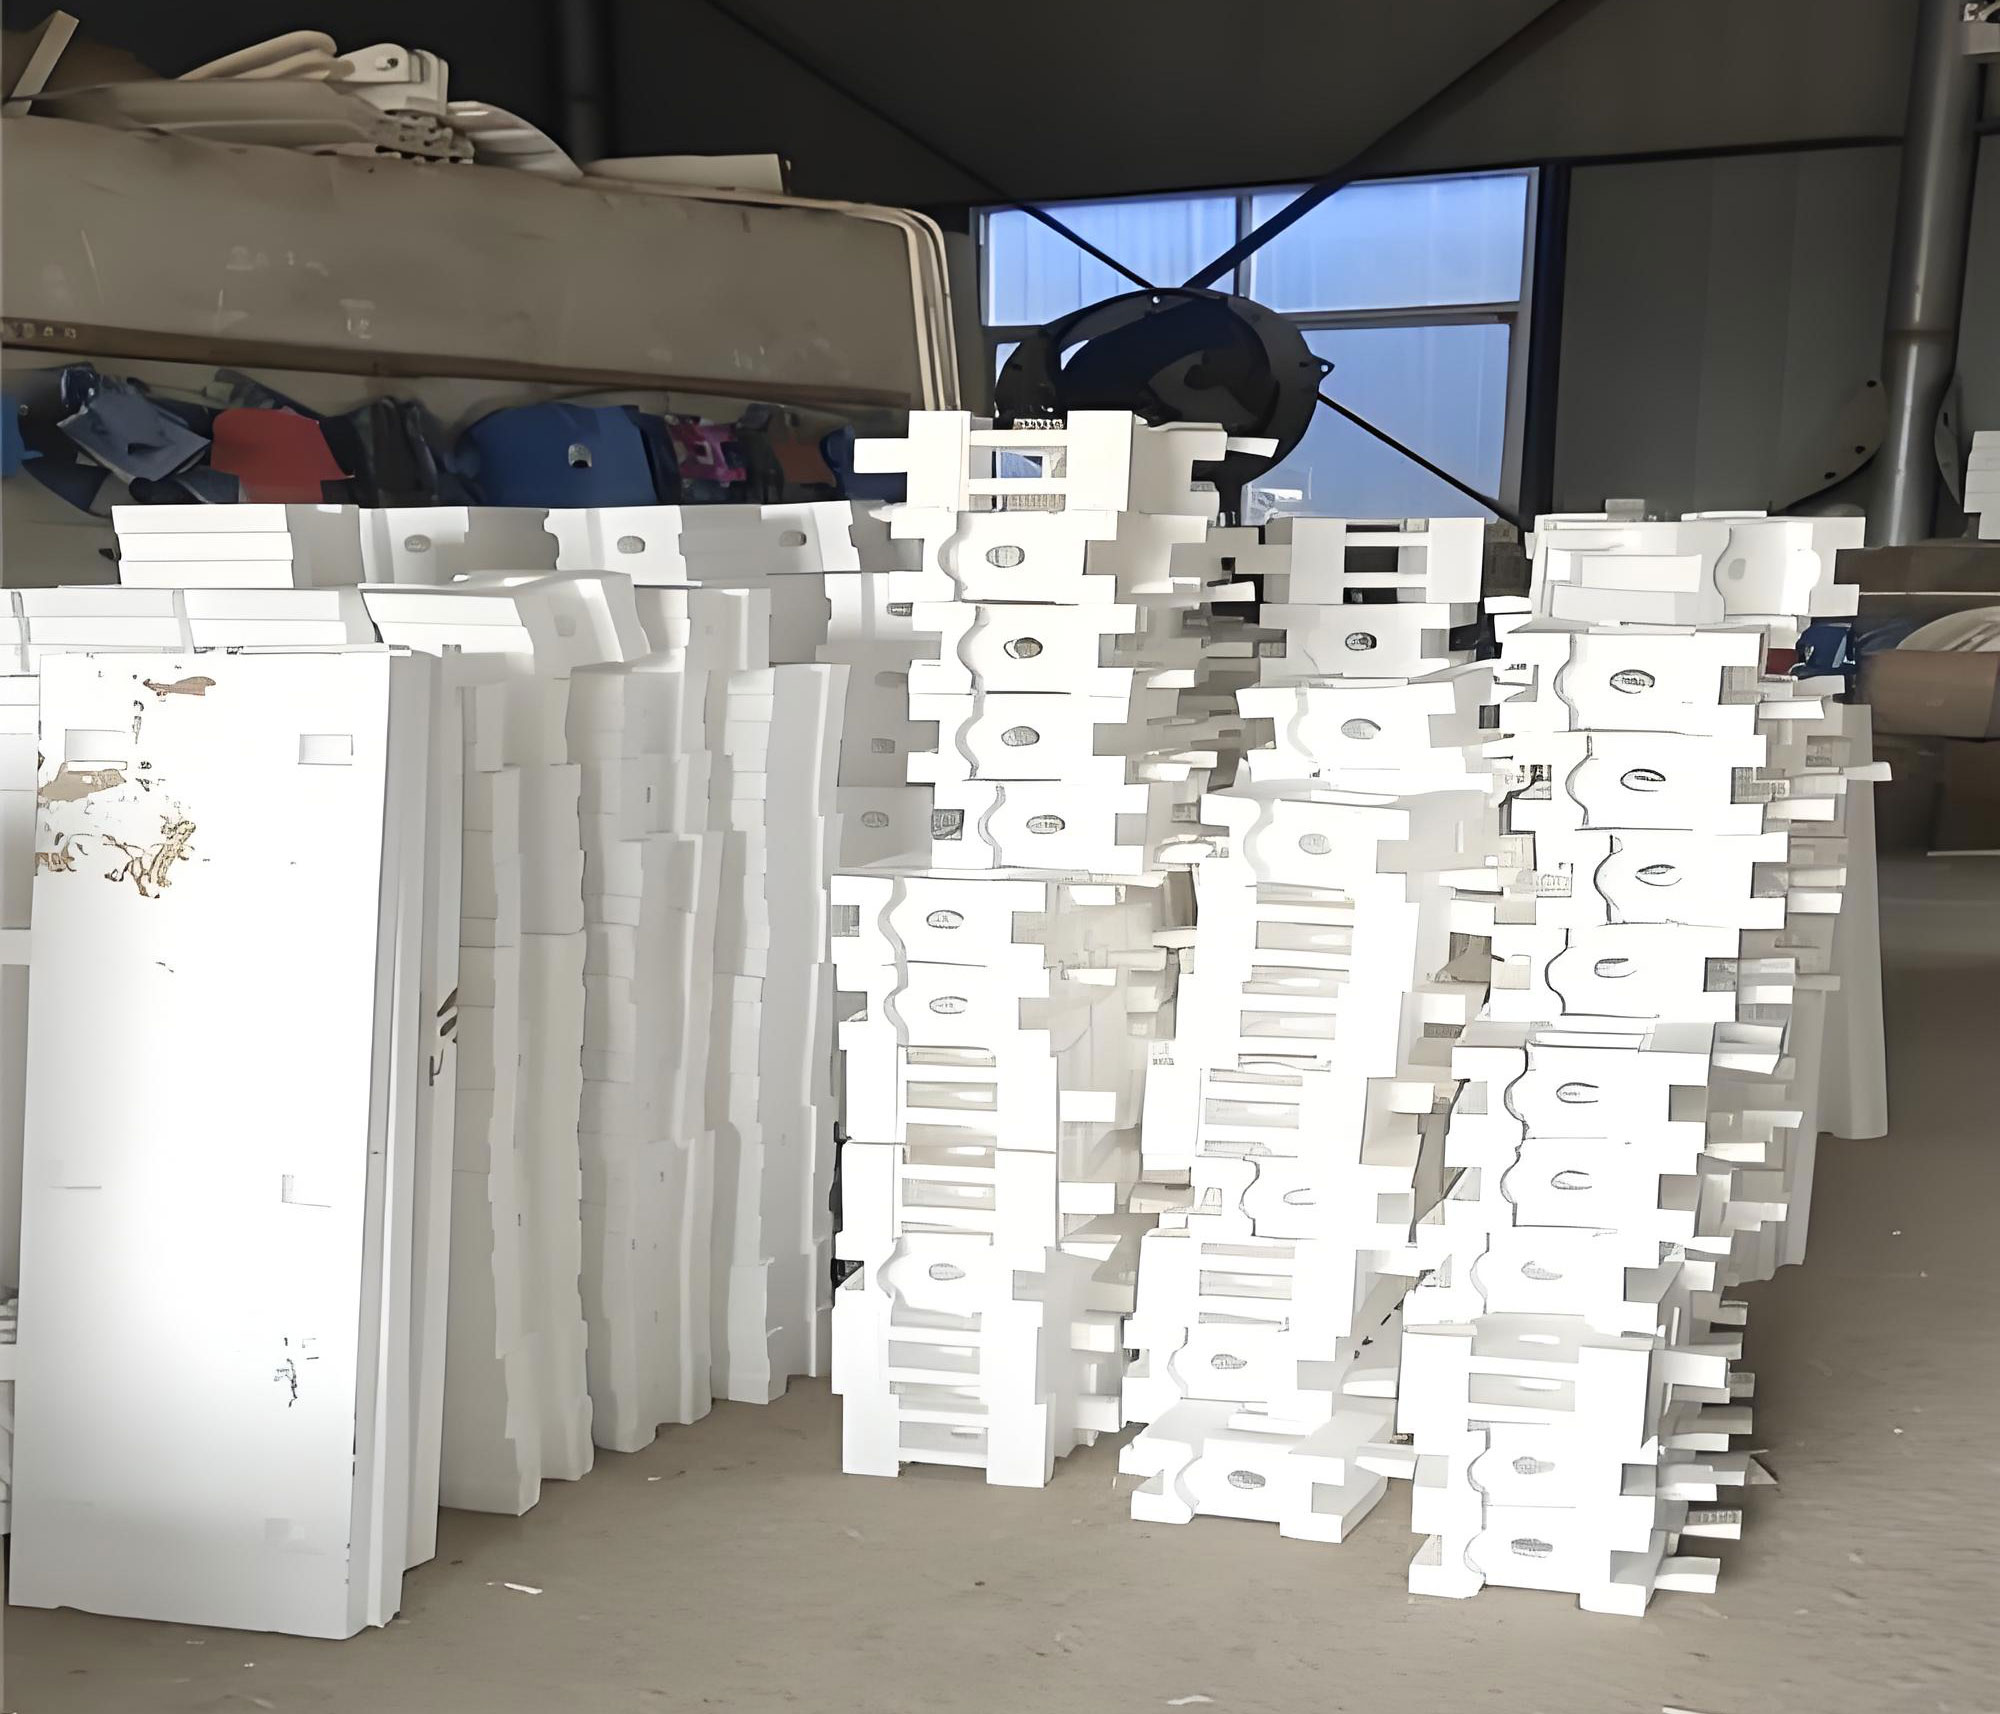
As modern design tools such as UG and other three-dimensional modeling systems are integrated into the tooling stage, the dimensional accuracy of lost foam castings can be greatly improved. With better simulation of shrinkage, gating, and filling, it becomes possible to obtain complex near-net-shape castings with excellent surface quality and remarkable internal soundness. For me, the main benefit of lost foam castings is the clean and environment-friendly nature of the process. Dry sand is reused, binders are avoided, and the foam pattern gasifies rather than remaining as a sand mold core. However, these benefits are only attainable when the process parameters are carefully controlled. In this article, I discuss the key technical measures that determine the quality of lost foam castings from the pattern through the final shakeout.
Pattern Quality Is the Foundation of Lost Foam Castings
The pattern is often called the heart of the lost foam casting process. If the foam assembly is inaccurate, deformed, or damaged, no amount of compensation in the coating or sand system can correct the final casting. In my experience, the first requirement is to select the correct foam raw material. The pattern material should be a dry-blended foam with a density of approximately 18 kg/m³. This density is a practical target because it provides enough strength for handling while still remaining light enough to gasify rapidly during pouring. The density of any sample block can be checked using the basic definition:
\[
\rho_f = \frac{m_f}{V_f} \approx 18\ \text{kg/m}^3
\]
In the construction of lost foam castings, I always recommend pre-drying the purchased foam pattern blanks before they are used. If the pattern is stored after purchase, it should be placed in a drying room for 8 to 16 hours before assembly. This pre-drying step removes residual moisture and stabilizes the foam. Moisture in the foam is harmful because it will vaporize during pouring, create gas porosity, and interfere with the pressure balance inside the mold. Stable foam blanks are especially important for large lost foam castings, where a slight moisture increase can cause serious vacuum-related defects.
When the pattern itself is cut or milled, the reference planes and centerlines must be marked correctly. In my own workshop practice, I insist on checking the centerline, position line, and datum surface carefully before any other operation. A small error in the datum can cause a large dimensional mismatch after the foam segments are assembled. All cut traces should be smoothed with fine sandpaper. This is not only a cosmetic issue. The surface roughness of the foam pattern is transferred directly to the internal surface of the coating and eventually to the casting. Therefore, in lost foam castings, a smooth foam surface is essential for obtaining a smooth final casting. Fine sandpaper should be used carefully so that the geometry is not changed. Excessive sanding can remove too much material and create a local depression.
| Pattern Parameter | Recommended Value or Control | Effect on Lost Foam Castings |
|---|---|---|
| Foam density | Approximately 18 kg/m³ | Balances strength, gas evolution, and surface quality |
| Pre-drying | 8–16 hours in drying room | Reduces moisture and stabilizes dimensions |
| Datum and centerlines | Mark and check before cutting | Prevents dimensional mismatch |
| Cutting trace treatment | Fine sandpaper smoothing | Improves surface finish |
| Adhesive | Hot-melt adhesive, minimum amount | Avoids excess glue residue and gas defects |
| Glue overflow | Must be wiped clean | Prevents inclusions and surface roughness |
During the assembly of foam segments, I strongly prefer hot-melt adhesive. However, the amount of adhesive must be minimized. Excessive adhesive not only creates local thickening but also generates extra gas during pouring. In lost foam castings, any organic material that remains in the mold must be eliminated through the coating and vacuum system. Therefore, glue that oozes out of the joint should be wiped away immediately. One of the most common defects I have observed in poorly controlled foundries is rough lines on the casting surface exactly where the foam pattern was glued. These lines disappear only when the joint is smooth and the glue excess is removed before coating.
Coating Control and Its Role in Lost Foam Castings
Coating selection is one of the most critical decisions in the production of lost foam castings. The coating must perform several functions at the same time. First, it must prevent liquid metal from penetrating into the dry sand. Second, it must permit the gaseous products of foam decomposition to escape through the coating and into the sand. Third, it must strengthen the foam assembly so that the pattern does not deform during vibration and sand filling. Fourth, it must influence the cooling rate and solidification behavior of the casting. In my experience, no single coating recipe is suitable for every metal and every section thickness. The coating must be chosen according to the casting material, pouring temperature, and geometry of the casting.
When I mix coating for lost foam castings, I avoid the “close enough” approach. Every raw material must be weighed and recorded. The refractory aggregate, binder, carrier, and additives must be added in the exact proportions. If the coating is too thin, it will not provide enough barrier against metal penetration. If the coating is too thick, it may crack when dried or delay gas evacuation, causing incomplete filling and folds. Before applying the coating, I check all foam joints again. Large gaps or open seams are unacceptable. If a wide gap exists, molten metal may leak through the joint and cause a flash or fin defect. In such cases, the joint should be repaired before the coating is applied.
For most of the lost foam castings that I have produced, the coating is applied in multiple layers. The first two layers should be relatively thin. The purpose of the early thin layers is to wet the foam surface uniformly and penetrate into any small surface irregularities. Each layer must be dried completely before the next layer is applied. I typically dry the coated pattern in a drying room at 40 °C to 50 °C for 18 to 24 hours. This temperature range is important because too high a drying temperature can soften or deform the foam pattern. Too low a temperature leaves moisture trapped inside the coating, which can cause steam defects during pouring.
\[
t_{dry} = 18\text{–}24\ \text{h}, \qquad T_{dry} = 40\text{–}50\ ^\circ\text{C}
\]
The final coating thickness is determined by the complexity and size of the casting. In ordinary sections of lost foam castings, I recommend a coating thickness of 2 to 3 mm. In the runner and riser areas of lost foam castings, the coating is usually about 3 mm thick. Thin-walled and intricate castings may require a slightly different thickness to balance filling resistance and heat loss. The following expression can be used in a general way to guide the coating thickness range:
\[
\delta_c =
\begin{cases}
2\text{–}3\ \text{mm}, & \text{regular casting surfaces} \\
3\ \text{mm}, & \text{gating and riser contact areas} \\
1.5\text{–}2\ \text{mm}, & \text{thin-walled and complex sections}
\end{cases}
\]
Coating quality greatly influences the surface finish of lost foam castings. During pouring, the liquid metal front progressively degrades the foam pattern. The gaseous products must flow through the porous coating and into the dry sand under the influence of the vacuum. If the coating permeability is too low, gas pressure builds up at the metal front and can cause back-pressure defects such as folds, cold shuts, or incomplete filling. If the coating permeability is too high, metal may penetrate into the sand and form a rough metal-sand reaction surface. A balanced coating is therefore the key to achieving dense and clean lost foam castings.
Molding, Assembly, and Vibration
After the coating has been fully dried, I do not rush immediately to pouring. In my process, the dried pattern assembly is allowed to stand for 5 to 8 hours before it is placed into the sand box. This waiting period allows the coating to equilibrate with the ambient humidity and avoids any residual solvents or moisture being sealed inside the mold. This step is especially important in humid climates. In lost foam castings, the mold cavity is formed by the pattern itself. There is no conventional mold cavity after the pattern is gasified. Therefore, the condition of the pattern and coating at the moment of pouring controls the final result.
One of the biggest mistakes that I see in the production of lost foam castings is the random grouping of multiple patterns in one sand box. The pattern sizes should be as consistent as possible. Large and small patterns placed together may cause different filling speeds and can create severe gas interaction between castings. I always try to keep the pouring system simple. A simple gating system reduces turbulence and minimizes the amount of foam decomposition gas generated during pouring. The runner system in lost foam castings should never be arranged as a complex network. A network-style gating system creates unpredictable flow patterns and makes it difficult to control the vacuum pressure in all branches. I also avoid attaching castings to the gating system in a disorderly manner.
The distance between adjacent castings in the same cluster is another important parameter. In my experience, the minimum spacing between two castings should be at least two times the wall thickness of the casting. This can be written as:
\[
s_{casting} \ge 2\, t_w
\]
where \(s_{casting}\) is the clear distance between castings and \(t_w\) is the nominal wall thickness. This spacing ensures that the sand between castings is strong enough to resist metal pressure and that the vacuum distribution is uniform around each pattern. When castings are placed too close together, the sand in the narrow gap may become poorly compacted, leading to sand erosion and penetration defects in lost foam castings.
When the pattern has openings or holes, the method of preventing sand from entering the internal cavity depends on the geometry. For holes with a cross-section smaller than 30 mm and a depth greater than 40 mm, I use magnesia sand to make a core. Magnesia sand has excellent refractory properties and resists the high temperature of the metal. For large shallow holes, silica sand can be used. The core material must be compatible with the metal being poured. If the core is not refractory enough, it can sinter and become difficult to remove from the finished casting. This is a common hidden problem in lost foam castings that are designed with deep recesses.
| Casting Feature | Core/Sand Method | Reason |
|---|---|---|
| Hole section less than 30 mm | Magnesia sand core | High refractory strength and resistance to metal erosion |
| Hole depth greater than 40 mm | Magnesia sand core | Prevents sand collapse and penetration |
| Large shallow hole | Silica sand | Economical and sufficient for low thermal load |
| Area not easy to compact | Manual compaction assistance | Prevents local loose sand and mold wall movement |
In the sand filling process, I always ensure that the sand box has sufficient sand coverage on all sides. The bottom sand layer under the pattern must be at least 200 mm thick. The sand around the pattern must also be at least 200 mm thick, and the top covering layer must be at least 200 mm thick. If the sand cover is too thin, molten metal can break through the surface or the vacuum can pull air through the sand bed. During filling, each batch of sand should be approximately 300 mm in height. After each batch of sand is added, the box is vibrated for about 60 seconds. This combination of layer thickness and vibration time provides a uniform, dense sand bed around the pattern.
\[
h_{bottom} \ge 200\ \text{mm}, \quad h_{side} \ge 200\ \text{mm}, \quad h_{top} \ge 200\ \text{mm}
\]
\[
h_{sand\ layer} \approx 300\ \text{mm}, \qquad t_{vibration} \approx 60\ \text{s}
\]
During vibration, some areas are more difficult to compact than others. Narrow vertical sections, undercut regions, and the areas around the sprue may need manual tamping or mechanical assistance. In my experience, relying only on the vibration table is not enough for complicated lost foam castings. Local manual compaction helps to eliminate dry-sand bridges and prevents the formation of large voids in the sand bed. After the sand box is full, the top of the box must be sealed with a plastic film. The sealing film is critical because the vacuum is applied through the sand bed. If the film is not tightly sealed around the edges, air leaks will reduce the negative pressure and destabilize the mold.
I also pay close attention to the overlap at the edges of the plastic film and at the interface between the film and the sand box. In lost foam castings, the vacuum pressure inside the sand mold is what holds the sand in place during pouring. A small leak at the box edge can cause significant sand movement and result in swells, penetration, or even mold collapse. Therefore, before pouring, I check the entire top film area to make sure it is sealed completely.
Vacuum and Pouring Control for Lost Foam Castings
Perhaps the most dramatic difference between lost foam castings and conventional sand casting is the use of vacuum pressure during pouring. The vacuum is not simply an aid to extraction of gas. It is a structural support for the sand mold. Under the force of the vacuum, the sand particles are held together by the pressure difference across the sealed film. This allows the unbonded dry sand to behave as a rigid mold. Therefore, the vacuum system must be checked carefully before every pouring operation.
I always begin the pouring sequence by checking the vacuum equipment. The sand box must be inspected for leaks, especially around valves, pipes, and the sealing film. The negative pressure displayed on the control panel and the pressure measured at the sand box should be consistent. If the panel says one value and the gauge at the sand box shows another value, there may be a blocked hose or a serious leak. In lost foam castings, a stable negative pressure is essential for both solid sand holding and gas removal.
The recommended negative pressure depends on the metal being poured. In my experience with ferrous lost foam castings, the pouring negative pressure for steel parts is normally 0.05 to 0.06 MPa. For cast iron, the recommended negative pressure is 0.03 to 0.04 MPa. This difference is related to the higher pouring temperature and higher metallostatic pressure of steel, which requires more support from the sand bed. The range can be written as:
\[
P_{pour} =
\begin{cases}
0.05\text{–}0.06\ \text{MPa}, & \text{steel castings} \\
0.03\text{–}0.04\ \text{MPa}, & \text{cast iron castings}
\end{cases}
\]
The pouring temperature of lost foam castings must be higher than the pouring temperature used in a conventional sand mold. This is because the foam pattern absorbs heat during gasification. In my experience, the pouring temperature should be 30 °C to 50 °C higher than the normal sand-casting pouring temperature. This temperature difference can be expressed as:
\[
T_{lost\ foam} = T_{sand\ casting} + \Delta T
\]
\[
\Delta T = 30\text{–}50\ ^\circ\text{C}
\]
The higher initial temperature helps to decompose the foam pattern quickly and prevents the leading edge of the molten metal from freezing before the mold is completely filled. This is especially important for thin-walled lost foam castings. However, the pouring strategy is not a single constant speed. I use a slow-fast-slow pattern. The pour begins slowly in order to open the sprue and establish a stable metal front. Once the metal is flowing smoothly, the pour is accelerated rapidly to fill the main cavity before the foam gas pressure becomes too high. As the metal reaches the riser, the pouring speed is slowed down again. The final slow stage gives the riser time to function and promotes feeding of the solidifying casting.
One of the most valuable advantages of lost foam castings is the directional solidification behavior caused by vacuum cooling. Because the metal cools from the bottom upward, the riser remains liquid longer and feeding is more effective. The vacuum helps remove the heat from the lower part of the mold, while the upper riser remains hot. This produces a favorable temperature gradient. In my own foundry, I have found that defects such as shrinkage porosity are less frequent in lost foam castings than in comparable sand castings when the gating and riser system is designed properly. However, the riser must still be large enough and the pouring speed must be reduced near the riser to allow the riser to be filled with hot metal.
| Process Parameter | Steel Lost Foam Castings | Cast Iron Lost Foam Castings |
|---|---|---|
| Pouring vacuum pressure | 0.05–0.06 MPa | 0.03–0.04 MPa |
| Temperature increase over sand casting | 30–50 °C | 30–50 °C |
| Holding vacuum after pour | 0.02–0.04 MPa | 0.02–0.04 MPa |
| Holding time | Depends on casting section and size | Depends on casting section and size |
During pouring, the molten metal front in lost foam castings advances through the foam pattern and decomposes the foam. The decomposition products are gases and some liquid residues. A portion of these products escapes through the coating into the surrounding sand and is drawn away by the vacuum. If the pouring speed is too fast, the foam gas cannot escape quickly enough and the gas pressure can cause bubbling or folds in the metal front. If the pouring speed is too slow, the metal front cools prematurely and can cause cold shut. Therefore, the pouring temperature, coating permeability, vacuum level, and pouring speed form an integrated control system. In my experience, adjusting one parameter without considering the other three is a frequent cause of quality instability in lost foam castings.
Cooling, Holding Time, and Shakeout
After the pouring stage is complete, the vacuum should not be switched off immediately. In my process, I maintain a holding vacuum after pouring. For steel lost foam castings, the holding negative pressure is usually 0.02 to 0.04 MPa. The exact value depends on the size and wall thickness of the casting. The holding time is determined by the casting size; larger castings require a longer holding time. The holding vacuum supports the sand mold while the metal solidifies and cools. If the vacuum is released too early, the unsupported sand may collapse, and the solidifying casting can deform or cause hot tears.
One useful concept in controlling the holding time is the solidification modulus of the casting. The solidification time of a sound casting is related to the volume-to-surface area ratio. This is often expressed by Chvorinov’s rule:
\[
t_s = B \left( \frac{V_c}{A_c} \right)^n
\]
where \(t_s\) is solidification time, \(V_c\) is the effective volume of the casting, \(A_c\) is the cooling surface area, \(B\) is a mold constant, and \(n\) is an exponent close to 2 for many casting conditions. In lost foam castings, the coating thickness and sand density modify the mold constant \(B\). Therefore, larger and thicker castings generally need longer cooling and holding periods before the vacuum is turned off. In my experience, the vacuum should be maintained until the casting has a solid outer shell strong enough to withstand the sand pressure. If the shell is too thin and the vacuum is released, the casting may swell outward and cause a dimensional defect.
After releasing the negative pressure, I normally wait 18 to 24 hours before shakeout. This is not a fixed rule; it depends on the size of the casting and the surrounding air temperature. Large lost foam castings may need more time to cool sufficiently to avoid distortion when they are removed from the sand. Small and medium castings may be shaken out earlier, but a conservative cooling period reduces the risk of residual-stress distortion and hot cracking. During the cooling period, the used dry sand remains in place and acts as an insulating blanket. If the casting is shaken out too early, thermal shock can occur and may lead to stress-related cracks.
\[
t_{cool} = 18\text{–}24\ \text{h}
\]
When the shakeout finally takes place, the dry sand falls away from the casting because there are no binders to hold it together. I have found that the surface quality of lost foam castings is often excellent if the coating and vacuum have been controlled correctly. The remaining coating can be removed by shot blasting or other normal cleaning methods. The recycled sand must be screened and cooled before it is reused in the next mold. In lost foam castings, sand reuse is one of the major environmental and economic advantages over traditional clay-bonded sand molding. However, the sand must be kept clean and free of large coating fragments.
Defect Prevention and Continuous Improvement in Lost Foam Castings
Even with careful control, defects can still appear in lost foam castings. I have developed a habit of recording every parameter for every pour. The density of the foam, coating batch, drying time, sand vibration time, vacuum pressure, pouring temperature, and holding time are all logged. When a defect appears, I compare the log with the defect location and appearance. This allows me to identify the cause more quickly. The main defects that affect lost foam castings include porosity, folds, cold shuts, metal penetration, sand inclusion, deformation, and carbon residue defects. Each defect has a different root cause and requires a specific corrective action.
| Defect Type | Typical Appearance | Main Cause | Control Method |
|---|---|---|---|
| Gas porosity | Rounded internal pores | Moisture in foam or coating; high coating moisture; trapped gas | Pre-dry pattern; dry coating completely; adjust vacuum |
| Fold or wrinkle | Lapped surface lines | Foam residue; insufficient coating permeability; low pouring temperature | Raise pouring temperature; improve coating permeability; control pouring speed |
| Cold shut | Unfused metal fronts | Too low pouring temperature; slow pouring; excessive gas back pressure | Increase temperature; pour faster; reduce coating thickness; improve venting |
| Metal penetration | Rough sand-metal mixture on surface | Low coating thickness; low coating refractoriness; loose sand | Increase coating thickness; improve compaction; adjust vacuum |
| Sand inclusion | Embedded sand particles | Coating cracking; sand entering through joints; poor manual compaction | Repair joints; inspect coating; compact local areas |
| Deformation | Warped dimensions | Weak pattern; uneven sand compaction; early shakeout | Strengthen pattern support; improve vibration; extend cooling time |
| Carbon residue | Black or shiny carbon film | High foam density; poor coating permeability; high pouring temperature | Reduce foam density; improve coating; balance pouring temperature |
One of the most important defects in lost foam castings is the fold defect caused by liquid foam residue. When the molten metal advances, the foam cannot always gasify completely. Some liquid polystyrene residue may remain and be pushed ahead of the metal front. If this residue is not carried into the sand or decomposed, it can become trapped along a boundary inside the casting. This appears as a fold or a bright carbon-enriched line. The chance of this defect increases when the foam density is too high, the pouring temperature is too low, or the coating is not permeable enough. I have also found that excessively high pouring temperatures can increase carbon pickup in steel lost foam castings. Therefore, the optimum pouring temperature must be selected carefully for each alloy and section thickness.
For steel lost foam castings, carbon pickup is a special concern. The foam pattern is carbon-rich, and if the decomposition products are not removed efficiently, the surface carbon content of the casting can increase above the specification. This is less important for cast iron lost foam castings because carbon variations are normal in iron. For steel, however, I recommend using a lower foam density, a permeable coating, and a sufficient vacuum to remove the gaseous carbon products before they can dissolve into the steel surface. If carbon defects persist, the gating system and coating sintering behavior should be reviewed.
When I design the gating system for lost foam castings, I always seek simplicity. A complicated gating system increases surface area, increases the amount of foam, and creates more gas. A simpler system reduces the chance of slag entrapment and metal turbulence. The sprue, runner, and ingates should be connected in a way that permits the metal to flow smoothly into the casting cavity. Sharp corners should be avoided in the gating system because they create local turbulent flow. The pouring cup should be large enough to maintain a steady stream of metal during the initial stage of pouring. In lost foam castings, the pouring cup is often part of the foam pattern, so its geometry must be carefully controlled.
Another element that I consider during design is the use of three-dimensional software. Modern CAD systems allow the foundry engineer to simulate the casting filling and solidification process before cutting the foam tooling. I use these simulations to check for possible air entrapment, cold spots, and riser effectiveness. This is especially useful for large and complex lost foam castings. When the simulation shows that a particular runner arrangement creates inconsistent flow, I modify it before the foam pattern is manufactured. This saves time and reduces the risk of a defective pour.
In my experience, lost foam castings are most successful when the casting design is modified to suit the process. Unlike conventional sand casting, there is no need to remove a wooden pattern from the mold. Therefore, lost foam castings can have more complex external geometry and deeper undercuts. However, the geometry must still allow complete filling and effective coating application. Internal passages and narrow slots should be designed so that the coating can be applied evenly. Sharp edges on the foam pattern should be avoided wherever possible because they are difficult to coat uniformly and tend to cause erosion.
Process Repeatability and Quality Assurance
Repeatability is the main reason why some foundries succeed with lost foam castings while others abandon the process. I have learned that quality control in lost foam castings is a matter of discipline. The operators must understand why every step is important. It is not enough to tell them that the coating should be 2 mm thick. They must know that a thin coating can cause metal penetration and that an excessively thick coating can cause cold shut. I use simple visual standards and control charts for the key variables. I also measure the coating thickness regularly using a wet-film gauge or a magnetic thickness gauge after drying.
The use of a first-article inspection is extremely important for the production launch of any new lost foam casting. After the first sample is produced, I verify its dimensions, surface condition, and internal soundness. The sample casting is sectioned for macroetching and, if needed, radiographed. The dimensional comparison is made against the original CAD model. This comparison tells me whether the foam pattern shrinkage, coating thickness, and sand compaction are in balance. If the first article has a uniform shrinkage allowance, I can adjust the tooling dimensions before large-scale production begins. In this way, the high dimensional precision of lost foam castings is achieved intentionally rather than by accident.
| Quality Assurance Step | Purpose | Typical Acceptance |
|---|---|---|
| Foam density check | Control gas evolution and strength | Approximately 18 kg/m³ |
| Coating thickness inspection | Ensure barrier and permeability balance | 2–3 mm on main surfaces; 3 mm on runners/risers |
| Vacuum pressure verification | Confirm no leaks and consistent negative pressure | Gauge value matches sand box value |
| Sand compaction control | Prevent mold wall movement and penetration | Each layer 300 mm, vibration 60 s; manual compaction where needed |
| Thermal history recording | Enable defect analysis | Record all pouring parameters |
| First-article layout | Confirm dimensional accuracy | Matches CAD tolerance |
| Destructive testing | Check internal soundness | No unacceptable porosity or folds |
I have also found that the cleanliness of the pattern assembly area has a direct influence on quality of lost foam castings. Dust, oil, and loose foam particles can be trapped between the foam and the coating, causing surface defects. The assembly bench should be clean, and workers should handle the foam patterns with clean gloves. The foam is soft and easily damaged. A small dent in the foam pattern will be reproduced in the coating and then in the casting. Therefore, proper handling and storage are not optional. I make sure that foam patterns are stored on flat racks and not stacked under heavy loads. The use of dedicated stillages reduces deformation during transport from the pattern shop to the molding line.
The drying room also deserves attention. In lost foam castings, the drying room must be able to maintain a stable temperature of 40 °C to 50 °C with adequate air circulation. I have seen drying rooms where the temperature near the heater is much higher than in other areas. This causes uneven drying. If one side of the coating is dry and the other side is still wet, the coating can crack during pouring. Therefore, I periodically measure the temperature at different locations in the drying room. Racks should be arranged so that hot air can circulate freely around every coated pattern. The drying time of 18 to 24 hours should be measured from the moment the last coating layer is applied, not from the moment the drying room door is closed. A consistent drying cycle is critical for reliable lost foam castings.
Another factor that I consider is the size of the sand box relative to the pattern cluster. The sand box should not be too large for the pattern assembly, because the extra sand volume increases the amount of vacuum required and slows down gas removal. The sand box should not be too small either, because the minimum sand distances must be respected. In my experience, the ideal sand box allows the pattern cluster to be placed with uniform sand thickness around it. The sealing film should be robust enough to resist the negative pressure. If the film is too thin, it may tear at a sharp edge of the pattern and cause a vacuum leak.
During pouring, the behavior of the metal front in lost foam castings is invisible to the operator. Therefore, indirect signs are important. I watch the filling of the pouring cup and the movement of the metal surface. A steady stream and a full pouring cup indicate a stable flow. The sound of the mold during pouring also gives information about the gas evolution. If there is a strong hissing or sputtering sound, the gas may not be escaping fast enough. If the metal suddenly slows down before the riser is full, the coating may be too dense or the pattern density may be too high. These observations are part of the practical skill needed to produce high-quality lost foam castings.
Economic and Environmental Advantages of Lost Foam Castings
In addition to quality, I am interested in the economic and environmental advantages of lost foam castings. Because the dry sand does not contain binders, it can be reclaimed and reused with very little waste. When conventional sand molding is used, the spent sand is often considered a waste material. In lost foam castings, the sand can be cleaned, screened, and returned to the process. This reduces landfill cost and makes the foundry more sustainable. Furthermore, the foam pattern is gasified during pouring, and the resulting gas is treated by the vacuum extraction system. With proper filtration and thermal oxidation, the emissions from lost foam castings can be controlled to meet strict environmental standards.
The absence of a parting line in lost foam castings is another advantage. In a conventional sand mold, the pattern must be withdrawn from the mold along a definite parting direction. This often limits the geometry and creates a flash line. In lost foam castings, there is no such parting line because the pattern remains inside the sand. This enables the production of more complex external shapes with less machining. For example, a curved water jacket or an intricate manifold can be cast directly in lost foam castings. The dimensional accuracy of the casting is often high enough to eliminate or reduce subsequent machining operations. In high-production components, the savings in machining time and tooling cost can be substantial.
However, I also recognize that lost foam castings are not always the best process for every component. The foam pattern cost must be considered. For very small production quantities, the cost of the foam tooling and the development process may be high. For large heavy castings, the gas evolution rate and the risk of fold defects increase. For metals with very high pouring temperatures and high density, such as some high-alloy steels, the refractory coating must be more sophisticated. Nevertheless, when the process is well controlled, rejected parts are few, and the total cost per good casting can be lower than conventional casting despite the additional steps of pattern construction and coating.
I have also seen how the use of computer simulations can reduce the risk of trial-and-error in lost foam castings. The thermal decomposition of the foam is difficult to model, but modern simulation tools can predict filling patterns and possible air entrapment. I use simulation not only for fluid flow but also for solidification shrinkage. By adjusting the gating and riser design in the virtual environment, I can avoid premature solidification in critical sections. This is especially important for ductile iron and steel lost foam castings, where feeding behavior has a major influence on soundness.
Summary of Key Control Formulas
In many of my training sessions, I summarize the key quality control formulas for lost foam castings on a single sheet. The first formula is the foam density requirement. The second is the coating thickness requirement. The third is the minimum spacing between castings. The fourth is the pouring temperature adjustment. The fifth is the vacuum pressure range. When these five values are controlled within their proper range, the process has a good chance of producing high-quality lost foam castings. The formulas are as follows:
\[
\rho_f = \frac{m_f}{V_f} \approx 18\ \text{kg/m}^3
\]
\[
\delta_c =
\begin{cases}
2\text{–}3\ \text{mm}, & \text{general casting surfaces} \\
3\ \text{mm}, & \text{gating and riser surfaces}
\end{cases}
\]
\[
s_{casting} \ge 2\, t_w
\]
\[
T_{lost\ foam} = T_{sand\ casting} + 30\text{–}50\ ^\circ\text{C}
\]
\[
P_{pour} =
\begin{cases}
0.05\text{–}0.06\ \text{MPa}, & \text{steel} \\
0.03\text{–}0.04\ \text{MPa}, & \text{cast iron}
\end{cases}
\]
The vacuum holding pressure after the pour should be reduced to 0.02 to 0.04 MPa and maintained until solidification is sufficiently advanced. The cooling time after the vacuum is released should be 18 to 24 hours before shakeout. The exact holding time and cooling time depend on the size of the casting. I always advise my team to treat these numbers as starting values and to refine them with production data. Every foundry has slightly different sand, coating, foam, and vacuum equipment. The principles remain the same, but the optimum window must be confirmed by observation.
Practical Recommendations for Reliable Lost Foam Castings
Based on my personal experience, I now present a concise list of practical recommendations that can improve the quality of lost foam castings. First, never compromise on foam pattern quality. Purchase foam blanks from a reliable supplier and verify their density, bead fusion, and surface condition. Store them in a dry, stable environment. Pre-dry the blanks for 8 to 16 hours before assembly. Use sharp tools when cutting foam and sand the cut surfaces lightly to remove burrs. Assemble the pattern with a minimum quantity of hot-melt adhesive and clean all excess glue.
Second, consider the casting design from the perspective of the lost foam process. Avoid extremely sharp edges and thin isolated sections that may be difficult to fill. Use generous fillets and radii wherever possible. Deep holes must be designed so that core sand can be placed and removed. The gating system should be simple and direct. The minimum distance between castings should be at least two times the wall thickness. If possible, avoid placing massive sections and thin sections close together in the same cluster, because they have very different cooling and gasification behavior.
Third, apply the coating in a disciplined way. Weigh all raw materials and keep records. Stir the coating thoroughly to eliminate lumps and air bubbles. Apply the first two coats thinly and allow them to dry. Increase the coating thickness gradually to reach the target value. The drying temperature must be 40 °C to 50 °C, and the drying time must be 18 to 24 hours unless experience shows that a different cycle is better. The coating thickness should be measured on the final coated assembly. For lost foam castings, the coating is not decorative; it is the mold wall. Therefore, coating quality is directly related to casting quality.
Fourth, ensure that the sand filling and compaction process is always under control. The sand box must have at least 200 mm of sand on every side and above the pattern. Each fill layer should be no more than 300 mm. The vibration time should be around 60 seconds. Manual compaction should be used in areas that are not easily reached by the vibration energy. The top film must be sealed completely. Before pouring, inspect the seam and confirm that the vacuum pressure at the box matches the required value. This is an absolute requirement for producing sound lost foam castings.
Fifth, control the pouring sequence strictly. Start slowly to open the sprue, then pour quickly, and finally slow down when the metal reaches the riser. The pouring temperature should be 30 °C to 50 °C higher than for conventional sand casting. The negative pressure during pouring should be adjusted according to the alloy. After pouring is complete, maintain a holding vacuum of 0.02 to 0.04 MPa for a time determined by the casting mass and solidification modulus. Wait 18 to 24 hours before shakeout to allow controlled cooling and stress relaxation.
Sixth, keep careful production records for every batch of lost foam castings. The records should include pattern density, coating batch number, drying time, sand batch, vibration time, negative pressure, pouring temperature, pouring time, holding time, and cooling time. When defects occur, use the records to search for correlations. In my experience, many quality problems in lost foam castings are caused by simple changes in raw material batches or ambient humidity. A good record system allows these changes to be identified quickly.
Seventh, invest in training. The lost foam casting process is not intuitive. Operators cannot see the mold cavity, and they cannot exactly see the metal flow. Therefore, they must understand the principles behind each step. They must know why the foam density is important, why the coating must be dried, why the vacuum is needed, and why the pouring speed changes. When workers understand the reasons, they are more likely to follow procedures and to report abnormalities. I have found that a well-trained team is the best guarantee of quality in lost foam castings.
Conclusion
In conclusion, lost foam castings offer many advantages when the casting is designed and produced with careful attention to process detail. The dimensional precision of the final casting depends on the initial quality of the foam pattern. The surface smoothness and internal soundness depend on the coating formulation, coating thickness, drying cycle, sand compaction, and vacuum control. The pouring temperature and pouring sequence must be adjusted to compensate for the energy absorbed by the gasifying foam pattern. After pouring, the holding vacuum and cooling time must be matched to the size and section thickness of the casting.
From my perspective, the best approach to controlling the quality of lost foam castings is a combination of design review, process standardization, and continuous data collection. I always remember that the foam pattern represents a lost cavity; once it is destroyed by the molten metal, there is no second chance to correct its position. The coating and vacuum system must work together to eliminate the products of foam decomposition and to hold the sand in place. When these requirements are satisfied, lost foam castings demonstrate their full potential: high dimensional accuracy, excellent surface finish, dense internal structure, reduced machining allowances, and cleaner production.
The importance of these control points cannot be overstated. Because the entire process is invisible during pouring, quality must be built into the pattern, coating, sand, and vacuum system before the metal is poured. In my own practice, I have seen how the disciplined application of these principles reduces scrap rates, improves productivity, and makes lost foam castings one of the most exciting and reliable casting processes available to modern manufacturing. The key is not any single innovation but the strict control of all variables together. By respecting the pattern, the coating, the sand, the vacuum, and the pouring sequence, the foundry engineer can truly turn lost foam castings into a high-quality production reality.