
In my work with lost foam casting, I have found that iron penetration is not simply a local sand-compaction problem. It is a coupled thermal, physical, and coating-integrity problem that begins long before liquid metal reaches a critical surface. When I first reviewed a large ductile iron wheel-side housing, the casting had a bell-shaped body, multiple internal annular grooves, and several thick sections. The lost foam casting process used dry unbonded sand, vibration compaction, vacuum assistance, and a refractory coating. The most persistent defect was iron penetration at the small end, where the geometry created a compacted resin-sand prefill with high closure and restricted gas escape. My investigation showed that the alpha-to-beta phase transition of quartz sand at approximately 573 °C to 600 °C produced about 1% volume expansion. That expansion, together with uneven drying and gas generation in the resin-sand prefill, was sufficient to rupture the coating and allow liquid iron to mix with sand. The result was an iron-wrapped-sand defect that could not be cleaned and caused leakage failure.
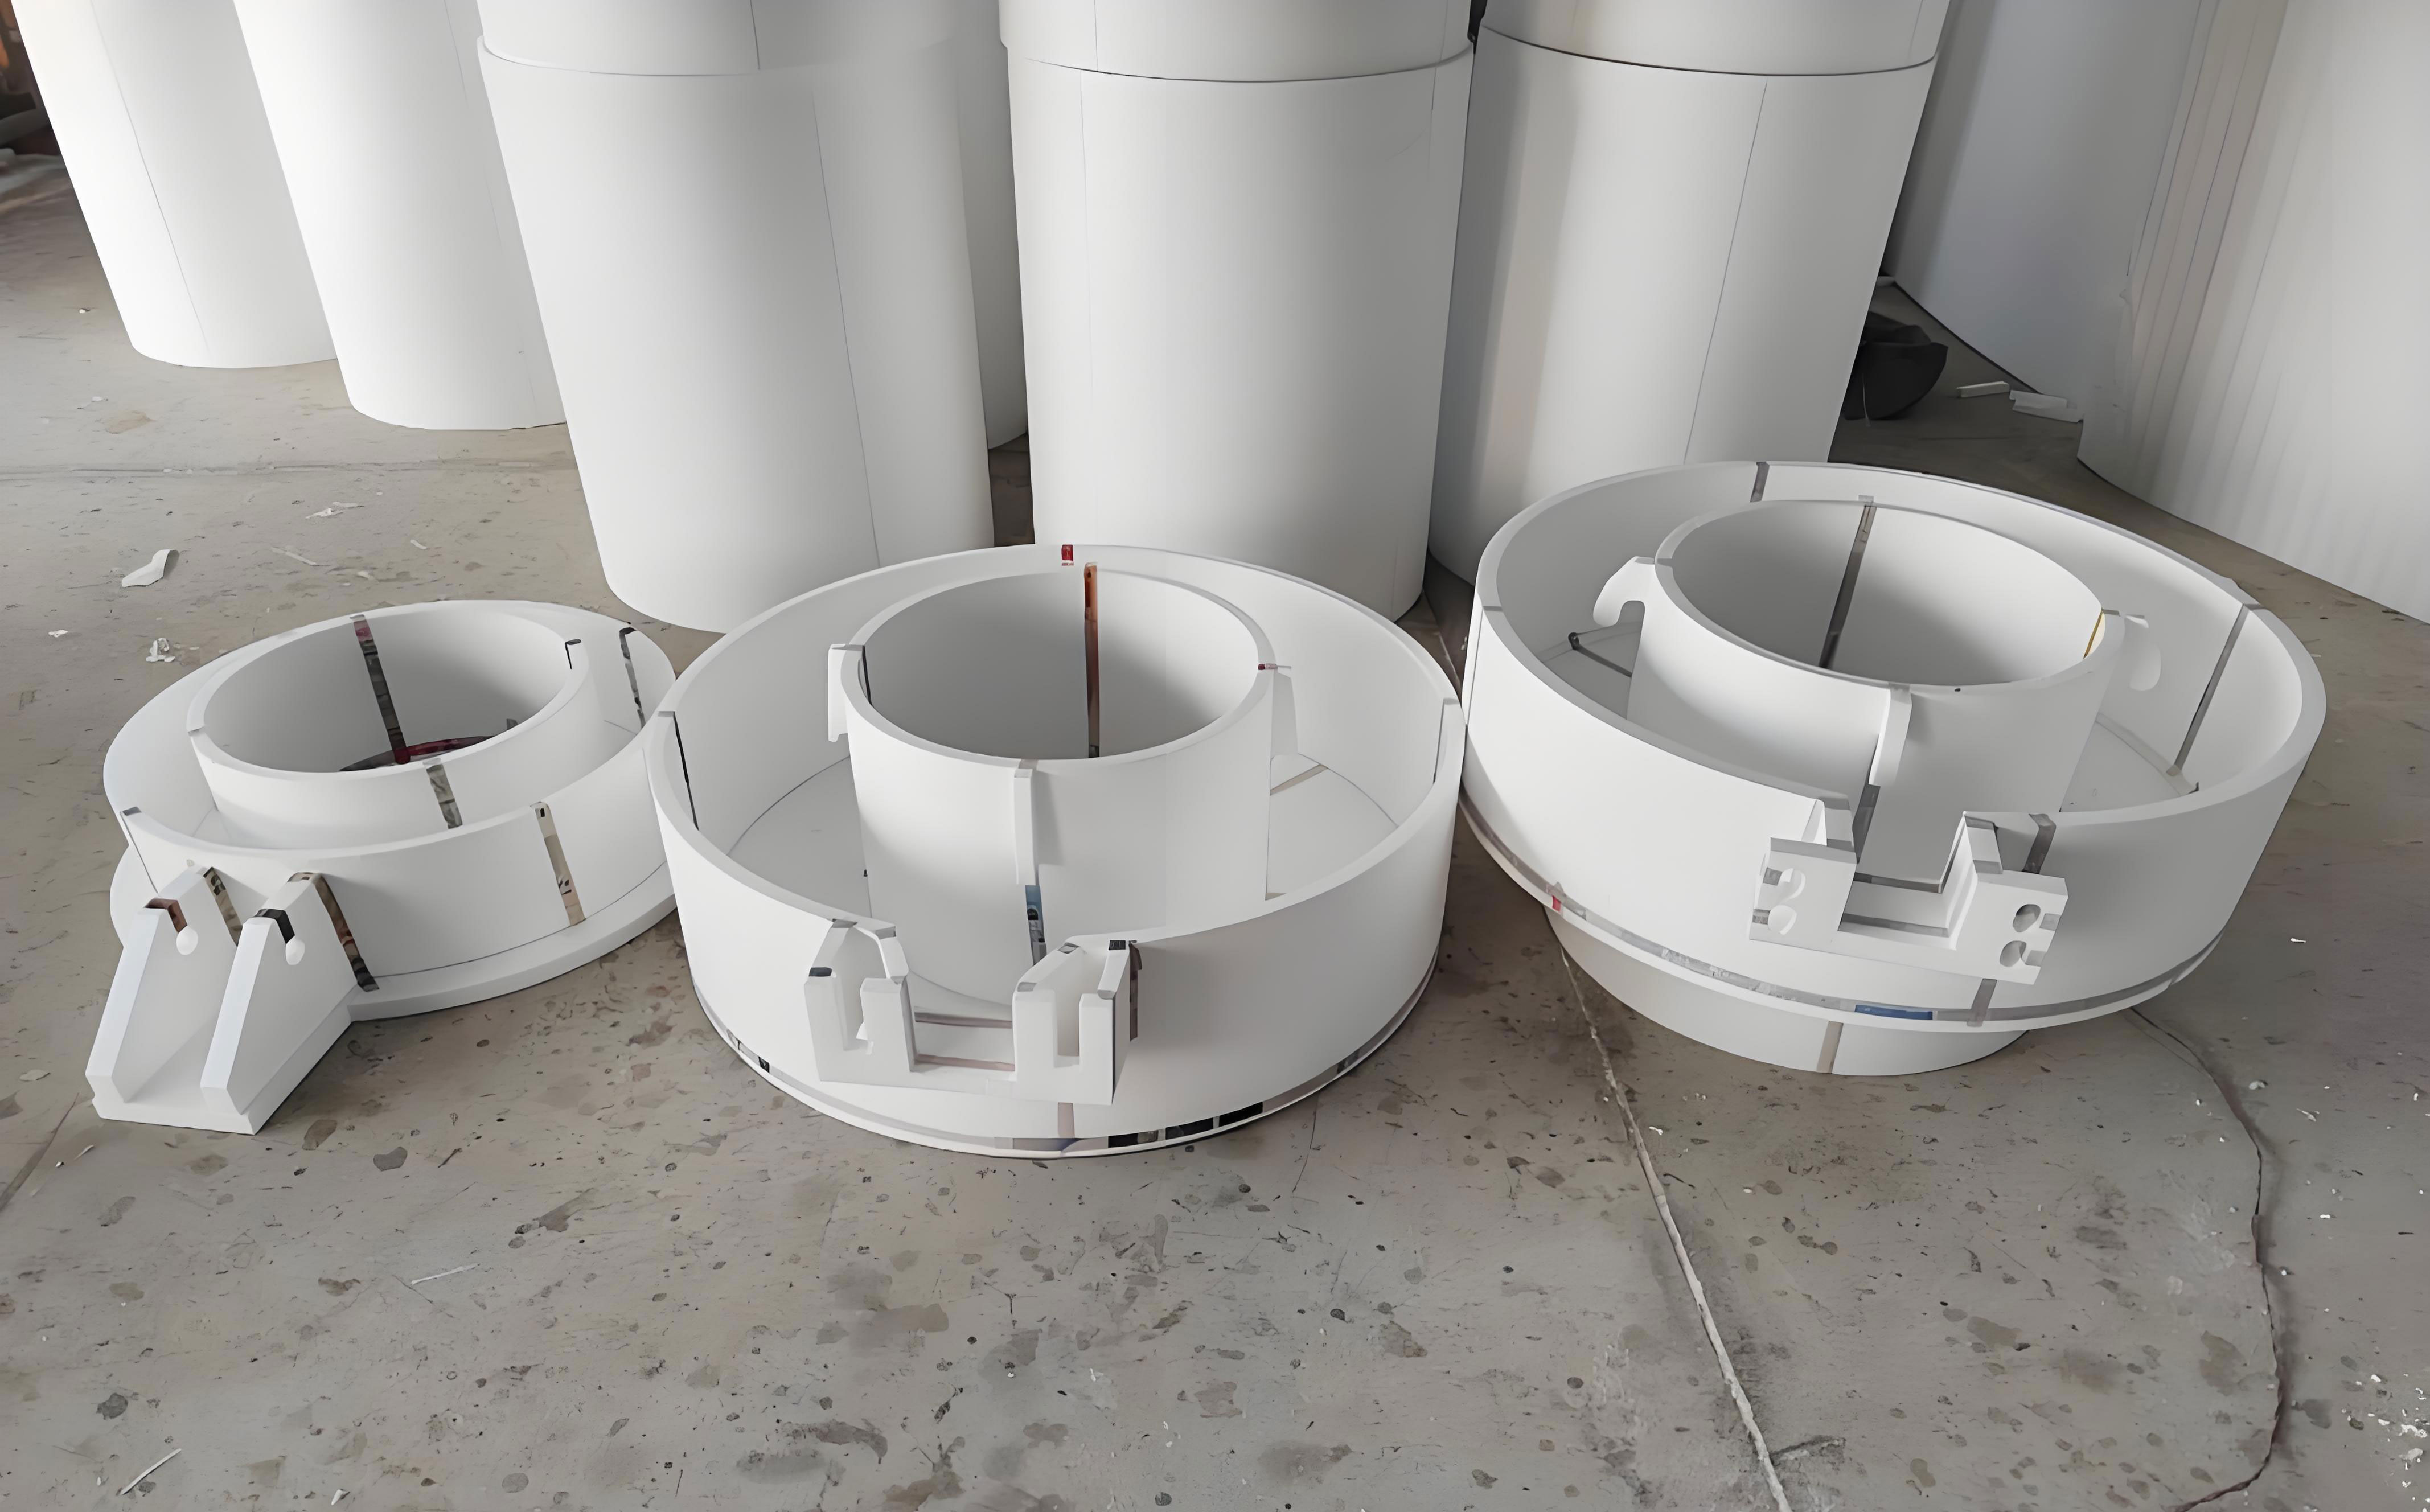
Why lost foam casting is sensitive to local compaction. In lost foam casting, a polymer pattern is coated, buried in dry sand, compacted by vibration, and then replaced by molten metal. The dry sand has no binder in the bulk region, so its strength depends on particle packing, vibration energy, vacuum level, and the shape of the cavity. In simple flat sections, the sand can rearrange and densify. In grooves, fillets, undercuts, and closed cavities, the sand cannot easily flow. These regions become vibration blind zones. When the coating is heated by the advancing metal front, the unsupported coating can deflect. If the coating tears or cracks, liquid metal enters the sand bed. The metal may surround individual sand grains and form a hard, irregular mixture that is usually described as iron penetration or iron-wrapped sand. In severe cases, the defect extends through the wall and creates a leak path.
I have summarized the main local risk features that I see in lost foam casting projects in the following table. The table is not a substitute for simulation or trial casting, but it helps me rank the risk before I choose a countermeasure.
| Geometry or process feature | Effect on sand flow | Effect on coating support | Iron penetration risk |
|---|---|---|---|
| Deep narrow groove | Sand bridges at the entrance and leaves a low-density core | Coating is unsupported on the groove floor and sidewalls | Very high |
| Small internal cavity | Sand cannot enter through a small opening | Coating receives almost no back pressure | Very high |
| Sharp internal fillet | Particle rearrangement is blocked | Stress concentration occurs at the coating radius | High |
| Undercut with upward-facing pocket | Sand may fall away during vibration | Local sand density drops after vibration stops | High |
| Large flat wall with poor venting | Sand can compact, but gas escape is slow | Gas pressure may oppose metal front | Moderate |
| Open external surface with good access | Sand flows and compacts normally | Coating is supported by dense sand | Low |
In conventional sand casting, a binder system provides green strength or cured strength throughout the mold. In lost foam casting, the bulk sand is unbonded. The vacuum increases apparent stiffness, but it does not eliminate local density differences. The vacuum also changes the direction of stress release. When sand or prefill expands, the vacuum-compacted surrounding sand acts like a stiff constraint. The expansion cannot easily push the surrounding sand outward, so the stress is redirected toward the coating and the semi-solid casting skin. This is one reason that adding more resin sand can sometimes make iron penetration worse rather than better.
Case geometry and material requirements. The component I studied was a wheel-side housing used in a power-split continuously variable transmission assembly. It had a bell shape with a large end and a small end. The maximum envelope was approximately 502 mm × 579 mm × 664 mm. The large end diameter was about 570 mm, and the small end diameter was about 240 mm. The casting weight was about 164 kg. The material was ductile iron QT400-15. The chemical composition and mechanical requirements are summarized below. The casting also required a leak test after machining. At 80 kPa to 100 kPa, the leakage rate had to remain below 10 mL/min.
| Element | Mass fraction range, % | Function or limit |
|---|---|---|
| C | 3.5–4.1 | Carbon for graphite formation and castability |
| Si | 2.0–3.0 | Silicon for nodularity and ferrite stabilization |
| Mn | ≤ 0.40 | Manganese control for matrix and segregation |
| S | ≤ 0.025 | Sulfur control for nodularization |
| P | ≤ 0.05 | Phosphorus control for toughness |
| Cu | Reported as not specified in the target range | Copper control for pearlite and hardness |
| Mo | Reported as not specified in the target range | Molybdenum control for hardenability |
| Ti | ≤ 0.05 | Titanium control for graphite morphology |
| Mg | 0.020–0.060 | Magnesium for nodularization |
| RE | 0.015–0.040 | Rare earth for nodularization and impurity control |
| Property or requirement | Target value | Verification method |
|---|---|---|
| Tensile strength | ≥ 400 MPa | Attached test bar |
| Yield strength | ≥ 250 MPa | Attached test bar |
| Elongation after fracture | ≥ 15% | Attached test bar |
| Ferrite content | ≥ 65% | Metallographic examination |
| Leakage rate | < 10 mL/min at 80–100 kPa | Air-tightness test after machining |
| Surface protection | Black water-based primer after cleaning | Visual and coating thickness check |
Casting difficulties caused by hot spots and closed grooves. The housing was large and had non-uniform wall thickness. I identified nine thick regions arranged symmetrically along the central axis. The largest hot spot was close to 57 mm × 120 mm × 260 mm. These regions solidified later than the surrounding thin walls. Without risers or controlled cooling, they would form shrinkage porosity. I therefore placed risers at the hot spots and designed the gating system to promote directional solidification.
The more difficult problem was the small end. The casting was bell-shaped and had several internal annular grooves. I counted eight grooves. Each groove had a depth of about 15.9 mm and a width of about 15 mm. When the casting was placed upright, sand could enter only through the central bore. The central bore diameter was about 152 mm. Sand flow through that opening was poor, and the annular grooves could not be compacted. When the casting was inverted, the large-end undercut disappeared, but the small-end grooves became upward-facing pockets with high closure. Three of those grooves were at the top of the mold after inversion. They were difficult to fill and almost impossible to vibrate. These three grooves became the highest-risk locations for iron penetration. I concluded that prefill with fast-curing resin sand was necessary, but I also suspected that the prefill itself could introduce a new failure mode.
| Feature | Dimension or count | Consequence in lost foam casting |
|---|---|---|
| Maximum envelope | 502 mm × 579 mm × 664 mm | Large sand volume and long filling path |
| Large-end diameter | About 570 mm | Large flat and curved surfaces |
| Small-end diameter | About 240 mm | Restricted access for sand and vibration |
| Casting weight | About 164 kg | High thermal mass and long solidification time |
| Hot spots | Nine thick regions, largest near 57 mm × 120 mm × 260 mm | Shrinkage risk and local heat concentration |
| Annular grooves | Eight grooves, depth about 15.9 mm, width about 15 mm | Sand bridging, low density, coating rupture risk |
| High-risk grooves after inversion | Three top grooves | Highest iron penetration probability |
Gating design and pouring parameters. I used side-bottom pouring for the housing. The gating system was an open, diffusive system suitable for ductile iron. The sprue-to-runner-to-gate area ratio was approximately 0.72 : 6.2 : 1. This means the runner area was very large compared with the sprue and gates. The purpose was to slow the metal, stabilize flow, distribute metal to multiple gates, and reduce turbulence. In ductile iron, turbulence can damage nodularization and cause slag or dross defects. A large runner acts as a buffer. Small sprue and gate areas control velocity and reduce splashing. I also used a bent sprue to move the metal stream away from the filter and to reduce direct erosion of the coating in the high-risk area.
The gating ratio can be expressed as follows:
$$A_{\mathrm{sprue}} : A_{\mathrm{runner}} : A_{\mathrm{gate}} \approx 0.72 : 6.2 : 1$$
The sprue was a cylindrical channel with a diameter of about 42 mm. The runner was a rectangular bar with dimensions of about 95 mm × 125 mm × 200 mm. Two gates were used, each with a rectangular section of about 40 mm × 40 mm × 80 mm. The gates were spaced about 40 mm apart and were rounded to about 12 mm near the casting. A ceramic filter was placed in the gating system. The filter capacity was about 2 kg/cm². The total poured weight, including the casting and gating system, was about 230 kg. I calculated the required filter area and diameter using the following relationships:
$$A_f = \frac{G}{q}$$
$$D_f = \sqrt{\frac{4G}{\pi q}}$$
Here, A_f is the required filter area, G is the filtered weight, q is the unit filtration capacity, and D_f is the equivalent filter diameter. Using G = 230 kg and q = 2 kg/cm², the calculated diameter was at least 121 mm. I selected a 125 mm filter. Transition cups with a 42 mm to 100 mm diameter and a height of about 100 mm were used at both ends of the filter. This detail is important in lost foam casting because a sudden change in gate area can create flow separation and air entrainment.
| Gating element | Design value | Reason for selection |
|---|---|---|
| Pouring position | Side-bottom pour | Reduce turbulence and promote stable filling |
| Gating type | Open diffusive system | Stabilize flow for ductile iron |
| Area ratio | 0.72 : 6.2 : 1 | Large runner for buffering and distribution |
| Sprue | 42 mm cylindrical, bent | Control velocity and avoid filter erosion |
| Runner | 95 mm × 125 mm × 200 mm rectangular | Reduce velocity and distribute metal |
| Gates | Two 40 mm × 40 mm × 80 mm rectangular gates | Balanced filling and reduced local overheating |
| Filter | 125 mm diameter, capacity about 2 kg/cm² | Remove inclusions and regulate flow |
| Total poured weight | About 230 kg | Used for filter sizing and filling calculation |
Pattern, coating, and pouring process. The expandable pattern was produced with dedicated beads. The molded density was controlled between 15 g/m³ and 25 g/m³ in the original process documentation. After drying, the pattern was assembled with the gating system. The small-end grooves received a local pre-coat before the first full coating. After drying, two full coatings were applied. After the second coating was dried, the small-end grooves were touched up and filled with sand. The coating had to be free from runs,堆积 and cracks. I controlled the drying temperature at about 50 °C ± 5 °C, the relative humidity at 30% RH or lower, and the drying time at more than 8 h. The Baumé values were controlled at 67 ± 5 for the first coat, 75 ± 5 for the second coat, and 64 ± 5 for the touch-up coat.
The pouring parameters were also tightly controlled. The pattern weight was about 240 kg. The sand temperature was between 40 °C and 70 °C. The tapping temperature was between 1,570 °C and 1,580 °C. The pouring temperature was between 1,380 °C and 1,450 °C. The vacuum level was between −0.07 MPa and −0.03 MPa. The upper internal cavity required manual sand filling to improve compaction. In some trials, I increased the vibration time, but vibration alone could not solve the closed-groove problem.
| Process step | Parameter | Control target |
|---|---|---|
| Pattern molding | Bead density | 15–25 g/m³ |
| Pattern drying | Moisture and dimensional stability | Thorough drying before assembly |
| First coating | Baumé value | 67 ± 5 °Bé |
| Second coating | Baumé value | 75 ± 5 °Bé |
| Touch-up coating | Baumé value | 64 ± 5 °Bé |
| Drying | Temperature | 50 ± 5 °C |
| Drying | Relative humidity | ≤ 30% RH |
| Drying | Time | > 8 h |
| Sand temperature | Bulk sand | 40–70 °C |
| Tapping temperature | Ductile iron melt | 1,570–1,580 °C |
| Pouring temperature | Mold filling | 1,380–1,450 °C |
| Vacuum | Sand box | −0.07 to −0.03 MPa |
| Manual filling | Upper internal cavity | Fill and compact by hand |
Pre-fill trial design. I designed four pre-fill schemes to isolate the effect of resin-sand placement. All schemes used the same gating system and the same coating process. The only variable was the amount and sequence of fast-curing self-hardening resin sand in the small-end region. In scheme A0, no resin sand was pre-filled; only touch-up coating was applied. In scheme A1, resin sand was used only in the annular grooves. In scheme A2, resin sand was used in the annular grooves and the entire small-end internal cavity, with the upper side shaped into a slope to improve adhesion and eliminate sand-filling dead zones. In scheme A3, resin sand was applied in layers. The annular grooves were filled first and allowed to cure for about 30 min. Then the non-ribbed inclined region of the small-end cavity was pre-filled and blended into a slope. The casting was then cured in the drying room for about 2 h before touch-up coating. Before pouring, the resin sand had to be fully cured. Each scheme was tested with a specific number of castings, as shown below.
| Scheme | Pre-fill region | Application method | Number of trial castings |
|---|---|---|---|
| A0 | None | Touch-up coating only | 4 |
| A1 | Annular grooves only | Single-stage resin-sand fill | 8 |
| A2 | Annular grooves plus entire small-end cavity | Large-volume fill with sloped upper surface | 8 |
| A3 | Annular grooves plus non-ribbed inclined region | Layered fill, staged curing, extended drying | 8 |
Experimental results. The results were consistent with the risk analysis but also revealed a non-monotonic effect. Scheme A0 produced severe iron penetration in all four castings. The groove structure was completely filled with iron-wrapped sand. Even the grooves that were oriented upward and should have been easier to compact showed severe penetration. These castings could not be cleaned and were rejected.
Schemes A1 and A2 eliminated iron penetration in the low-risk regions, but random penetration still occurred in the three high-risk top grooves. In scheme A1, five of eight castings were acceptable. In scheme A2, only three of eight castings were acceptable. This was a critical observation: increasing the pre-fill volume from A1 to A2 did not reduce the defect. It increased the defect rate. The larger amount of resin sand created a denser, more constrained prefill. That prefill expanded during heating and transferred stress to the coating.
Scheme A3 performed best. Seven of eight castings were acceptable. The high-risk and low-risk regions both remained free from iron penetration. The small-end grooves were smooth and clean after cleaning. Only one casting was rejected because of iron penetration. The results are summarized below.
| Scheme | Pre-fill region | Trial castings | Acceptable castings | Rejected castings | Yield |
|---|---|---|---|---|---|
| A0 | None | 4 | 0 | 4 | 0% |
| A1 | Annular grooves only | 8 | 5 | 3 | 62.5% |
| A2 | Annular grooves plus entire small-end cavity | 8 | 3 | 5 | 37.5% |
| A3 | Annular grooves plus non-ribbed inclined region, layered fill | 8 | 7 | 1 | 87.5% |
The yield can be written as:
$$Y = \frac{N_{\mathrm{good}}}{N_{\mathrm{total}}} \times 100\%$$
$$S = \frac{N_{\mathrm{scrap}}}{N_{\mathrm{total}}} \times 100\%$$
Here, Y is the acceptable yield and S is the scrap rate. For scheme A3, the yield was 87.5%, while scheme A2 had a yield of only 37.5%. The difference cannot be explained by sand compaction alone. It requires a phase-transition and stress-release explanation.
The role of quartz sand phase transition. Quartz sand undergoes a displacive transformation from low-temperature alpha quartz to high-temperature beta quartz at approximately 573 °C. In practice, the transformation in a thermal gradient occurs over a range around 600 °C. The transformation is rapid and reversible. It is accompanied by a volume expansion of about 1%. The volume change can be expressed as:
$$\frac{\Delta V}{V_0} = \frac{V_{\beta} – V_{\alpha}}{V_{\alpha}} \times 100\% \approx 1.0\%$$
If the expansion were isotropic and unconstrained, the corresponding linear expansion would be approximately:
$$\frac{\Delta L}{L_0} = \left(1 + \frac{\Delta V}{V_0}\right)^{1/3} – 1 \approx 0.33\%$$
This value may appear small, but in a constrained resin-sand prefill inside a closed groove, it is significant. The surrounding vacuum-compacted sand and the semi-solid casting skin restrict expansion. The phase-expansion stress can be approximated by a thermo-mechanical relationship:
$$\sigma_{\mathrm{phase}} = \frac{E \alpha_{\mathrm{eff}} \Delta T}{1 – \nu}$$
Here, E is the effective elastic modulus of the constrained sand-resin-coating system, alpha_eff is the effective expansion coefficient, Delta T is the temperature change, and nu is Poisson’s ratio. The equation is qualitative, but it shows that a stiffer prefill and a larger constrained volume increase stress. Resin sand is stiffer than unbonded dry sand. Therefore, increasing the prefill volume increases the phase-expansion stress transmitted to the coating.
Gas pressure also contributes. The resin sand contains residual moisture and volatile binder components. If the inner part of the prefill is not fully cured or dried, heating generates gas. The gas pressure can be estimated by the ideal gas law:
$$P_g V_g = \frac{m}{M} R T$$
Here, P_g is gas pressure, V_g is gas volume, m is gas mass, M is molar mass, R is the gas constant, and T is absolute temperature. In a closed groove, the gas cannot escape quickly. The pressure adds to the phase-expansion stress and pushes the coating away from the sand. When the coating strength is exceeded, liquid metal enters the gap. Because the metal is still above the solidus, it mixes with the resin sand and forms iron-wrapped sand. Once this defect forms, it cannot be removed by shot blasting or machining without damaging the casting.
| Temperature or stage | Physical event | Effect on prefill and coating | Consequence for lost foam casting |
|---|---|---|---|
| Room temperature to 200 °C | Residual moisture and volatiles begin to evolve | Gas pressure starts to build in closed regions | Coating may blister if venting is poor |
| 200–500 °C | Binder decomposition and further gas release | Resin-sand strength changes and internal stress develops | Local coating support becomes unstable |
| Approximately 573 °C | Alpha quartz transforms to beta quartz | About 1% volume expansion occurs | Expansion stress is transferred to the coating |
| 600–800 °C | Phase transition continues in the thermal gradient | Constrained resin sand pushes against the semi-solid skin | Coating rupture risk increases |
| Above 800 °C | Metal is still liquid or semi-solid near the groove | Any coating breach is immediately filled by iron | Iron-wrapped sand forms |
| Solidification and cooling | Metal contracts and sand remains expanded or cracked | Defect is locked into the casting | Leak path and cleaning failure |
Why more prefill can be worse. The phase-transition mechanism explains the non-monotonic result. With no prefill, the problem is low sand density and insufficient coating support. With a small prefill, the coating gains local support, so low-risk regions improve. With an excessive prefill, the coating is supported, but the prefill becomes a dense, confined body. During heating, the quartz grains expand. The surrounding vacuum-compacted sand cannot yield easily, so the expansion is directed toward the coating and the casting. At the same time, the interior of the large prefill may not be fully dried. It generates gas. The gas pressure cannot escape through the dense outer layer. The combined phase stress and gas pressure exceed the coating strength. The coating tears, and liquid metal penetrates the prefill. This is why scheme A2, with the largest prefill volume, had a lower yield than scheme A1.
The vacuum level amplifies this effect. A higher vacuum increases the compactness and apparent stiffness of the bulk sand. It also increases the contact pressure between the sand and the pattern. The bulk sand becomes a stronger constraint. When the prefill expands, the path of least resistance is no longer outward into the bulk sand. It is toward the coating and the casting. If the coating has already been softened or weakened by heat, it ruptures. The defect then appears on the casting surface as a patch of metal mixed with sand.
Why layered prefill works. Layered prefill addresses three mechanisms at the same time. First, it allows part of the drying shrinkage and curing deformation to occur before the next layer is applied. This reduces the locked-in stress in the final prefill. Second, it gives moisture and volatiles a chance to escape between layers. The final prefill contains less residual moisture and binder volatiles, so gas pressure during pouring is lower. Third, it controls the density and continuity of the prefill. The prefill is still strong enough to support the coating, but it is not a single massive, gas-tight block. The interlayer boundaries and the staged curing history provide internal paths for stress relaxation and gas escape. In my trials, scheme A3 used this approach and achieved the best result.
| Mechanism | Single-stage large prefill | Layered prefill | Effect on iron penetration |
|---|---|---|---|
| Drying shrinkage | Locked into a large mass | Partially released between layers | Layered prefill lowers residual stress |
| Gas generation | Gas trapped in the interior | Gas can escape before the next layer | Layered prefill lowers gas pressure |
| Resin-sand stiffness | High and continuous | Moderate and interrupted | Layered prefill reduces phase stress transfer |
| Coating support | Strong but rigid | Strong and compliant | Layered prefill protects coating integrity |
| Phase expansion | Large constrained expansion | Smaller local expansions | Layered prefill reduces rupture probability |
| Curing uniformity | Uneven, core may remain weak or wet | More uniform due to staged curing | Layered prefill improves reliability |
Process optimization based on the mechanism. I now treat quartz sand phase transition as a design variable in lost foam casting. For high-closure regions, I do not simply add more resin sand. I first evaluate whether the geometry can be opened. Increasing the fillet radius reduces stress concentration and improves sand flow. Reducing the closure of a groove allows gas to escape and permits vibration energy to reach the prefill. If the geometry cannot be changed, I use a controlled prefill strategy. The following table summarizes the optimization rules I apply.
| Problem | Primary countermeasure | Secondary countermeasure | Reason |
|---|---|---|---|
| Low local sand density | Local resin-sand prefill | Increase vibration time and manual compaction | Provides coating support |
| High closure and gas trapping | Open the groove or add venting | Use layered prefill | Allows gas escape and stress release |
| Sharp internal fillet | Increase fillet radius | Thicken local coating | Reduces stress concentration and improves sand flow |
| Excessive prefill volume | Reduce prefill to the minimum effective volume | Use staged curing | Lowers phase-expansion stress |
| Residual moisture in prefill | Extend drying time | Pre-cure before coating | Reduces gas pressure |
| Coating rupture under expansion | Increase coating strength and toughness | Apply touch-up coating after prefill | Improves strain tolerance |
| High thermal load | Control pouring temperature | Use chill or thermal balance | Reduces time above the phase-transition range |
| Vacuum-induced constraint | Optimize vacuum level | Use staged vacuum reduction | Reduces sand stiffness during expansion |
In the optimized process, I use a small amount of resin sand only where it is needed. I fill the annular grooves in layers. I allow each layer to cure for at least 30 min before the next layer is added. I then place the pattern in the drying room for at least 2 h before touch-up coating. I extend the final drying time to ensure that the prefill is fully cured. I also verify the prefill by touch and by weight. A prefill that feels cold or damp is not acceptable. Before pouring, I confirm that the vacuum level is within the specified range and that the manual sand fill in the upper cavity is complete.
| Optimized step | Parameter or action | Purpose |
|---|---|---|
| Geometry review | Increase fillet radius where possible | Reduce closure and stress concentration |
| Coating | First coat, second coat, touch-up coat | Build a continuous refractory barrier |
| Prefill layer 1 | Fill annular grooves, cure about 30 min | Support groove coating and release initial stress |
| Prefill layer 2 | Fill non-ribbed inclined region, slope to drain gas | Support the cavity without creating a gas trap |
| Drying room cure | About 2 h before touch-up coating | Improve curing uniformity and reduce moisture |
| Touch-up coating | Apply after prefill is stable | Seal surface and improve coating integrity |
| Final drying | Temperature 50 ± 5 °C, humidity ≤ 30% RH, time > 8 h | Remove residual moisture and volatiles |
| Pouring | 1,380–1,450 °C, vacuum −0.07 to −0.03 MPa | Control filling and limit thermal load |
| Verification | Visual inspection, leak test, metallography | Confirm defect elimination and material quality |
Alternative sand and coating considerations. Quartz sand is widely used in lost foam casting because it is inexpensive and readily available. However, its phase transition is a fixed material characteristic. For castings with very high closure and high thermal load, I consider alternative sands with lower expansion or different transition behavior. Zircon sand, chromite sand, and fused silica have different thermal expansion characteristics. They are more expensive, so I use them selectively in high-risk cores or prefill regions. A coating with higher strain tolerance can also help, but coating strength alone cannot compensate for a massive, gas-trapping prefill. The coating must be supported by a sand system that can accommodate expansion.
| Sand type | Main expansion behavior | Relative cost | Suitable use in lost foam casting |
|---|---|---|---|
| Quartz sand | About 1% volume expansion near 573 °C due to alpha-to-beta transition | Low | General bulk sand and low-risk prefill |
| Zircon sand | Low and more uniform thermal expansion | High | High-risk cores or local prefill |
| Chromite sand | Low expansion and high heat capacity | High | Hot spots and high-closure prefill |
| Fused silica | Amorphous structure with low expansion | Medium to high | Precision cores and expansion-sensitive regions |
| Ceramic sand | Tailored expansion and high refractoriness | High | Critical cavities and difficult geometries |
Quality verification after optimization. I verify the result at three levels. First, I inspect the as-cast surface after cleaning. A good surface should show a continuous coating skin and no hard, dark patches of metal-sand mixture. Second, I perform the leak test after machining. The leak rate must remain below 10 mL/min at 80 kPa to 100 kPa. Third, I check the microstructure and mechanical properties on attached test bars. The tensile strength must be at least 400 MPa, the yield strength at least 250 MPa, the elongation at least 15%, and the ferrite content at least 65%. If a casting passes the leak test but has local iron penetration, it may still fail in service because the defect can act as a stress raiser or a leak path after thermal cycling.
| Verification stage | Method | Acceptance criterion | Action if failed |
|---|---|---|---|
| As-cast surface | Visual inspection after cleaning | No iron-wrapped sand, no coating breach | Reject or repair only if allowed |
| Dimensional check | Layout inspection | Within drawing tolerance | Adjust pattern or tooling |
| Leak test | Air pressure 80–100 kPa | Leakage < 10 mL/min | Reject or rework if possible |
| Mechanical test | Attached test bar | UTS ≥ 400 MPa, YS ≥ 250 MPa, elongation ≥ 15% | Adjust melt treatment or heat treatment |
| Metallography | Image analysis | Ferrite ≥ 65% | Adjust chemistry or cooling |
| Process audit | Review of prefill and drying records | Layered fill, full cure, extended drying | Retrain or revise work instruction |
General lessons for lost foam casting. My experience with this housing changed the way I evaluate iron penetration in lost foam casting. I no longer treat resin-sand prefill as a universal solution. I ask three questions before I choose a prefill method. First, what is the local sand density without prefill? Second, what is the closure of the region and how easily can gas escape? Third, what is the thermal history of the region, and will the quartz sand remain in the phase-transition range for a long time? These questions determine whether the defect is caused by insufficient support, gas pressure, phase expansion, or a combination of all three.
I also use a simple risk index in design reviews. The index is qualitative, but it forces the team to consider the phase transition. It can be written as:
$$R_{\mathrm{ip}} = f(G_c, T_h, V_p, M_r, C_s)$$
Here, R_ip is the iron penetration risk, G_c is geometric closure, T_h is thermal load, V_p is prefill volume, M_r is moisture retention, and C_s is coating strength. A high G_c and T_h with a large V_p and high M_r produce a very high risk. The solution is not simply to increase C_s. It is to reduce V_p, reduce M_r, and improve gas escape. If the geometry allows, reducing G_c is the most robust solution.
| Risk factor | Low risk | Moderate risk | High risk | Preferred action |
|---|---|---|---|---|
| Geometric closure | Open external surface | Partially open groove | Closed internal cavity | Open geometry or add venting |
| Thermal load | Thin section, short contact time | Medium section | Hot spot with long solidification time | Balance thermal mass and use chills |
| Prefill volume | None or minimal | Local groove fill | Large cavity fill | Reduce to minimum effective volume |
| Moisture retention | Fully cured and dried | Surface dry, core uncertain | Damp or cold prefill | Layered fill and extended drying |
| Coating strength | High strain tolerance | Standard refractory coating | Thin or cracked coating | Repair and control coating process |
| Gas escape | Open vents and permeability | Restricted path | Closed pocket | Add vents or change geometry |
Discussion of the phase-transition mechanism in more detail. The alpha-to-beta quartz transition is a displacive transformation. It does not require long-range diffusion. It occurs rapidly when the local temperature reaches the transition range. In a lost foam casting, the temperature field is not uniform. The coating surface reaches high temperature first. The resin-sand prefill behind the coating heats more slowly. The transition therefore occurs in a moving zone. The outer part of the prefill may already be expanding while the inner part is still cool and rigid. This creates a shell of expanding sand around a cooler core. The shell pushes outward. The cooler core resists. The coating and the semi-solid metal skin are caught between these forces.
If the prefill is a single large mass, the expanding shell can generate a high compressive stress against the coating. The coating is a brittle refractory layer. It has limited strain capacity. When the strain exceeds the coating’s critical strain, a crack forms. Liquid metal enters the crack. Because the metal is above the solidus, it can flow into the resin-sand prefill. The sand grains become surrounded by metal. The result is a composite of iron and sand that is harder than the surrounding casting. This composite is difficult to machine and can break tools. It also creates a leak path if it crosses a wall.
If the prefill is layered, the expanding shell is interrupted. Each layer is thinner. The interlayer boundaries can slide or crush slightly. Gas can escape along the boundaries. The total strain transferred to the coating is lower. The coating may still expand, but it can do so without cracking. This is why scheme A3 performed better than scheme A2. The layered prefill did not eliminate the phase transition, but it changed how the expansion was accommodated.
The pouring temperature also matters. A higher pouring temperature increases the time that the small-end region remains above the phase-transition range. In ductile iron, the pouring temperature is often kept high to avoid chill and to ensure nodularity. However, excessively high superheat increases the thermal load on the coating and the prefill. I therefore control the pouring temperature within a narrow range and avoid unnecessary superheat. I also use the gating system to distribute metal evenly and avoid local overheating at the small end.
The vacuum level is another control variable. A higher vacuum increases the sand compaction and the heat transfer rate. It also increases the apparent stiffness of the bulk sand. In some cases, a very high vacuum can improve mold strength, but in a high-closure prefill region, it can increase the constraint on the expanding sand. I prefer to use the lowest vacuum that still provides adequate mold stability. In the housing trials, the vacuum range of −0.07 MPa to −0.03 MPa was sufficient. I avoid unnecessary excursions to the high end of the range.
Practical rules I now use in lost foam casting. The following rules are based on the mechanism and the trial results. They are written as a checklist for process design and shop-floor control.
| Rule | Description | Why it matters |
|---|---|---|
| Review closure first | Identify all cavities that cannot be reached by vibration | Prevents surprise iron penetration |
| Use minimum effective prefill | Fill only the unsupported area, not the entire cavity | Reduces phase-expansion stress |
| Apply in layers | Fill, cure, then fill again | Releases drying stress and gas |
| Extend drying | Dry until the prefill is fully cured | Reduces gas pressure during pouring |
| Slope the prefill | Shape the upper surface to drain gas | Avoids gas traps |
| Thicken local coating | Add touch-up coating after prefill | Improves strain tolerance |
| Control vacuum | Use the lowest stable vacuum | Reduces sand constraint |
| Control pouring temperature | Avoid excessive superheat | Reduces time above the transition range |
| Open the geometry if possible | Increase fillet radius and reduce closure | Eliminates the root cause |
| Verify with leak test | Test after machining | Confirms wall integrity |
Economic and production impact. Iron penetration in lost foam casting is expensive not only because of scrap. It also causes rework, cleaning downtime, tool damage, and leak-test failures. In the case of the wheel-side housing, scheme A0 had a 0% yield. Scheme A2, which used the most resin sand, had only a 37.5% yield. Scheme A3, which used less resin sand but applied it in layers with extended drying, reached 87.5% yield. The cost of the additional drying time and the extra handling was far lower than the cost of scrap and leak-test failure. This is a clear example of how understanding the phase transition of quartz sand can change the process economics.
| Scheme | Relative prefill volume | Relative drying time | Yield | Main limiting factor |
|---|---|---|---|---|
| A0 | None | Standard | 0% | Insufficient coating support |
| A1 | Low | Standard | 62.5% | Incomplete support in high-closure grooves |
| A2 | High | Standard | 37.5% | Phase-expansion stress and gas pressure |
| A3 | Controlled | Extended | 87.5% | Balanced support and stress release |
The result also shows that more material is not always better. In many foundries, the first response to iron penetration is to add more resin sand. My trials show that this can be counterproductive when the region is closed and the thermal load is high. The correct response is to understand the expansion behavior of the sand and to design the prefill as a stress-managed system. The prefill must support the coating, but it must also allow gas to escape and expansion to be accommodated.
Extending the findings to other castings. The same mechanism applies to other lost foam casting geometries. Any closed cavity filled with quartz sand or resin sand can experience phase-expansion pressure. The risk is highest when the cavity is surrounded by thick metal, when the pouring temperature is high, when the prefill is large, and when the drying is incomplete. I have seen similar defects in pump housings, valve bodies, and transmission cases. In each case, the defect appears at a location that is difficult to compact and difficult to vent. The solution is usually a combination of geometry change, controlled prefill, and improved drying.
For castings with very high risk, I use a low-expansion sand in the prefill. Zircon sand or chromite sand can reduce the phase-expansion stress because they do not undergo the same abrupt quartz transition. However, these sands are denser and more expensive. They also change the thermal properties of the mold. I use them only in the critical region and keep quartz sand in the bulk. This hybrid approach controls cost while protecting the coating.
| Application | Recommended sand strategy | Coating strategy | Process strategy |
|---|---|---|---|
| Open, low-risk lost foam casting | Quartz bulk sand | Standard refractory coating | Normal vibration and vacuum |
| Moderate closure with local risk | Quartz bulk sand plus small resin-sand prefill | Touch-up coating at the risk area | Layered prefill and extended drying |
| High closure with hot spot | Low-expansion sand in the prefill | Thick, strain-tolerant coating | Layered prefill, controlled vacuum, thermal balance |
| Very high closure and leak-critical wall | Low-expansion sand plus venting | Multiple coating layers | Geometry change preferred; otherwise process window control |
Final conclusions from my study. The alpha-to-beta phase transition of quartz sand at about 573 °C to 600 °C is a major cause of iron penetration in lost foam casting, especially in high-closure prefill regions. The transition produces about 1% volume expansion. In a confined resin-sand prefill, this expansion generates stress that can rupture the refractory coating and allow liquid iron to mix with sand. Uneven drying and gas generation make the problem worse. Increasing the prefill volume can increase the risk because the prefill becomes stiffer and traps more gas. A layered prefill with staged curing, extended drying, and a controlled, minimal fill volume is much more effective. Geometry changes that reduce closure and increase fillet radius are the most robust long-term solution.
For the wheel-side housing, the optimized layered prefill process raised the yield from 0% in the no-prefill scheme to 87.5%. The best result came from scheme A3, which used layered resin-sand filling in the annular grooves and the non-ribbed inclined region, followed by extended curing and drying. The high-risk and low-risk regions were both free from iron penetration in seven of eight castings. This confirmed that the problem was not simply a lack of sand support. It was a phase-transition-driven coating rupture problem. Once I treated the quartz sand expansion as a controlled process variable, the lost foam casting process became stable and repeatable.
I now recommend that every lost foam casting risk review include the following steps: identify closed regions; estimate the thermal load; check whether quartz sand will remain in the phase-transition range; evaluate the prefill volume and moisture content; and verify that gas can escape. If the risk is high, I reduce the prefill volume, apply it in layers, extend drying, and consider low-expansion sand. I also review the geometry to increase fillet radii and reduce closure. These measures have proven effective in preventing iron penetration and improving the quality of complex ductile iron castings produced by lost foam casting.