
In my work on municipal pipeline systems, I have often witnessed the severe limitations of conventional repair methods for water supply networks. Traditional restoration of a leaking pipe usually requires shutting down the flow, excavating a large trench, cutting out the damaged section, welding or bolting a new spool, and then refilling the excavation. This procedure is time-consuming, labor-intensive, and disruptive to urban life. The need for a faster, safer, and more economical solution has become increasingly urgent as cities expand and existing pipelines age. I was therefore motivated to develop a family of mechanical fittings that could seal leaks and create branch connections without extensive pipe section replacement. The most successful development in this effort was a saddle-type pipe clamp made of nodular cast iron. For the larger sizes, I adopted the lost foam casting process, which gave me the geometric freedom and cost efficiency needed to produce the components in a reliable way.
The product family that I developed consists of three main items: saddle-type pipe clamps, Haffner joint repair clamps, and mechanical tees. All of these are intended to meet the same general need: to stop leakage or to create a branch opening in a pressurized water pipe quickly and effectively. The saddle-type clamp is a two-piece bolted structure that surrounds the pipe at a leak or at a pre-drilled opening. A rubber sealing gasket is placed between the metal body and the pipe surface. When the bolts are tightened, the two halves are drawn together, compressing the rubber and forming a new metallic sealing cavity around the damaged area. The same principle is applied in the Haffner joint repair clamp, which is used for repairing straight pipe sections and bell-and-spigot joints. The mechanical tee functions in a similar manner, but it includes a threaded outlet that allows a smaller branch pipe to be connected directly to the main line.
From the beginning of the design process, I recognized that the casting process would be critical to the success of the product. The body must have high strength, good ductility, and excellent pressure-retaining capability. The material I selected was QT420-5 nodular cast iron, which is a ductile iron grade with a minimum tensile strength of 420 MPa and an elongation of at least 5%. This material offers a good combination of strength and toughness, and it can withstand the mechanical loads imposed by bolted joints and internal water pressure. In addition, ductile iron has good corrosion resistance when properly coated, which is essential for buried water infrastructure applications.
| Element | Mass fraction / % |
|---|---|
| C | 3.4 – 3.8 |
| Si | 2.4 – 2.8 |
| Mn | 0.25 – 0.50 |
| P | < 0.08 |
| S | < 0.03 |
| Cu | 0.30 – 0.35 |
| Fe | Balance |
In my casting trials, I used a graphite-based recarburizer during melting to control the carbon equivalent. This is important because the final graphite structure and the resulting mechanical properties of the nodular iron depend strongly on the carbon and silicon contents. Copper was added in a small amount to promote pearlite formation, which increases the strength and hardness of the casting. With the composition shown above, the as-cast microstructure consisted of nodular graphite in a ferritic-pearlitic matrix, giving the desired balance between strength and machinability.
When I considered the production routes for these castings, I compared three molding processes: an automatic high-pressure molding line, a static-pressure molding line, and the lost foam casting process. For smaller products with nominal diameters below DN300, the automatic molding line or static-pressure line provided good productivity and acceptable dimensional accuracy. However, for larger products such as DN700 saddle clamps, the sand molding approach required expensive patterns and core boxes, and the internal geometry was difficult to form without cores. Therefore, I chose the lost foam casting process for products with nominal diameters greater than DN300. The lost foam casting process allowed me to produce complex shapes without cores, reduce draft angles, and eliminate parting lines in many areas. This greatly simplified the production of the saddle clamp bodies.
The lost foam casting process that I established in this development involves several well-controlled steps. First, expandable polystyrene beads are pre-expanded and injected into a shaped mold to form the foam pattern. The pattern is then aged to ensure dimensional stability. After aging, multiple patterns are assembled into a cluster with a gating system. The cluster is coated with a refractory coating that must have high permeability to gases and sufficient strength to support the sand during molding. After the coating is dried, the cluster is placed into a steel flask, and dry silica sand is poured around it while the flask is vibrated to compact the sand. A plastic film is placed over the top of the flask, and a vacuum is applied to the sand. When molten iron is poured into the sprue, the heat vaporizes the foam pattern, and the gaseous decomposition products escape through the permeable coating and the evacuated sand bed. The liquid metal fills the cavity that was occupied by the foam, reproducing the shape of the pattern with high fidelity.
One important detail in my lost foam casting trials was the orientation of the pattern in the flask. I placed the saddle clamp pattern with its open cavity facing upward. This orientation allowed the dry sand to flow into all internal recesses and compact uniformly during vibration. If the pattern had been placed with the cavity facing downward, the sand would have bridged across the opening and would not have filled the internal space completely. This would have caused mold collapse or deformation during pouring. The upward orientation ensured that the sand effectively supported the pattern from all sides and that the final casting had a clean, fully formed geometry.
| Parameter | Value |
|---|---|
| Pouring temperature | 1510 – 1530 °C |
| Vacuum level | 0.04 – 0.06 MPa |
| Holding time after pouring | 10 – 15 min |
| Coating layer thickness | 0.3 – 0.8 mm |
| Vibration frequency during sand filling | 50 – 100 Hz |
| Vibration duration | 60 – 120 s |
The pouring temperature is one of the most critical parameters in the lost foam casting process for ductile iron. If the temperature is too low, the molten metal may solidify before completely replacing the foam pattern, causing cold shuts or misruns. If the temperature is too high, the risk of sand burning and surface defects increases. In my trials, I found that a pouring temperature in the range of 1510 to 1530 °C gave the best combination of filling and surface quality. The vacuum level also required careful adjustment. A higher vacuum increases the rigidity of the sand mold and prevents the mold from expanding, but it can also densify the sand so much that gas cannot escape easily, leading to surface defects on the casting. I determined that a vacuum of 0.04 to 0.06 MPa was sufficient to stabilize the mold without excessively hindering gas removal.
Mathematically, the solidification behavior of the casting can be described by Chvorinov’s rule. The local solidification time \(t_s\) is related to the casting modulus \(M\), which is the ratio of the volume \(V\) to the cooling surface area \(A\):
\[
t_s = B \left( \frac{V}{A} \right)^2
\]
In this equation, \(B\) is a constant that depends on the mold material, the metal properties, and the pouring temperature. For a saddle clamp, the geometry varies along the circumference, so I used the local modulus to identify sections that might solidify more slowly and therefore require feeding. In the lost foam castings, the gating system was designed to ensure that the heaviest sections received sufficient liquid metal during solidification to compensate for shrinkage.
Another useful criterion for detecting microshrinkage risk is the Niyama criterion, which is often written as:
\[
N_y = \frac{G}{\sqrt{\dot{T}}}
\]
where \(G\) is the local temperature gradient and \(\dot{T}\) is the cooling rate at the end of solidification. In my experience, a Niyama value above a threshold value indicates a low risk of shrinkage porosity. I used this criterion in the design of the gating and risering system for the saddle clamps. Because the lost foam process tends to produce a slightly different solidification pattern than conventional sand casting, I validated the numerical predictions with actual sectioning and dye penetrant testing on the first production castings.
The gas generated by the vaporization of the EPS foam can be estimated by the ideal gas law. The volume of gas \(V_g\) produced at the pouring temperature \(T\) is:
\[
V_g = \frac{m_{\text{EPS}} R T}{M P}
\]
where \(m_{\text{EPS}}\) is the mass of the foam pattern, \(R\) is the specific gas constant, \(M\) is the molar mass of the decomposition products, and \(P\) is the pressure in the mold cavity. This equation illustrates why the coating permeability and the vacuum level are so important. If the gas cannot escape quickly enough, it will create back pressure that can stop the metal flow or cause surface defects. The vacuum applied to the sand bed reduces the partial pressure of the gas and promotes its rapid removal through the coating.
The effective pressure holding the sand in place during pouring can be expressed as:
\[
P_{\text{eff}} = P_{\text{atm}} – P_{\text{vac}}
\]
where \(P_{\text{atm}}\) is atmospheric pressure and \(P_{\text{vac}}\) is the absolute pressure in the vacuum system. A typical effective pressure of about 0.04 to 0.06 MPa was enough to maintain a stable mold cavity without over-compacting the sand. In practice, I monitored the vacuum continuously during the pour, and I adjusted the vacuum valve to keep the effective pressure within the desired window.
After pouring and solidification, the castings were cooled in the flask for the prescribed holding time, then the flask was tipped over to shake out the sand. The sand was reused after cooling and screening. The castings were then subjected to shot blasting to remove residual coating and sand. I examined each casting for surface defects such as sand inclusion, cold shut, and misrun. The gating system was cut off, and the castings were ground to remove any remaining gates and flash. For the saddle clamps, the mating surfaces and bolt holes required machining to ensure proper alignment of the two halves. I machined the sealing surfaces on a CNC machining center, and I used a fixture that held both halves together to ensure that the bolt holes matched perfectly.
One of the most important validation steps in the development was the type test performed according to the standard GB/T 13295-2019. This standard is widely used in China for ductile iron pressure pipes and fittings. I prepared a test plan for a DN700 × DN100 saddle-type pipe clamp, which means a clamp that is intended to be mounted on a DN700 main pipe and to provide a DN100 branch connection. The purpose of the test was to verify the structural integrity and sealing performance of the first article under hydraulic pressure.
The type test setup consisted of a DN700 pipe with a flanged end, the saddle clamp to be tested, a pressure test manifold, a water pump, and appropriate safety guarding. The clamp was installed on the end of the DN700 pipe so that the branch outlet was oriented upward. A 5 mm rubber sealing pad was placed between the clamp and the pipe surface according to the assembly instructions. The pressure manifold was connected to the test pump, and the entire assembly was slowly filled with water. Air was vented through a valve at the highest point. I then increased the water pressure to a gauge pressure of 2.5 MPa. The pressure was held for 10 minutes, during which I inspected the clamp and the rubber seal for any sign of leakage. After the holding period, the pressure was released, and the clamp was removed from the test fixture for visual inspection.
| Test step | Observation |
|---|---|
| Filling with water | No abnormal condition; air vented satisfactorily |
| Pressurization to 2.5 MPa | Pressure increased smoothly; no leakage observed |
| Holding at 2.5 MPa for 10 min | Gauge remained stable; no dripping or dampness on sealing surfaces |
| Depressurization and disassembly | No cracks, no permanent deformation, no rubber extrusion |
The test results confirmed that the saddle clamp design was capable of withstanding the required pressure without leakage. The rubber gasket was not damaged, and the metal body showed no evidence of yielding or cracking. This gave me confidence that the lost foam castings had the necessary soundness and that the overall assembly could be safely used in municipal water systems.
In addition to the type test, I performed several production quality checks on the lost foam castings. I measured the hardness of the castings, which typically fell in the range of 170 to 230 HBW. I also examined the graphite nodularity on metallographic samples taken from the wall sections. The nodularity was greater than 85%, which is excellent for ductile iron castings. The ferrite-to-pearlite ratio was consistent with the specified chemical composition and cooling rate. The key mechanical properties obtained from tensile test bars machined from cast-on samples exceeded the minimum requirements of QT420-5. The tensile strength was typically 450 to 500 MPa, and the elongation reached 6% to 8%. These results were repeatable across several production heat lots, indicating that the lost foam casting process was stable and well controlled.
| Property | Required value | Typical measured value |
|---|---|---|
| Tensile strength / MPa | ≥ 420 | 450 – 500 |
| Yield strength / MPa | ≥ 270 | 300 – 340 |
| Elongation / % | ≥ 5 | 6 – 8 |
| Brinell hardness / HBW | 170 – 230 | 180 – 210 |
| Graphite nodularity / % | ≥ 80 | ≥ 85 |
The wall thickness of the saddle clamp is a critical parameter because it determines the pressure capacity of the part. For a thin cylindrical shell subjected to internal pressure, the hoop stress \(\sigma_\theta\) can be estimated by Barlow’s formula:
\[
\sigma_\theta = \frac{P D_i}{2 t}
\]
where \(P\) is the internal gauge pressure, \(D_i\) is the internal diameter, and \(t\) is the wall thickness. In my design, I set the minimum wall thickness such that the elastic hoop stress at the test pressure remained well below the yield strength of the material. I also considered the additional stresses caused by bolt tightening. The bolted joint applies a clamping force that compresses the rubber gasket, and this creates a bending moment in the flanges of the clamp. To ensure a robust design, I performed a finite element analysis for the DN700 clamp. The results showed that the maximum stress occurred at the inner corner of the bolted flange, but the peak value was below the yield limit with a safety factor of more than 2.5.
The lost foam casting process played an important role in achieving this robust design. Because I was able to produce a smooth, continuous transition between the shell wall and the flange, I avoided the sharp corners that are common in sand castings with conventional patterns. The elimination of cores also eliminated the risk of core shift, which can cause non-uniform wall thickness. In a pressure part, uniform wall thickness is essential for predictable stress distribution and reliable performance.
Another benefit of the lost foam castings is the ability to integrate small features directly into the pattern. For example, the lugs and alignment bosses on the saddle clamp body can be formed as part of the one-piece foam pattern. This reduces the number of components and simplifies the assembly process. I also used cast-in holes for some of the bolt locations, which eliminated the need for drilling in the foundry. The foam pattern contained small cylindrical cores made of heat-resistant material that held their position during sand filling and pouring. After shakeout, the cores were removed, and the bolt holes were already formed. This is a significant advantage of the lost foam process, as it can produce near-net-shape components with complex internal passages and precise holes.
During the process development, I encountered several challenges. One challenge was the formation of lustrous carbon defects on the surface of the casting. Lustrous carbon is a graphitic film that can appear when the foam pattern decomposes incompletely. It can cause surface delamination or poor paint adhesion. I reduced the occurrence of lustrous carbon by adjusting the pouring temperature, using a coating with higher permeability, and ensuring that the vacuum was applied uniformly across the flask. I also experimented with different foam densities and found that a lower density foam reduced the amount of residual carbon without compromising pattern strength. The final process parameters gave a surface finish that was smooth and free of lustrous-carbon defects.
Another challenge was preventing sand from becoming trapped in the internal cavity of the saddle clamp. The cavity is bounded by curved surfaces, and if the sand cannot flow into the deepest part of the pattern, a void will remain. This void causes a distorted casting. I solved this problem by placing the pattern with the cavity facing upward and by using a vibration table that provided a suitable amplitude and frequency. The sand must essentially behave as a fluid-like medium and flow into every recess. I found that a vibration frequency of 50 to 100 Hz and a duration of 60 to 120 seconds gave consistent sand filling. The upward orientation was important because gravity assisted the sand in entering the cavity.
The production of the saddle clamps was not limited to large sizes. For products with nominal diameters below DN300, I used conventional sand casting on an automatic molding line and a static-pressure molding line. These smaller products do not benefit as much from the lost foam process because the pattern cost is lower and the metal fill time is shorter. However, for DN300 and larger, the lost foam castings become increasingly cost-effective. A comparison between the two processes for a DN700 saddle clamp is shown below.
| Criteria | Sand casting | Lost foam castings |
|---|---|---|
| Pattern cost | High for large size | Moderate |
| Core required | Often required | Not required |
| Draft angle | Necessary | Minimal |
| Parting line | Present | Absent in most areas |
| Dimensional accuracy | Good | Better |
| Surface finish | Fair | Good |
| Lead time for first article | Long | Short |
| Production flexibility | Less | More |
After completing the process development and type tests, I introduced the products into several municipal engineering projects. The main application was to stop leakage at pipe sockets and to create new branch connections in existing water mains. The saddle clamps proved to be particularly useful in emergency repair situations because they could be installed quickly with limited equipment. The installer only needed to open a small excavation around the damaged pipe, clean the pipe surface, place the rubber gasket around the leak, and bolt the two halves together. No welding, no threading, and no epoxy curing were required. This significantly reduced the time from excavation to restoration of service.
The products were tested in a variety of installations, including replacement of old cast iron pipes, repair of damaged ductile iron mains, and insertion of branch connections for new residential or industrial water service. In each case, the installation was completed within a short time, and the repaired pipe was immediately put back into service after a simple pressure check. The feedback from field crews was positive. The clamps were easy to handle, and the instructions were straightforward. The rubber gasket compressed evenly when the bolts were tightened in the recommended order, creating a reliable seal even on pipes with slightly imperfect surface conditions.
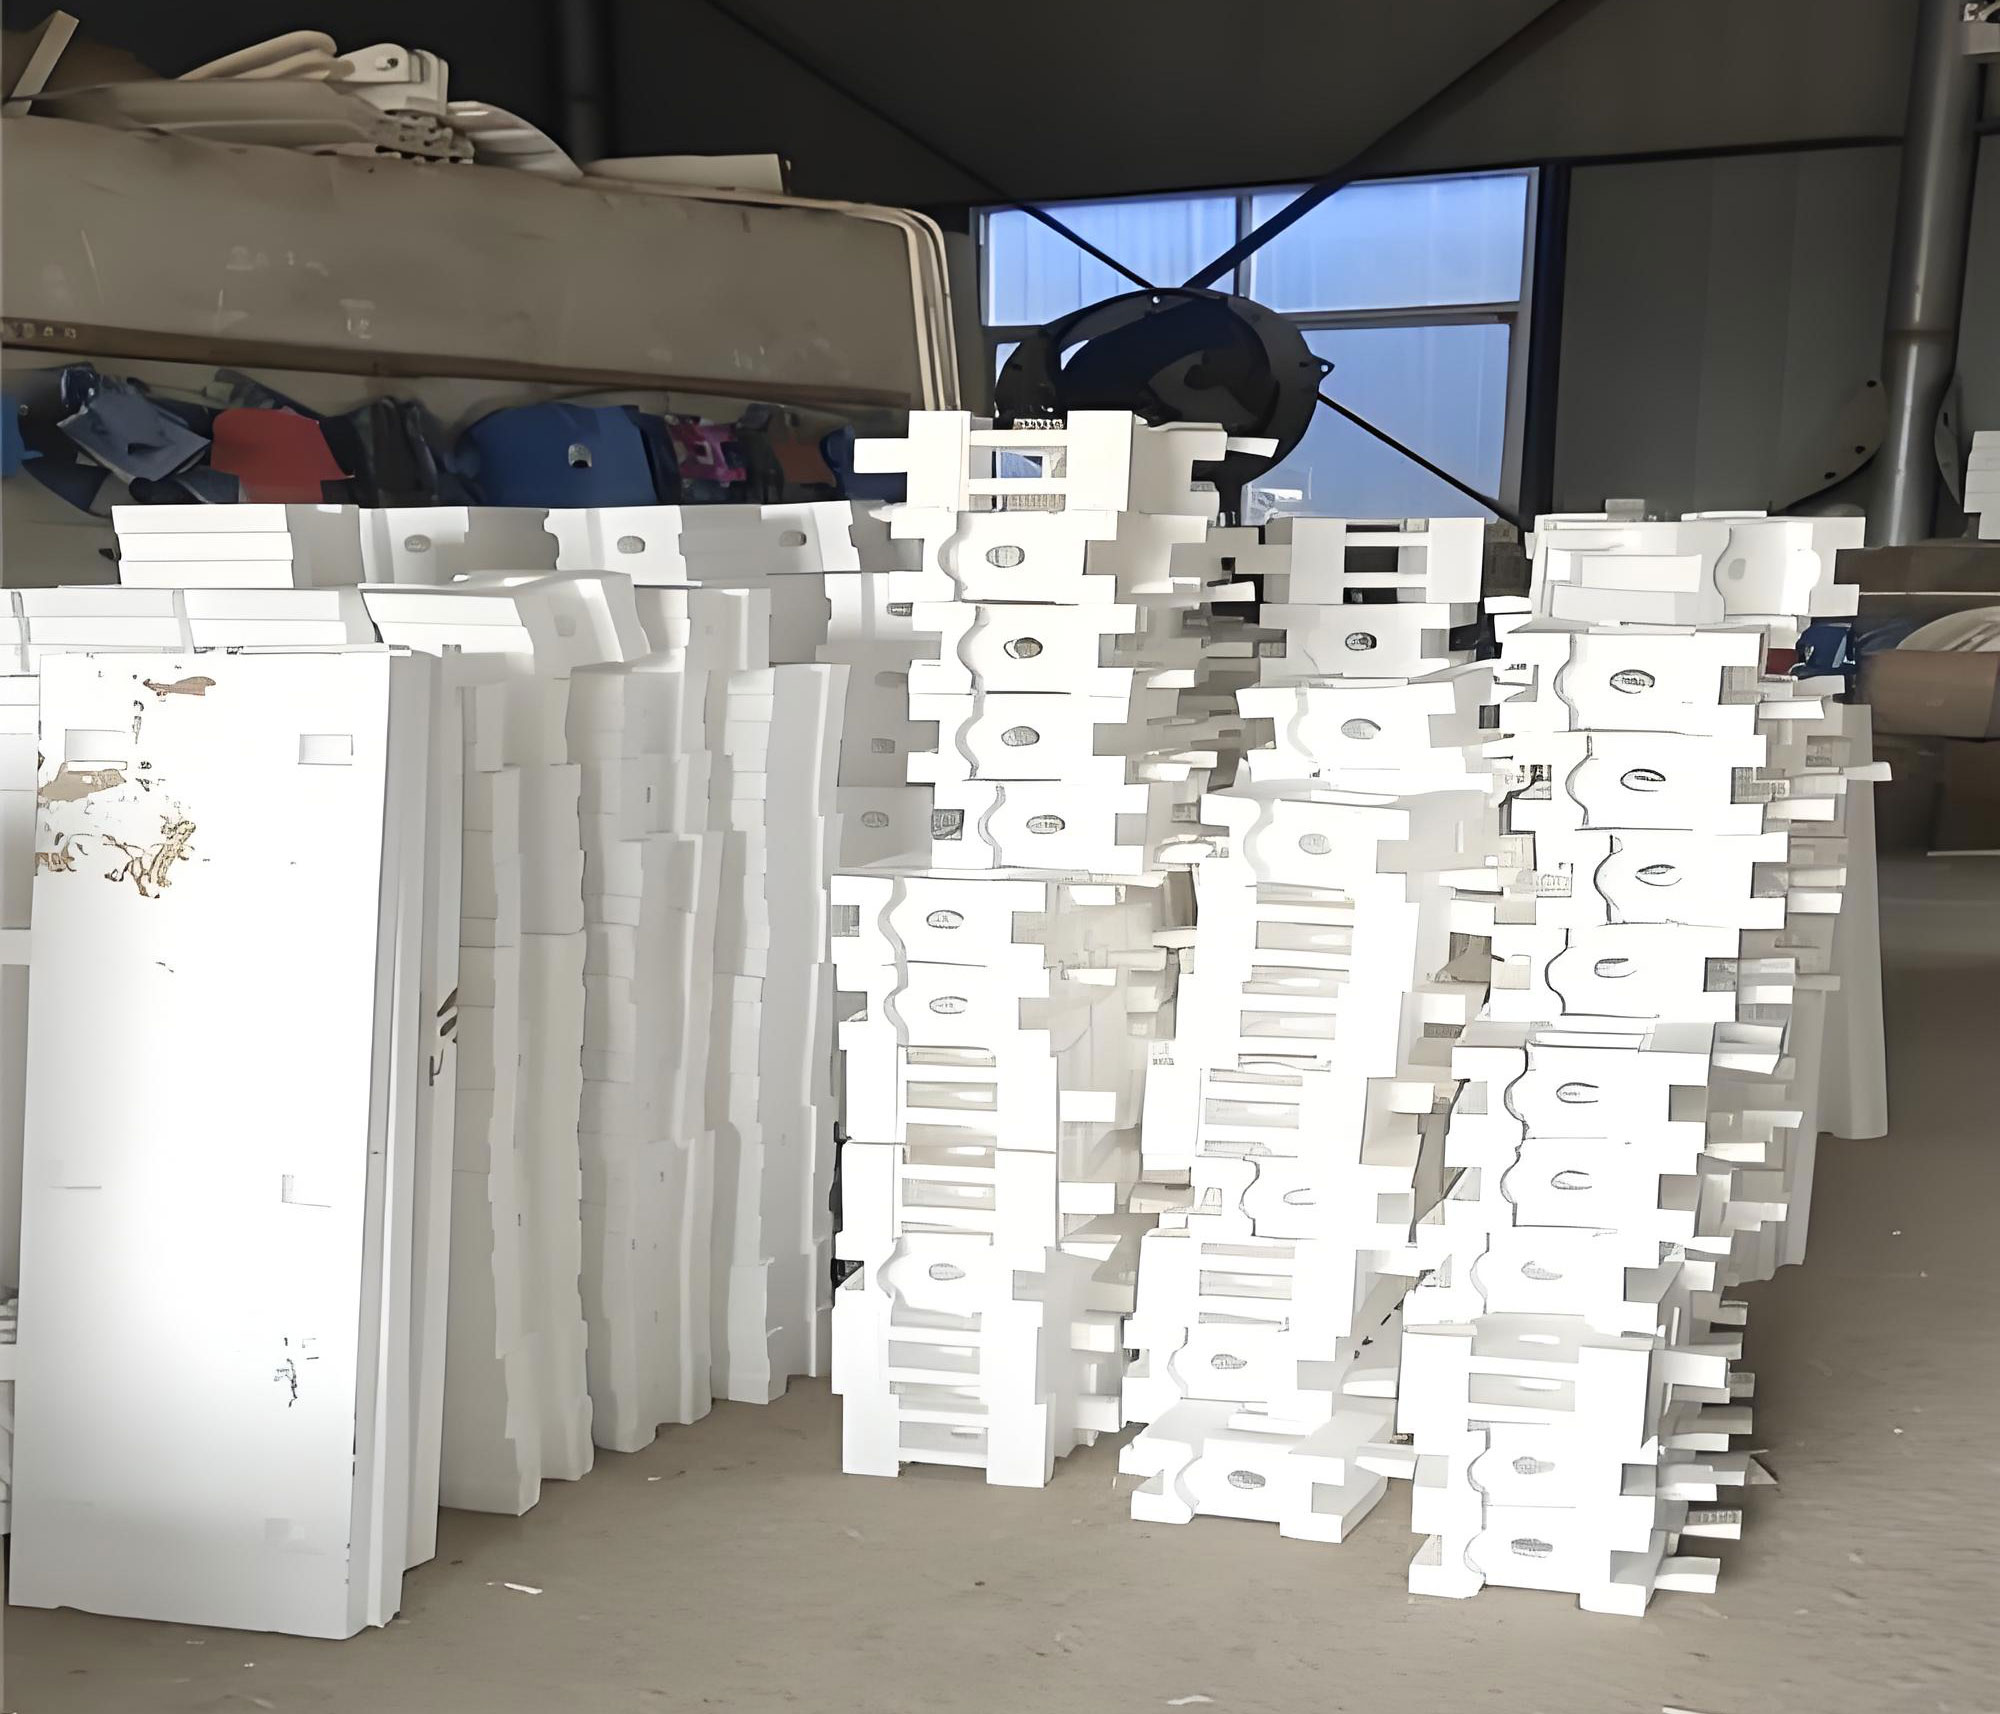
From an economic perspective, the use of lost foam castings for the large saddle clamps reduced the tooling investment and shortened the development cycle. I was able to produce a first article within a few weeks after finalizing the pattern geometry, compared with several months for traditional metal pattern equipment. The cost benefit becomes more significant when multiple sizes are required, because the same foam molding system can be used with different mold inserts to produce several sizes of saddle clamps. The sand used in the lost foam process is reusable, and the absence of cores reduces the amount of sand to be discarded. This makes the process more environmentally friendly than conventional core-making processes.
The reliability of the lost foam castings was also confirmed by long-term pressure testing. After the initial type test, I conducted periodic production tests on samples from different batches. These tests included hydrostatic pressure tests at 2.5 MPa, pneumatic tests with leak detection, and torque tests on the bolted assembly. I also performed a salt-spray corrosion test on coated samples to verify that the anticorrosion treatment met the requirements for buried service. The results showed no significant corrosion after the test period, and the coating remained well adhered to the casting surface.
In addition to the saddle-type pipe clamps, the lost foam casting process was also used for some components of the Haffner joint repair clamps and mechanical tees where the geometry was too complex for conventional sand molding. The mechanical tee, which is used for branch connections on pipes below DN300, was manufactured by sand casting for most sizes, but the larger versions benefited from the lost foam process. The Haffner joint repair clamp, which must conform to the external profile of the pipe bell, was often produced more efficiently as a lost foam casting because the foam pattern can accurately reproduce the curved contour without requiring a separate core.
One of the lessons I learned during this development is that the success of lost foam castings depends heavily on the quality of the refractory coating. The coating must prevent molten metal from penetrating the sand, while allowing the gaseous decomposition products from the foam to escape. If the coating is too thick or too impermeable, gas pressure builds up and can cause defects such as gas holes in the casting. If the coating is too thin or too porous, sand can be washed into the melt or the metal can penetrate between the sand grains, causing rough surfaces and inclusions. I spent considerable time optimizing the coating composition and the coating application method. The final coating had a controlled permeability and a thickness of about 0.3 to 0.8 mm after drying.
Another important aspect is the foam pattern quality. The EPS beads must be fully fused together without gross voids, and the pattern surface must be smooth. Any imperfection on the pattern surface is directly copied into the final casting. I therefore used a steam molding process with carefully controlled steam pressure and time to create uniform beads. The patterns were aged for at least 24 hours after molding to allow them to stabilize dimensionally. Once the patterns were stable, they could be assembled into clusters with a hot melt adhesive. The gating system was also made of EPS foam, and the entire cluster was dipped into the refractory slurry. The coating was dried in a controlled oven at a low temperature to prevent distortion of the foam pattern.
The pouring operation in a lost foam foundry requires special attention to the metal flow rate. Unlike conventional casting, in which the cavity is empty and the metal fills by gravity or pressure, the lost foam cavity is filled with foam that must be vaporized ahead of the liquid front. The rate of metal advancement must be matched to the rate at which the foam can be decomposed and the gas removed. If the pouring rate is too high, the metal can push against a large volume of un-vaporized foam and cause a surface defect known as “fold.” If the pouring rate is too low, the metal may cool before the cavity is completely filled. I controlled the pouring rate by using a pouring cup with a stopper system and by training the pourer to maintain a consistent stream. This is one of the operator-dependent variables that can affect the quality of lost foam castings.
For the DN700 saddle clamp, the gating system was designed as a bottom-feed system. The metal entered the mold cavity from below, which promoted a smooth upward filling front. The foam decomposed evenly, and the gas moved upward through the coating and into the sand bed. This avoided turbulent flow and reduced the chance of gas entrapment. The risers were placed at the highest points of the cavity to feed the solidification shrinkage and to allow any residual gas to escape. After solidification, the risers were cut off and recycled.
I also used computer simulation to verify the process design before conducting the first pour. The simulation allowed me to predict the filling pattern, the temperature distribution, and the location of potential shrinkage. I used a commercial casting simulation package that included a specific module for lost foam filling. The model accounted for the decomposition of the foam pattern and the gas pressure within the cavity. The simulation results were in good agreement with the actual castings. For example, the simulation predicted that the last area to solidify would be at the boss around the branch outlet, and indeed this was the area where I placed an external riser. The final casting showed no shrinkage porosity in that region.
The mathematical expression for the filling flow through the gating system can be derived from Bernoulli’s equation. The volumetric flow rate \(Q\) in the early stage of pouring can be approximated as:
\[
Q = C_d A_g \sqrt{2g h}
\]
where \(C_d\) is the discharge coefficient, \(A_g\) is the cross-sectional area of the gate, and \(h\) is the effective metallostatic height. However, in a lost foam system, the presence of the foam pattern introduces an additional resistance. A more realistic model includes the gas pressure \(P_g\) acting against the metal front:
\[
Q = C_d A_g \sqrt{\frac{2(\rho g h – P_g)}{\rho}}
\]
where \(\rho\) is the density of the liquid metal. This equation indicates that a higher gas pressure at the metal front reduces the flow rate. Therefore, increasing the coating permeability or the vacuum level can improve the filling ability of the process.
I applied these concepts to optimize the casting of the saddle clamps. For the DN700 product, the total pattern weight was about 38 kg, and the pouring time was controlled to approximately 25 to 35 seconds. The pouring temperature was maintained above 1510 °C to ensure that the last portion of the cavity was filled with liquid metal that was still sufficiently hot to promote good feeding. The vacuum level was set to 0.05 MPa, and the molder was instructed to continue applying the vacuum for at least 15 minutes after pouring to allow the casting to solidify without mold deformation.
In terms of standards and specifications, I followed the requirements for ductile iron fittings from GB/T 13295-2019. This standard covers material properties, dimensional tolerances, and pressure testing methods. The saddle clamp bodies were coated with an epoxy-based paint that meets the requirements for drinking water applications. The coating is flexible and durable, so it does not crack when the clamp is tightened. The bolts were made of stainless steel or galvanized carbon steel, depending on the customer’s specification. The rubber seals were made of EPDM, which is suitable for contact with potable water and has good resistance to ozone and aging.
The design of the rubber seal is as important as the metal casting. The seal must fit tightly around the pipe surface, accommodate small irregularities, and maintain its elasticity over many years. I chose a shaped gasket with multiple sealing lips. When the clamp is tightened, the lips compress and create several concentric sealing lines. This redundancy ensures that even if one sealing line is bridged by a surface scratch, the remaining lines still maintain the pressure seal. The gasket design was validated by sealing tests on both new steel pipes and old, slightly corroded cast iron pipes. In every case, the clamp achieved a leak-free seal at the test pressure.
During the field application, I observed several advantages of the lost foam casting product compared with fabricated steel alternatives. First, the ductile iron body is rigid and self-supporting, so it does not require internal stiffeners. Second, the cast shape has a smooth external profile, which makes it easy to wrap with corrosion-protection tape. Third, the body has excellent resistance to soil loading because ductile iron has high compressive strength. Fourth, the lost foam castings have a naturally rounded surface, which reduces stress concentrations under high pressure. These features contributed to the positive feedback from municipal engineering teams.
The installation procedure in the field is straightforward. The first step is to excavate around the damaged pipe to expose a clean working area. The pipe surface is cleaned with a wire brush to remove loose rust and scale. The rubber gasket is then placed around the pipe at the desired position. The two halves of the saddle clamp are placed over the gasket and aligned by means of the cast alignment pins. The bolts are inserted and tightened gradually in a diagonal pattern to ensure even compression of the gasket. The recommended torque for the bolts depends on the size of the clamp and the bolt diameter. For the DN700 clamp, a torque of about 180 to 220 N·m is recommended. After the bolts are fully tightened, the repair is inspected visually, and if necessary, a pressure test is performed by applying air or water to the branch outlet.
I also used the saddle clamp as a base for hot-tapping operations. In a hot-tap installation, a valve is mounted on the branch outlet of the clamp, and a drilling machine is attached to the valve. The drill cuts a hole through the wall of the main pipe while the pipe remains under pressure. Once the hole is completed, the drill is retracted, and the valve is closed. This procedure creates a new branch connection without shutting down the main line. The saddle clamp provides a stable and rigid platform for the tapping machine, so the drilling operation can be performed safely. The lost foam castings have sufficient dimensional accuracy and flatness on the branch outlet face to mount the valve without an additional machining operation that would be expensive for a large part.
From an economic point of view, the development of these lost foam castings has been very favorable. The initial investment in foam molding tooling was much lower than the cost of large sand foundry patterns. The lead time from design to first article was shortened significantly, which allowed me to respond quickly to customer requests. The casting yield was improved because the gating system could be optimized through simulation and because the lost foam process does not require a separate core assembly. The scrap rate from production was below 3%, which is an excellent level for a new ductile iron casting process. This high yield is attributed to the thorough process development and the careful control of process parameters.
In the future, I plan to expand the application of lost foam castings to other pipe fittings, such as large-diameter mechanical couplings, repair sleeves, and flanged adapters. The same process principles can be used for any geometry that contains internal passages or curved contours. I also intend to investigate the use of lighter foam materials and advanced coatings to further improve the surface quality and reduce the environmental impact. The lost foam casting process has already demonstrated its ability to produce pressure-rated ductile iron components with high integrity, and I believe it will become an increasingly important manufacturing route for the water industry.
The success of the project was not only a technical achievement but also a practical solution to a long-standing problem in municipal pipe maintenance. The saddle-type pipe clamp produced by lost foam castings allowed the repair team to stop leaks quickly, create branch connections safely under pressure, and return the pipe network to service in a fraction of the time required by traditional methods. I have seen how this innovation reduces water loss, reduces inconvenience to residents, and reduces the risk of excavation-related accidents. It also reduces the cost of road restoration because the excavation pit can be much smaller when a clamp is used instead of a full pipe replacement.
To summarize, the lost foam casting process played a central role in the development of nodular iron saddle pipe clamps. The process enabled a cost-effective, high-quality production route for large and geometrically complex fittings. The resulting products met all structural and performance requirements, including the 2.5 MPa hydrostatic pressure test. The field trials confirmed that the clamps are easy to install and reliable in service. I am confident that the combination of ductile iron material and lost foam casting technology is an excellent choice for the production of advanced pipe repair components. As municipal infrastructure continues to age and require more efficient maintenance methods, the importance of such cast components will only increase. I look forward to further refining the process and extending its application to even more products in the future.