
Sand casting remains one of the most widely used metal forming processes, especially for producing sand casting parts with complex geometries and large dimensions. In the past, the design of sand casting parts largely depended on the experience of foundry engineers, leading to long development cycles, frequent design iterations, and high scrap rates. With the rapid advancement of computer technology, casting process simulation and computer-aided design have become essential tools to improve the quality and efficiency of sand casting parts. This paper presents my personal work on developing a CAD system specifically for sand casting axis-shaped components using the secondary development capabilities of Pro/Engineer. The system integrates geometric modeling, process parameter selection, gating system design, and riser design in a unified environment, thus providing a practical solution for the computer-aided design of sand casting parts.
1. Introduction
Foundry technology is a fundamental manufacturing discipline that transforms metallic materials from the solid state to liquid state and then back to solid state. This unique physical transition makes the production of sand casting parts inherently complex. The design of the casting process, including the gating system, risers, feeding aids, and cooling channels, directly determines the internal soundness and dimensional accuracy of the final product. Traditional design methods for sand casting parts are heavily based on empirical rules and trial-and-error procedures. This approach often results in a long production lead time and high material waste, especially for large steel castings such as crankshafts, rolls, and turbine shafts.
The recent development of casting CAD/CAE technologies offers a promising way to replace the traditional empirical methodology with a more scientific and quantitative approach. By simulating mold filling, solidification, and cooling processes, engineers can predict potential defects such as shrinkage porosity, gas entrapment, and hot tears before actual pouring. However, most commercial casting CAE software packages require substantial preprocessing efforts, including the construction of a three-dimensional solid model with gating and riser systems. The gap between the raw part model and the process model is a major bottleneck in the industrial application of casting simulation.
In this context, I have developed a casting process CAD system that is tightly integrated with Pro/Engineer (Pro/E). The system is designed to assist engineers in building process-ready models of sand casting parts, especially shaft-like components. The development involves several key tasks: selecting an appropriate development platform and programming language, exploiting the Pro/Toolkit application programming interface, constructing menu and database resources, and implementing the functional modules for process parameter design, gating system design, and riser system design. The resulting system enables the user to generate a complete casting model, including all necessary process attachments, directly in the Pro/E environment. This model can then be exported to casting simulation software for numerical verification.
Throughout the paper, I will emphasize the practical aspects of developing the system, the challenges encountered, and the solutions adopted. The term sand casting parts appears repeatedly, as the entire development effort is centered around this specific category of castings.
2. Selection of the Development Platform and Language
At the beginning of the project, a critical decision was made regarding the choice of the CAD platform on which the casting process design system would be built. The platform must be mature, powerful, and, most importantly, open enough for secondary development. I evaluated several well-known commercial CAD systems, including AutoCAD, UG, CATIA, SolidWorks, and Pro/Engineer. A detailed comparison is presented in Table 1.
| CAD Software | Developer | Primary Strengths | Main Limitations |
|---|---|---|---|
| AutoCAD | Autodesk | Widely used in 2D drafting, low cost, low hardware demand | Weak 3D solid modeling, limited parametric and associative capability |
| UG | Siemens PLM Software | Strong in free-form surface modeling and CAM integration | High hardware requirement, complex to learn, high cost |
| CATIA | Dassault Systèmes | Excellent surface modeling, digital mockup, supports virtual reality | Expensive, requires professional graphics hardware |
| SolidWorks | Dassault Systèmes | User-friendly Windows interface, parametric design, low cost | Less capable in complex surface modeling than Pro/E or UG |
| Pro/Engineer | PTC | Parametric, feature-based, fully associative, comprehensive API | Steep learning curve for new users, not a native Windows application |
Table 1. Comparison of typical CAD/CAM systems for secondary development.
After careful consideration, I chose Pro/Engineer 2001 as the development platform. The reasons are as follows:
- Pro/Engineer was one of the first CAD systems to adopt full parametric and feature-based design methodologies, which makes it very suitable for repetitive design tasks commonly encountered in the process planning of sand casting parts.
- It provides a complete and mature application programming interface called Pro/Toolkit, which allows developers to access the Pro/E database, create custom menus, and extend the native functionality.
- The university project group had already accumulated experience with Pro/Engineer and its integration with casting simulation tools such as ProCAST. Therefore, using the same platform reduced the learning curve and allowed for direct coupling with downstream CAE software.
For the programming language, I selected C and Visual C++ 6.0. Pro/Toolkit is designed to be used with the C language, and Visual C++ 6.0 provides a robust integrated development environment (IDE), an efficient compiler, and a rich set of Microsoft Foundation Classes (MFC) that greatly simplify the creation of graphical user interfaces and database access. In addition, VC++ 6.0 supports the Data Access Objects (DAO) technology, which is convenient for managing the process parameter database used by the CAD system.
3. Pro/Toolkit Secondary Development Technology
Pro/Toolkit is the official user customization toolkit provided by PTC for Pro/Engineer. It enables external programs to interact seamlessly with Pro/E data and functionality. With Pro/Toolkit, one can read and modify geometric models, create features, access dimensions, and even build custom user interfaces. The toolkit follows an object-oriented approach; each object is represented by a C structure, and all operations are performed through functions that follow the naming convention Pro<Object><Action>.
3.1 Development Modes
Pro/Toolkit supports two main development modes: synchronous and asynchronous. In the synchronous mode, the application is loaded and executed as part of the Pro/E session. In the asynchronous mode, the application communicates with Pro/E through remote procedure calls, which is less efficient. I decided to use the synchronous mode for its higher communication efficiency. The synchronous mode itself can be implemented in two ways: as a dynamic link library (DLL) or as a multi-process executable. The DLL mode combines the application code with Pro/E at startup, resulting in faster execution. The multi-process mode compiles the application into a separate executable that runs as a child process of Pro/E. For debugging purposes, the multi-process mode is more convenient because it allows the developer to attach a debugger to the child process without restarting Pro/E. Therefore, I used the multi-process mode during development and switched to the DLL mode for final deployment.
| Feature | Multi-process Mode | DLL Mode |
|---|---|---|
| Execution speed | Slower due to inter-process communication | Faster due to direct function calls |
| Debugging | Easier, no need to restart Pro/E each time | Requires restarting Pro/E to load new code |
| Deployment | Need to manage separate executable | Single DLL file that can be easily registered |
| Common usage | Development phase | Release phase |
Table 2. Comparison of synchronous mode implementation options.
3.2 Building the Pro/Toolkit Application Framework
One of the main technical challenges was generating a working Pro/Toolkit application framework within the Visual C++ 6.0 IDE. The traditional approach documented in the PTC manuals used the Microsoft DOS command-line utility with a makefile. However, I preferred to use the VC++ IDE because it significantly speeds up project management and debugging. I investigated several strategies and found that the most practical one is to create a regular MFC DLL using the MFC AppWizard (DLL) template. In the wizard, I selected the option “Regular DLL using shared MFC DLL” to ensure that the Pro/Toolkit application can use MFC classes and dialog resources. After the wizard generated the skeleton project, I added the necessary Pro/Toolkit library files and include paths in the project settings. Table 3 summarizes the three methods that are commonly used to generate a Pro/Toolkit application framework with VC++ 6.0.
| Method | Description | Advantages | Disadvantages |
|---|---|---|---|
| 1. DOS makefile | Modify the original Pro/Toolkit makefile and compile with nmake | Full control, no need to set up VC project manually | No MFC support, inconvenient for GUI development |
| 2. Win32 console project | Create a Win32 Console Application and add Pro/Toolkit source files | Simple project structure, direct control over output files | Cannot easily use MFC dialog classes |
| 3. MFC regular DLL | Use MFC AppWizard to create a regular DLL and link with Pro/Toolkit libraries | Supports MFC classes and dialogs; easy to integrate with database and GUI | More complex setup, but manageable with proper project settings |
Table 3. Methods for generating a Pro/Toolkit application framework.
In my development, I used the third method. After creating the MFC DLL project, I added the following library files to the linker settings:
$$ \text{protoolkit.lib}, \quad \text{prodev\_dll.lib}, \quad \text{protk\_dll.lib}, \quad \text{prodevdll.lib} $$
I also added the include directories for Pro/Toolkit headers, such as <protoolkit\_src>/includes and <protoolkit\_src>/protk\_appls/includes. With these adjustments, the standard MFC DLL framework could be compiled and linked into a Pro/Toolkit application.
3.3 Initialization and Termination Functions
Every synchronous Pro/Toolkit application must contain two user-defined functions: user_initialize() and user_terminate(). user_initialize() is called when the application is loaded by Pro/Engineer. In this function, I set up the custom menus, register menu action handlers, and prepare any necessary resources. The signature of the function is as follows:
$$ \text{int user\_initialize()}\\ \{ \\ \quad \text{// initial menu and dialog setup} \\ \quad \text{return 0;} \\ \} $$
user_terminate() is called when the application is terminated by Pro/Engineer. In this function, I can clean up memory, close database connections, and perform other housekeeping tasks. A minimal implementation is:
$$ \text{void user\_terminate()} \\ \{ \\ \quad \text{// cleanup operations} \\ \} $$
These two functions are the entry points for the Pro/Toolkit application. Without them, the application cannot be recognized by Pro/Engineer. In addition to the interface functions, the main body of the application consists of user-defined functions that carry out the actual casting process design tasks. These functions are usually triggered by menu selections. For example, when the user clicks the “Gating System Design” menu item, the corresponding function loads an MFC dialog box in which all gating parameters can be entered and calculated.
3.4 Resource Files
Pro/Engineer uses several types of text resource files to define menus and messages. Menu resource files have the extension .mnu or .aux. The .mnu file is used to define a new menu, while the .aux file is used to add new buttons to an existing menu. Both types follow the same format: a series of three-line groups. The first line contains the menu item identifier; the second line contains the help string; the third line can be used for a translated string. For example, to add a menu button labeled “Casting CAD” to the Part menu, I created a part.aux file with the following content:
part.aux
#
#
Casting CAD  & Casting Process CAD

#
#
I also created an information file with the extension .txt to display messages in the Pro/E message window. Information files follow a specific format with four lines per message: a unique keyword, a format string, a translation string, and a blank line. The format string can include placeholders such as %0d, %1s, and %2f. These placeholders are replaced with actual values when the message is displayed.
4. Overall Architecture of the Casting Process CAD System
The developed system, named CastingCAD, is embedded in the Pro/Engineer environment. Its overall architecture is shown in Figure 1. The system consists of three main functional areas: three-dimensional solid modeling, casting process CAD, and casting CAE. The solid modeling module is the native Pro/Engineer modeling environment, where the user builds the raw part model. The casting process CAD module is the core of the developed system. It includes sub-modules for part classification, casting type selection, material definition, parting surface determination, process parameters, gating system design, and riser system design. The casting CAE module is an external link to commercial simulation software, which can be used to verify the designed process.
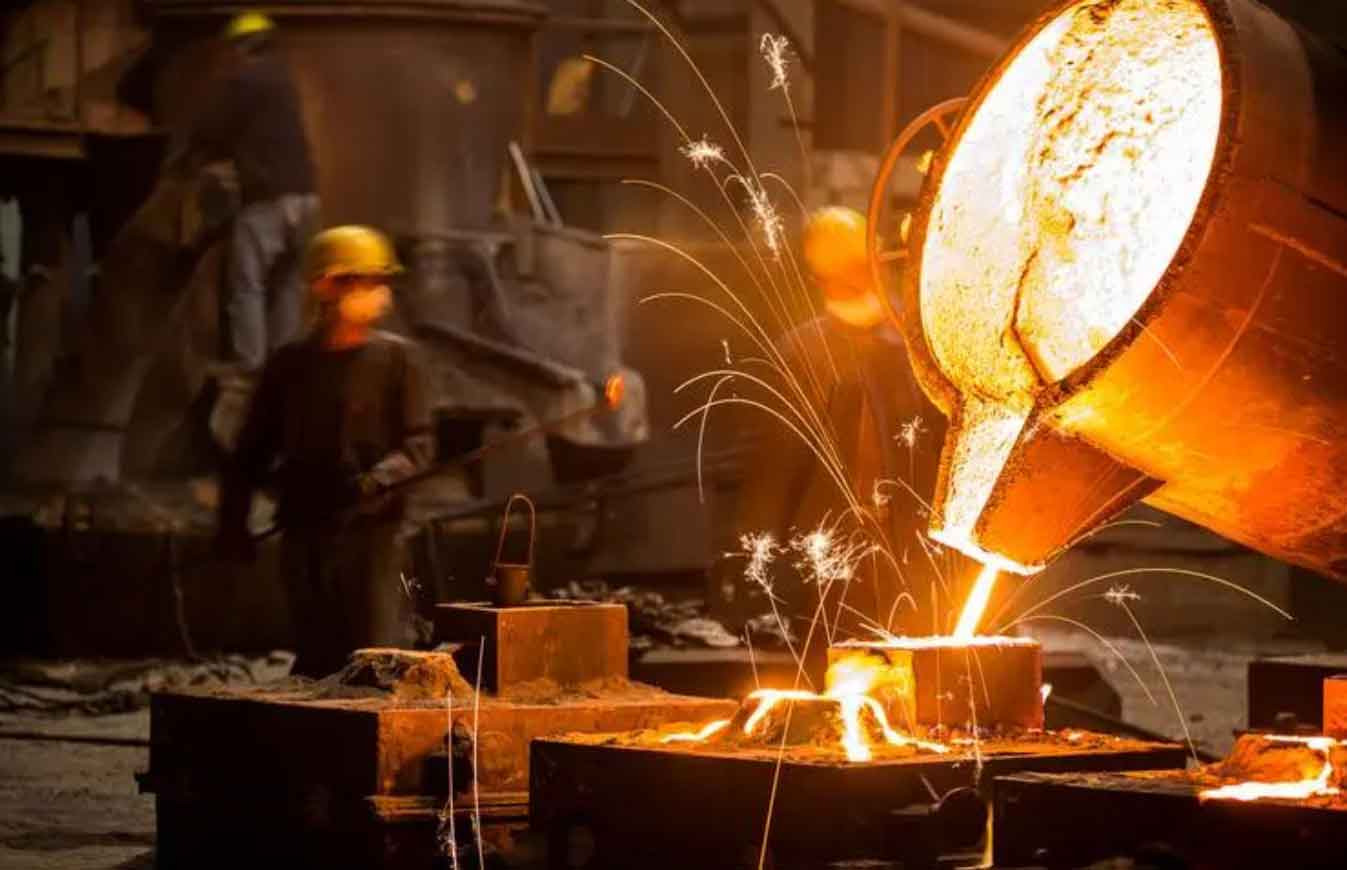
Figure 1. Conceptual architecture of the casting process CAD system for sand casting parts. (The image shows a typical foundry production environment for sand casting parts.)
4.1 Menu Structure
The menu structure of the system was designed according to the conventional casting process design workflow. Figure 2 illustrates the designed menu hierarchy. It consists of three top-level sub-menus: Part Type, Casting Type, and Casting Module.
| Top-Level Menu | Sub-Menu Items | Function |
|---|---|---|
| Part Type | Shaft, Wheel, Plate, etc. | Select the type of the part to be cast. |
| Casting Type | Sand casting, Metal mold casting, Investment casting, etc. | Choose the casting method; each type is linked to a specific database. |
| Casting Module | Shaft Module, Wheel Module, Plate Module | Enter the specific design module for the selected part class. |
Table 4. Structure of the casting process CAD menu.
When the user selects the Casting Module, the system displays a secondary menu with the following options for shaft-like parts:
- Material Definition: allows the user to set the material name and its physical properties including density, modulus, and thermal expansion coefficient.
- Parting Surface: used to determine the mold joint and the orientation of the casting in the mold. For simple parts, the parting surface can be created using the datum planes defined in Pro/E. For complex parts, the user can create a more sophisticated surface by leveraging Pro/E’s surface modeling tools.
- Process Parameters: includes machining allowance, shrinkage rate, draft angle, and casting fillet. The system provides database-driven lookup tables for these parameters, which are based on foundry handbooks and industrial practice.
- Riser System: guides the user through feeding zone division, modulus calculation, riser type selection, riser size computation, and riser placement.
- Gating System: supports the design of gating channels, including sprue, runner, and ingate. It also provides methods for calculating the optimal cross-sectional areas based on the desired filling time and wall thickness.
4.2 Database Design
One of the central components of the system is the casting process database. The database stores parameters that are essential for designing sand casting parts, such as material properties, recommended cooling times, riser geometry data, and gating system dimensions. I selected Microsoft Access 2000 as the database management system because it is lightweight, widely available, and fully compatible with the DAO (Data Access Objects) technology in VC++.
The database is organized into several tables. Table 5 shows the structure of the main process parameter table, which is used to store the recommended values for common carbon steel and alloy steel castings.
| Field Name | Data Type | Description |
|---|---|---|
| MaterialID | Text | Unique identifier for the material |
| MaterialName | Text | Name of the material (e.g., ZG270-500) |
| Density | Double | Density of the material (kg/m3) |
| Shrinkage | Double | Linear shrinkage rate (in percentage) |
| ModulusThreshold | Double | Minimum modulus for riser design |
| MachiningAllowance | Double | Recommended machining allowance (mm) |
Table 5. Structure of the material parameter database used for sand casting parts.
The DAO technology enables the Pro/Toolkit application to access the Access database through MFC classes such as CDaoDatabase and CDaoRecordset. In the MFC DLL, I created a dialog-based interface that displays the database contents in a tabular format. The user can query, modify, add, or delete records through this interface. This database approach greatly reduces the need to manually look up data in handbooks, thereby accelerating the design process of sand casting parts.
5. Implementation of the Shaft-Like Sand Casting Parts CAD Module
This section describes the implementation of the functional modules that are specifically tailored to the process design of shaft-like sand casting parts. A shaft-like part is characterized by a long length-to-diameter ratio, often with several extended bosses, journals, and flanges. The thermal centers are usually found at the junctions between the main body and the bosses, where feeding is most critical.
5.1 Part Modeling and Pre-Processing
The user starts by creating or importing a three-dimensional solid model of the desired sand casting part in Pro/Engineer. The system provides a small library of pre-defined shaft shapes. If a similar geometry is available, the user can retrieve it from the library, modify the dimensions, and obtain a new model. Otherwise, the part can be modeled manually using Pro/E’s feature-based modeling tools. As an example, I used a typical crankshaft made of steel ZG270-500. The crankshaft has a maximum diameter of 1270 mm and a total length of 1720.85 mm. The three large crank webs and the main journal intersections are areas where hot spots are likely to form. This example is representative of many sand casting parts in heavy machinery.
5.2 Material Definition and Process Parameters
Before performing any process calculations, the user should set the material and its properties. In the developed system, a dialog box is provided to select the material from the database or to define a new material. Typical properties such as density, solidus temperature, and latent heat can be entered. The system also allows the user to set the shrinkage rate, machining allowance, draft angle, and casting fillet through dedicated dialog boxes. All these parameters are stored in the process database, which can be accessed for later reference.
The machining allowance is usually dependent on the casting size, tolerance grade, and the position of the surface (top, side, or bottom). For sand casting parts, the recommended allowances are often given in tables. An example of the stored machining allowance data is shown in Table 6.
| Surface Position | Allowance for Medium Steel Castings (mm) | Allowance for Large Steel Castings (mm) |
|---|---|---|
| Top surface | 5 – 7 | 8 – 12 |
| Side surface | 4 – 6 | 7 – 10 |
| Bottom surface | 3 – 5 | 6 – 8 |
Table 6. Recommended machining allowances for steel sand casting parts.
The shrinkage rate of steel is typically about 2% for the solidification contraction, and the pattern maker’s allowance is added to the model accordingly. In Pro/E, this can be accounted for by using the Shrinkage command. The system prompts the user to enter the shrinkage value in percentage, and the model is automatically scaled. Similarly, the draft angle and casting fillet are applied using the Draft and Round functions in Pro/E.
5.3 Gating System Design
The gating system is a critical element in the production of sound sand casting parts. Its purpose is to fill the mold cavity completely and smoothly without causing turbulence or erosion. In my system, the gating design is based on the steel rising velocity method, which is commonly used for large steel castings. The method involves the following steps:
- Determination of the required rising velocity. The minimum rising velocity of molten steel in the mold cavity should be high enough to prevent the mold surface from being damaged by heat radiation and to avoid oxide film formation. Recommended minimum values are stored in the database, as illustrated in Table 7.
| Casting mass (kg) | Minimum rising velocity (mm/s) |
|---|---|
| ≤ 1000 | 30 |
| 1000 – 5000 | 20 |
| 5000 – 10000 | 15 |
| ≥ 10000 | 10 |
Table 7. Recommended minimum rising velocity for steel sand casting parts.
- Calculation of the pouring time. The pouring time can be estimated by the formula:
$$ t = \frac{G}{N \cdot n \cdot v} $$
where \( G \) is the total mass of molten steel (kg), \( N \) is the number of ladles used simultaneously, \( n \) is the number of pouring gates per ladle, and \( v \) is the pouring flow rate (kg/s). The flow rate depends on the nozzle diameter of the ladle. Typical average values are provided in Table 8.
| Nozzle diameter (mm) | Flow rate (kg/s) |
|---|---|
| 40 | 50 |
| 60 | 80 |
| 80 | 120 |
| 100 | 180 |
Table 8. Average pouring flow rate values versus nozzle diameter.
- Verification of the rising velocity. The actual rising velocity is computed by
$$ v_L = \frac{C}{t} $$
where \( C \) is the height of the casting in the pouring position (mm) and \( t \) is the pouring time (s). If the calculated \( v_L \) is lower than the recommended value from Table 7, the pouring parameters must be adjusted, e.g., by increasing the nozzle diameter or adding more gates.
- Determination of the cross-sectional areas. Once the pouring time is fixed, the cross-sectional areas of the gating system components are determined using empirical ratios. The system provides a table that relates the nozzle diameter to the recommended cross-sectional areas of the sprue, runner, and ingates. This table can be used directly to build the gating model in Pro/E.
For the example crankshaft, the total mass of steel was approximately 20,000 kg, and the desired pouring time was calculated as 180 s. The system recommended a set of gating dimensions, which the user then implemented in Pro/E using the “sprue”, “runner”, and “ingate” features. Figure 3 in the original implementation showed the gating design interface and the resulting gating system model.
5.4 Riser System Design
Riser design is essential for preventing shrinkage defects in sand casting parts. The modulus method is one of the most widely applied techniques. The modulus \( M \) of a cooling body is defined as the ratio of its volume \( V \) to its cooling surface area \( A \):
$$ M = \frac{V}{A} $$
For a riser to provide effective feeding, its solidification time must be longer than that of the casting section it feeds. This is achieved by making the modulus of the riser larger than the modulus of the casting section. The riser modulus is given by
$$ M_r = f \cdot M_c $$
where \( M_c \) is the modulus of the casting region to be fed, and \( f \) is a safety factor. Based on foundry practice, I adopted the following values:
$$ f = 1.2 \quad \text{for open top risers} $$
$$ f = 1.5 \quad \text{for blind risers} $$
A table of standard riser geometries, including their initial volume, weight, and maximum feeding capacity, is stored in the database. The system allows the user to search for a standard riser that has a modulus equal to or greater than the calculated \( M_r \). Once selected, the riser type and dimensions can be retrieved from the database and inserted into the Pro/E model.
In the crankshaft example, the calculated modulus of the largest hot spot was \( M_c = 10.02 \) cm. Multiplying by the safety factor of 1.2 gave \( M_r = 12.02 \) cm. The database search suggested using a standard riser with \( M_r = 11.96 \) cm and a maximum feeding weight of 4340 kg. The total weight of the casting at the hot spot was 4338 kg, so the selected riser was considered acceptable. The riser design dialog is shown in Table 9, which summarizes the input and output for the riser calculation.
| Parameter | Symbol | Value |
|---|---|---|
| Modulus of casting section | \( M_c \) | 10.02 cm |
| Safety factor | \( f \) | 1.2 |
| Required riser modulus | \( M_r \) | 12.02 cm |
| Selected standard riser modulus | \( M_{r,std} \) | 11.96 cm |
| Maximum feeding weight | \( G_{max} \) | 4340 kg |
| Actual feeding weight | \( G_{act} \) | 4338 kg |
Table 9. Example riser calculation for a steel sand casting crankshaft.
After the riser type and size are determined, the user positions the riser in the Pro/E model using basic move and pattern commands. The system also provides a function to check the feeding distance and to ensure that directional solidification is achieved. If the feeding distance is insufficient, the user may add a chill or increase the riser size.
5.5 Integration with Casting Simulation
Once the complete process model, including the gating and riser systems, has been constructed, the next step is to perform a casting simulation to validate the design. The finished model can be exported to M A G M A or other commercial CAE programs using neutral formats such as STEP or IGES. In the simulation, the mold filling and solidification processes are analyzed, and the potential shrinkage defects are predicted. If the simulation results indicate that the casting is unsound, the user returns to the CAD system, modifies the process parameters or adds additional risers, and repeats the cycle until a satisfactory design is obtained.
In the example of the crankshaft, the system calculated an overall process yield of about 60%, which indicates a reasonable balance between the gating/riser scrap and the soundness of the final sand casting part. This shows the effectiveness of the developed system in optimizing the casting process for a typical shaft-like component.
6. Results and Discussion
The developed system has been successfully used to design the casting process for a large steel crankshaft. The system allowed the user to complete the following tasks in a single Pro/Engineer environment:
- Create or import the part model.
- Define the material and set the necessary physical properties.
- Create the parting surface and determine the casting orientation.
- Apply the machining allowance and shrinkage values.
- Design the gating system using the rising velocity method.
- Calculate the riser dimensions using the modulus method and retrieve standard riser data from the database.
- Assemble the gating and riser components with the part model.
- Export the final model to an external simulation package for verification.
The modular design of the system makes it easy to extend. The database-oriented approach ensures that the system can be updated without modifying the source code. By linking to real production data, the system can evolve continuously as new materials and process technologies emerge.
7. Conclusions and Future Work
In this work, I have designed and implemented a CAD system for the process design of sand casting parts, with a focus on axis-shaped components. The system is based on the Pro/Engineer platform and uses the Pro/Toolkit API for secondary development. The main conclusions from this work are as follows:
- Pro/Engineer combined with Visual C++ 6.0 and Pro/Toolkit provides a powerful development environment for building specialized casting CAD systems. The MFC regular DLL approach is the most convenient method for creating applications that require rich user interfaces and database access.
- Using the multi-process mode during development significantly reduces the debugging time because each test run does not require a complete restart of Pro/Engineer. The DLL mode is recommended for final deployment due to its faster execution speed.
- DAO and MFC dialog technology can be successfully applied inside Pro/Engineer to develop a user-friendly database management subsystem. This subsystem permits efficient storage and retrieval of process parameters for sand casting parts.
- The developed system streamlines the complete process design workflow for shaft-like sand casting parts. It shortens the design cycle, reduces manual data look-up errors, and produces a process-ready three-dimensional model for casting simulation.
Several improvements can be made in the future. First, the system should be extended to include the design of chills, cores, and other auxiliary tooling. Second, the current classification-based design approach can be improved by adopting a more generic decomposition strategy, where complex parts are automatically decomposed into simpler primitives such as rods, plates, and shells. Third, the database can be ported to a network-enabled database system to allow collaborative design among distributed engineering teams. Finally, a closer integration with casting simulation software would enable automatic optimization of the process parameters based on iterative numerical analysis.
In conclusion, the developed casting process CAD system represents a significant step toward the digitization of process planning for sand casting parts. It demonstrates how commercial CAD platforms can be customized to meet the specific needs of the foundry industry and provides a practical tool for engineers working on large steel casting parts.