
As a practitioner deeply involved in the realm of foundry tooling, I find the evolution of sand casting truly remarkable. From its ancient, manual origins, the process has transformed into today’s high-pressure, automated, or semi-automated production lines. This advancement has led to a dramatic increase in production efficiency and a significant improvement in the quality of sand casting parts. The inherent advantages of the method—its applicability to parts of virtually any shape, size, or complexity, the wide availability of molding materials, short production cycles, and low cost—ensure its continued dominance in modern heavy machinery manufacturing. In this article, I will detail my first-hand experience in designing and manufacturing the metal dies for a classic, thin-walled sand casting part: a timing gear housing for a diesel engine. This walkthrough aims to provide a concrete reference for fellow engineers navigating the complexities of tooling for sand casting parts.
Part Analysis and Foundry Requirements
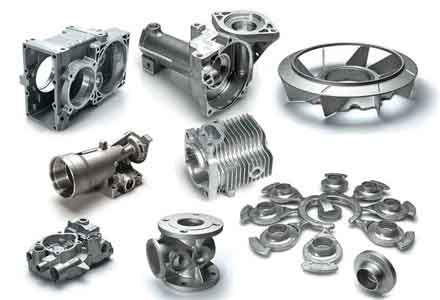
The component in focus is a timing gear case, a critical part of the transmission system in diesel engines, which are ubiquitous in sectors like mining, rail, construction, and power generation. The demand for such sand casting parts is substantial and ongoing. With continuous engine redesigns, the associated casting dies must also be frequently updated. For this specific case, the material specification is HT250 gray iron. The key requirements for these sand casting parts are uniform wall thickness, regular geometry, and smooth surface transitions. Technically, the castings must be stress-relieved, achieve a hardness of 163–229 HB, and be free from penetrating defects such as blowholes, sand inclusions, and slag. These stringent requirements directly dictate the design philosophy and manufacturing precision of the metal dies used to produce the sand molds.
3D Rough Model Design: The Foundational Step
The entire process begins not with the die, but with a digital model of the final rough casting. This model is not a direct copy of the finished machined part; it must incorporate all necessary allowances and modifications for the casting process. Using 3D CAD software, I constructed this model based on the machined part drawing and foundry specifications. The critical modifications for creating viable sand casting parts include:
- Shrinkage Allowance: For HT250, a shrinkage rate of 1% must be applied to all linear dimensions to compensate for solidification contraction.
$$ L_{pattern} = L_{casting} \times (1 + Shrinkage\%) $$
For a nominal dimension \( L_{casting} = 1000mm \), the pattern dimension becomes:
$$ L_{pattern} = 1000 \times 1.01 = 1010mm $$ - Machining Allowance: Surfaces requiring post-casting machining are enlarged. For major mating faces prone to warping, a larger allowance is critical. Key parameters are summarized below.
- Draft Angles: Added to all surfaces perpendicular to the parting line to facilitate pattern removal from the sand mold.
- Fillet Radii: Sharp internal corners are replaced with radii to prevent stress concentrations and improve metal flow.
| Feature | Allowance/Value | Rationale |
|---|---|---|
| Global Shrinkage | 1.0% | Material-specific (HT250) solidification contraction. |
| Major Mating Face | 3.0 mm | Prevent scrap due to potential casting warpage over long span (~1m). |
| Small Machined Pads/Bosses | 2.5 mm | Standard allowance for secondary machining. |
| Holes > φ40 mm | 2.5 mm (core will form hole) | Allowance for boring/reaming to final size. |
| Unspecified Draft | 0.5° – 1.0° | Ensure clean pattern withdrawal from sand. |
| Unspecified Fillet Radius | R3 – R5 mm | Improve casting soundness and reduce stress. |
The resulting 3D rough model is the true “target” geometry that the sand mold must create. It is this model, not the final part print, that drives all subsequent mold and die design.
Sand Mold Design: From Part to Mold Cavity
The next step is to design the sand mold that will form this rough casting. In modern high-pressure molding lines, this involves creating two metal dies (cope and drag) that will compact sand to form the mold halves. The first task is to define the mold cavity itself. Using specialized casting simulation software or the molding modules in advanced CAD, I import the rough model as a reference and create a block representing the sand mold blank. The most critical decision here is the parting line—the plane or surface that separates the cope (top) and drag (bottom) molds. For the timing gear case, the presence of side bosses necessitates a stepped parting line; a simple flat part would be impossible to eject. After carefully defining this complex parting surface, the software splits the sand block into the two mold halves. This creates the negative cavity of our final sand casting parts.
Metal Die Design: Engineering for Production
The cope and drag sand molds are theoretical entities. The practical goal is to create the robust metal dies that will repeatedly form these sand molds on the molding line. The process is essentially a “mold of the mold.” In the CAD assembly, I place the sand mold halves (cope and drag) into a standard mold plate or die block. Using a Boolean subtraction operation, the die block is cut away by the sand mold geometry, leaving the positive form of the die. This form is then finished by adding several crucial features absent from the sand model:
- Gating System: Channels for molten metal must be incorporated into the die. For the drag die, this includes the ingates (entry points). Sizing is based on the weight and section thickness of the sand casting parts. The choke area is critical.
$$ A_{choke} = k \sqrt{W} $$
Where \( A_{choke} \) is the minimum cross-sectional area (cm²), \( W \) is the casting weight (kg), and \( k \) is an empirical factor (typically 0.3-0.6 for iron). For a ~50kg casting, calculation yielded \( A_{choke} \approx 4.2 cm² \). This was implemented as two ingates with a trapezoidal cross-section of 3.6 cm² each, satisfying \( A_{total} > A_{choke} \). - Alignment Pins/Bushings: Precision-machined pins on one die half and matching bushings on the other ensure perfect registration between the cope and drag sand molds during molding.
- Vent Seals (Crush Ribs): A raised rib, typically 1-2mm high and 8-12mm wide, is added around the perimeter of the die’s parting surface. When the dies close during molding, this rib presses into the sand of the opposing mold half, creating a seal that prevents metal penetration (finning) at the mold joint, a common defect in sand casting parts.
The final die designs are complete 3D models ready for manufacturing. It is vital to remember that every feature on this die will be replicated in every sand mold it produces, and thus on every sand casting part poured.
| Die Feature | Design Specification | Function |
|---|---|---|
| Parting Line | Stepped/Surfaces | Accommodates side bosses for proper ejection. |
| Ingates (Drag) | 2 off; 200mm L x 18mm H | Delivers metal to cavity; placed on straight edges for easy cutoff. |
| Runner (Cope) | Trapezoidal, Area = 7.2 cm² | Distributes metal from sprue to ingates. |
| Alignment | 2x Hardened Steel Pins/Bushings | Ensures precise cope/drag mold alignment. |
| Vent Seal (Crush Rib) | 10mm W x 1.5mm H, full perimeter | Prevents flash/fins at mold parting line on final sand casting parts. |
| Die Material | GGG70 (Ductile Iron) or similar | Provides good machinability, wear resistance, and castability for the die blank itself. |
Manufacturing and Machining of the Dies
With the 3D design finalized, the physical manufacture of the dies begins. The selected material is a high-grade cast iron (GGG70), chosen for its excellent vibration damping, good machinability, and wear resistance—essential for the high-cycle production of sand casting parts.
- Patternmaking & Casting of Die Blanks: Ironically, the metal dies themselves start as sand casting parts. A wooden pattern is first machined, incorporating the same 1% shrinkage allowance. This pattern is used in a conventional sand casting process to produce rough, oversized blanks for both the cope and drag dies. The drag blank is cast thicker (~120mm) than the cope (~100mm) to accommodate different backing structures.
- CNC Machining: The cast blanks are then mounted on a 5-axis machining center. The CNC program, derived directly from the 3D CAD model, executes the machining in stages:
- Roughing: High-feed-rate tools rapidly remove the bulk of material, leaving a uniform stock allowance.
- Semi-Finishing: Tools with smaller stepovers refine the shape closer to final dimensions, preparing for the finish pass.
- Finishing: Ball-nose end mills are used to accurately generate the complex contoured surfaces of the cavity, the parting surface, and the vent seal ribs. Achieving a fine surface finish here is paramount, as any tool marks will be transferred to the sand mold and ultimately appear on the surface of the production sand casting parts.
- Drilling/Boring: Holes for alignment pins, bushings, and machine mounting are precisely drilled and bored.
- Heat Treatment & Finishing: While the cast iron may not require through-hardening, surface treatments like nitriding can be applied to increase the wear resistance of critical areas like the vent seals and gating surfaces. Finally, the dies are polished in the cavity areas to ensure optimal sand release and casting surface quality.
Conclusion: The Interdependency of Design and Production
The successful production of high-quality, consistent sand casting parts is inextricably linked to the meticulous design and precision manufacturing of their metal dies. This process is a multi-stage translation: from the machined part to the casting rough model, to the sand mold cavity, and finally to the positive form of the production die. Each step requires a deep understanding of foundry science—shrinkage, fluid dynamics, solidification, and sand behavior. The use of modern 3D CAD and CAM software is indispensable, allowing for the integration of empirical formulas (like the choke area calculation \( A_{choke} = k\sqrt{W} \)) into a precise, manufacturable model. By carefully considering every allowance, designing an effective gating and venting system, and employing high-precision machining, the resulting dies become the reliable heart of an automated molding line, capable of producing robust sand casting parts that meet ever-increasing performance and quality standards. The journey of the timing gear case die exemplifies this holistic engineering approach, where design intent is faithfully locked into tool steel to be replicated thousands of times in iron.