The structure design of squeeze casting die requires simple structure, reasonable process, easy manufacturing and quality assurance. This paper mainly discusses the design of the working parts, that is, the structural design of the punch and die and its insert for the parts which are in direct contact with the alloy melt.
Punch is one of the most important parts in squeeze casting mold, which not only forms the shape and size of squeeze casting parts, but also plays the function of liquid squeeze casting and secondary pressure. In order to realize the function of secondary pressurization, the punch adopts a combined structure. The punch core is directly connected with the piston rod of the clamping cylinder, and the periphery is connected with the punch fixed plate through the cavity plate of the punch. There is a certain gap between the punch core and the cavity plate of the punch, and a 5mm secondary pressurization space is reserved up and down. The specific assembly structure is shown in Figure 1.
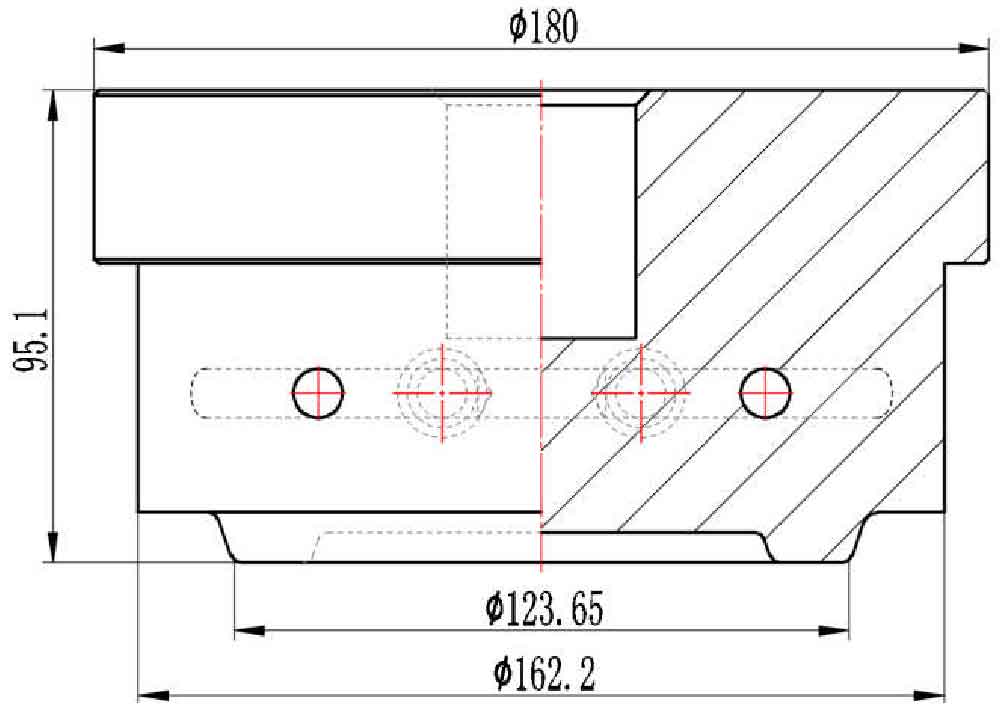
The punch adopts the core design, which simplifies the cavity shape, makes the machining easier, saves valuable die steel and processing time, and is easy to repair and replace. The specific core design dimension is shown in Figure 2.
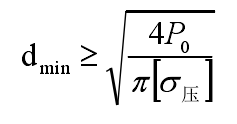
The stress of convex model core should also be checked to check whether its material and size can meet the requirements of strength and stiffness. The core of the convex model is of circular design, and its checking formula of compressive stress is as follows:
Where,
Dmin – minimum section diameter, mm;
P 0 – extrusion force, N;
[σ pressure] – allowable compressive pressure of material, MPa;
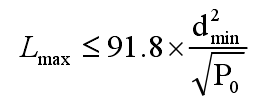
The checking formula of longitudinal bending stress is as follows:
Where,
Lmax – maximum free length, mm;
The hot working die steel H13 is used as the core of the die. According to the table of material property parameters, the [σ pressure] = 590MPa, the maximum value of P0 is 3000kN at the time of secondary pressure. Substituting it into the formula, it is concluded that Dmin = 80.46mm.
The above calculation results and relevant data are substituted into the common formula to obtain Lmax = 343mm. The dimensions of the experimental die are shown in Fig. 2, which are in accordance with the verification requirements.
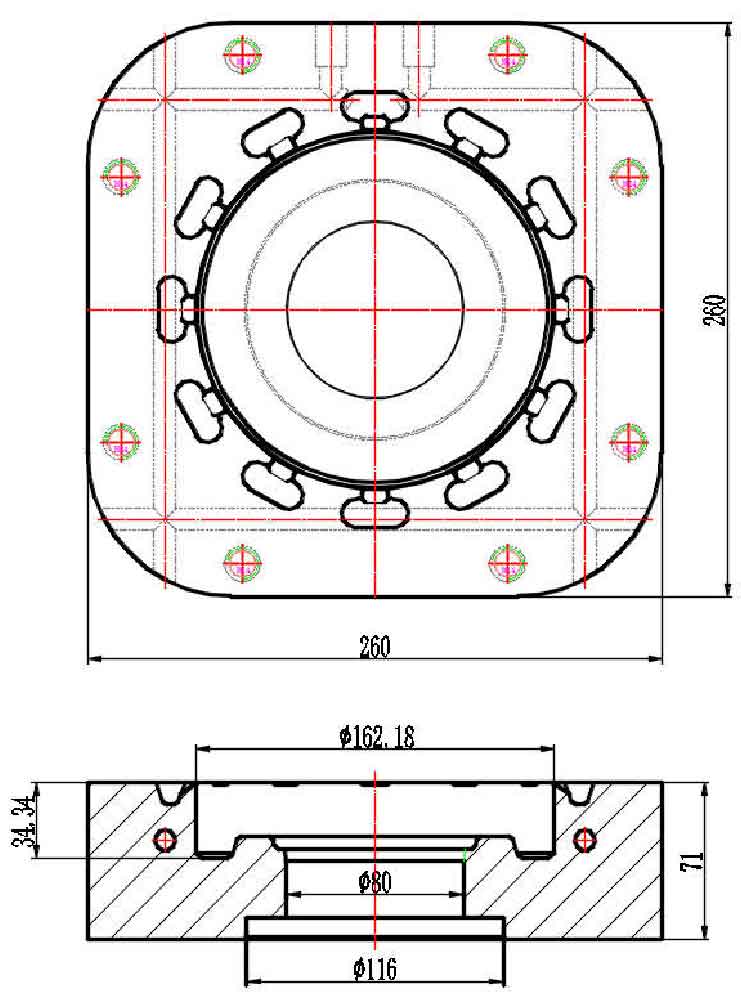
The die is also an important working part to obtain the shape and size of the extrusion casting. Due to the simple parts, there is a ejector bar at the bottom, which is easy to demould. The specific design is an integral structure, and its shape and size are shown in Figure 3.
The die also needs to check its stiffness and strength to judge whether the die side wall thickness and die bottom thickness reach its safe and reliable range. The experimental die is checked according to the relevant formula of the integral rectangular die, which is no longer listed one by one.


