HT150 belongs to medium strength gray iron castings. Gray iron has good casting performance, simple process and small casting stress, so manual aging is not required; It has certain mechanical strength and good shock absorption. It is suitable for manufacturing parts bearing medium stress and parts working in weak corrosion environment, such as cover, bearing seat, valve body, hand wheel, underframe, etc.
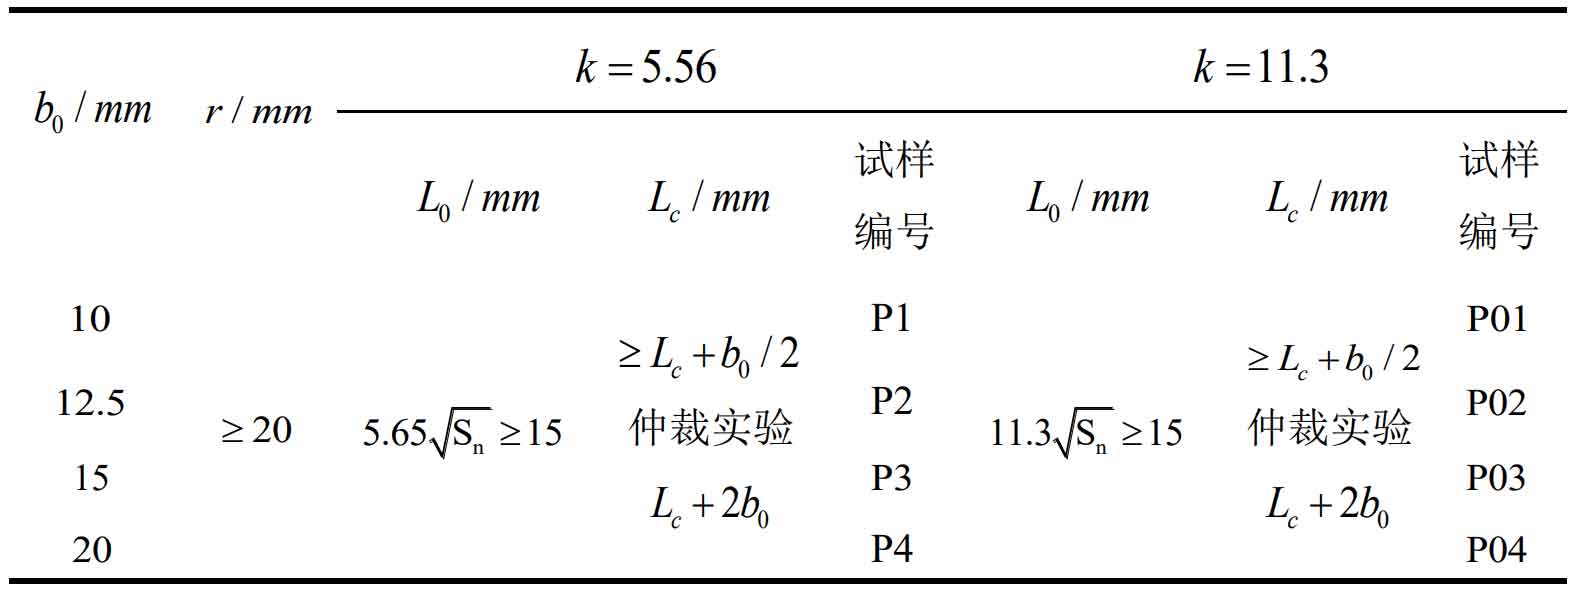
Considering the application of gray iron casting materials and test equipment, the sheet metal tensile test of gray iron casting materials was carried out according to the national standard (GB / T 228.1-2010) (see table 1 and table 2).

Note 2: if necessary, the sample with thickness less than 0.5mm can be equipped with small lugs on its parallel length to clamp the extensometer, and the distance between the width center lines of the upper and lower lugs is the original gauge distance.

According to the shape and size of gray iron casting material, the proportion sample with priority proportion coefficient k = 5.56 is adopted. The parameters of the sheet tensile sample are processed into standard test pieces according to the provisions of metal tensile test method, as shown in Figure 1.
The sample meets the requirements of national standard and ASTM e8m standard (metric unit) for short sample. Two narrow edges of the specimen, i.e. with surface roughness RA3 two μ M the required position can not only retain the machining trace of wire cutting, but need to be grinded or milled to RA3 by NC machine tool two μ M or less, otherwise the test result of elongation after fracture will be affected.
According to the requirements of gray iron casting materials and national standard GB / T 228.1-2010, the sample width is B0 = 12.5mm and the thickness is A0 = 2mm, that is, the sample cross-sectional area S2 = a B 25mm2;
Then:
The size of tensile specimen is shown in Figure 2:
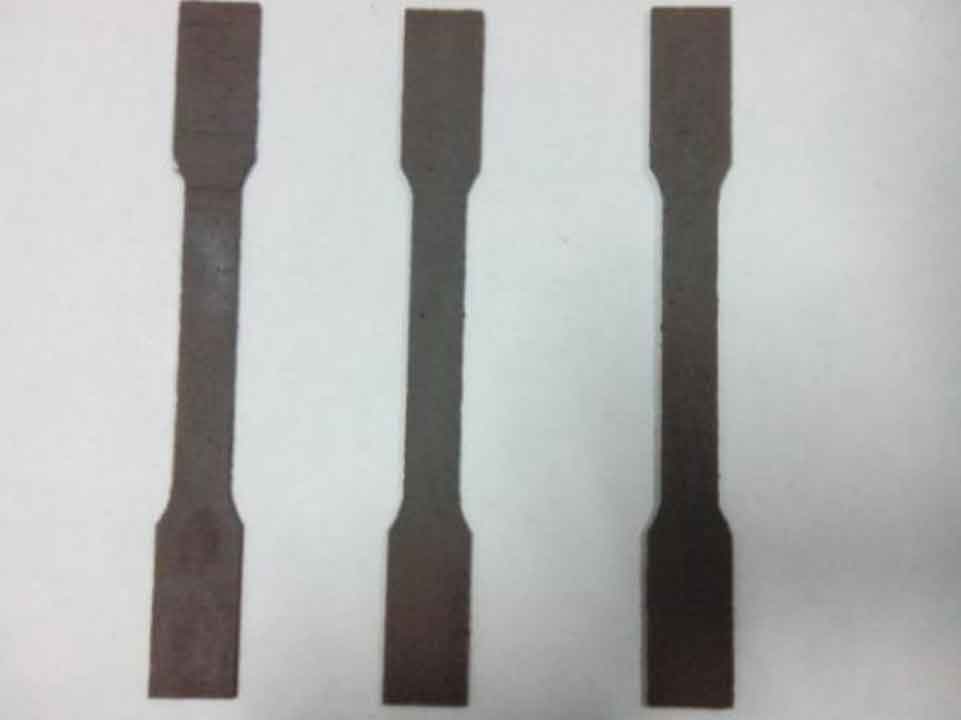
Take the material with 45mm wall thickness of gray iron casting for experiment, cut the gray iron casting material into the above drawing dimensions on the on-line cutting machine, and then grind or mill it to RA3 with NC machine tool two μ As shown in Figure 3 or below. The sample is carried out on the universal material testing machine. Before the experiment, use the vernier caliper to measure the sample gauge l0, interface dimensions B0 and A0
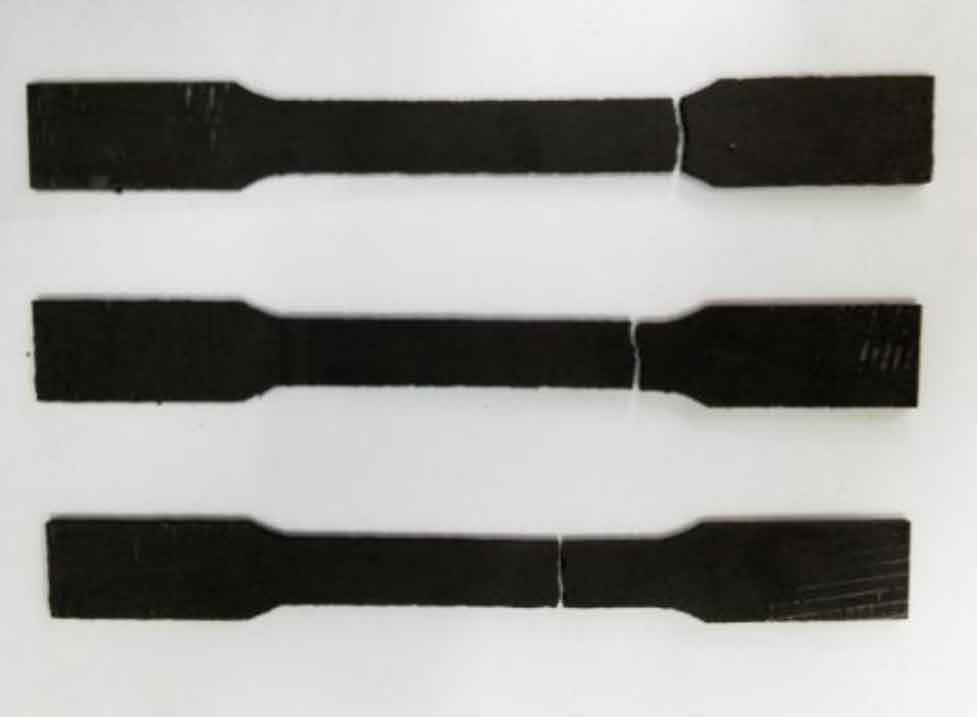
, calculate the cross-sectional area A0. By stretching the sample, pay attention to observe the changes of the sample and pointer during the gradual loading of the sample. When the sample tensile shows yield fracture (the fracture morphology is shown in Figure 4), stop loading immediately and record the data required for the experiment.
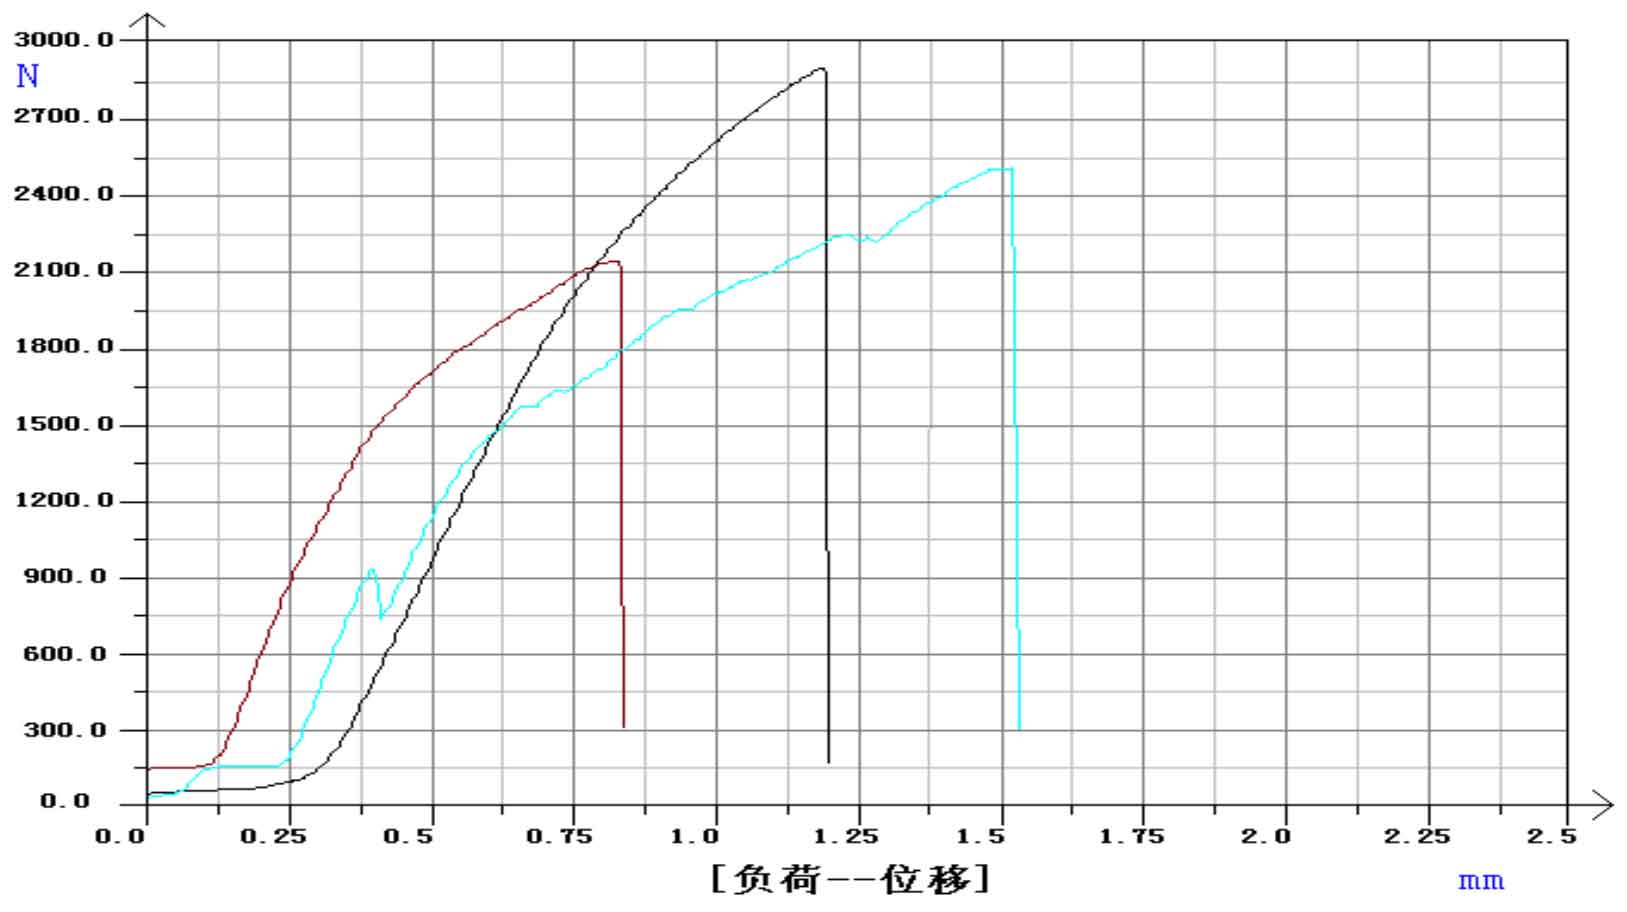
Fig. 5 shows the variation of displacement with stress during the tensile process of the sample:
According to the relationship between displacement and stress in the tensile process of the sample in Figure 5, the sample has been in an elastic state during the tensile process. When the applied load exceeds the yield limit of the sample, the sample breaks, and there is almost no plastic deformation in the whole process.


